

This post may contain affiliate links. Please read our disclosure for more info.
Are you looking to increase the flexibility in your body with a softer, slower paced yoga practice? Yin Yoga may just be the practice for you. Maybe you love the intensity of your vinyasa class but are looking for the perfect restorative practice to compliment your fiery flow practice. If you are looking to try this deep practice, we have the best Yin Yoga sequence for beginners just for you!
Yin Yoga is a passive yoga practice that focuses on the deep connective tissues in your body. It allows for your fascia, joints, bones, and ligaments to open, promoting flexibility in your body. Similar to more “yang” practices like vinyasa, power, or hot yoga, it allows the energy in your body to flow more freely; and in addition, it will leave you feeling relaxed, less stressed, and more open.
What is Yin Yoga?
While some poses may seem similar to what you may practice in a vinyasa class, the practice of Yin Yoga postures is very different. Most Yin poses have different names to the traditional hatha yoga names. Yin Yoga specifically works to deeply penetrate the connective tissues in your body, releasing physical and energetic blocks.
Through long holds, deep breathing, and relaxation, your body begins to open up deeply. The main difference of yin poses in relation to other yoga practices is that the postures are held without the use of muscular strength and are held for longer periods of time.
Yin poses are generally held for 1-5 minutes, or even longer. Props such as blocks, blankets, and bolsters are used to allow the body to get as comfortable as possible in each pose. Usually in a more fiery practice, yogis are encouraged to engage muscles and use strength. However, in Yin Yoga, passive stretching with support, and releasing of any muscular tension is encouraged.
The Benefits of Yin Yoga
- Improves your flexibility
- Promotes relaxation in the mind and body
- Lowers stress and anxiety levels
- Increases body circulation
- Releases fascia
- Allows your energy to flow easily in the body
- Improves joint mobility and range of motion
- Releases physical and emotional blocks in the body
- Compliments a more “yang” practice like Vinyasa or Power Yoga
Tips for Practicing Yin Yoga
Yin yoga is quite different from other types of yoga, as the goal is to give no muscular exertion in order to fully relax into the pose to put “stress” on the connective tissue. Below are a few things to keep in mind while practicing yin yoga:
- Use as many props as you need: It is important to be comfortable and supported in your pose so that your muscles can relax and open. Set up your pose with your props before coming into it.
- Try not to come out of the pose once you are in it: Yin Yoga may prove to be more challenging than a fast-paced vinyasa class. It takes practice to resist the urge to fidget or move when it begins to feel intense. But focus on breathing and releasing in each posture.
- Move slowly into the posture: The longer that you stay in a pose, the more your body will naturally open. Allow gravity to do the work and try not to come to your edge right away.
- Find stillness and relaxation: Close your eyes and let your body relax. The mind may begin to wander the more intense a posture gets, but allow yourself to stay focused on your breath and relaxation.
- Build up slowly: Stay in a pose for around 2 minutes and slowly start to build up to around 5 minutes.
Can Beginners Practice Yin Yoga?
Beginners can absolutely practice Yin Yoga! Don’t worry if you feel that you aren’t open or flexible enough to practice— increasing flexibility and mobility in the body is one of the reasons yogis practice Yin Yoga.
Because this practice is slower and postures are held for a longer period of time, it can be easier for beginners to follow than a faster paced vinyasa practice. That being said, it can also feel pretty intense in your body, so allow yourself time and space as you familiarize yourself with this yoga practice.
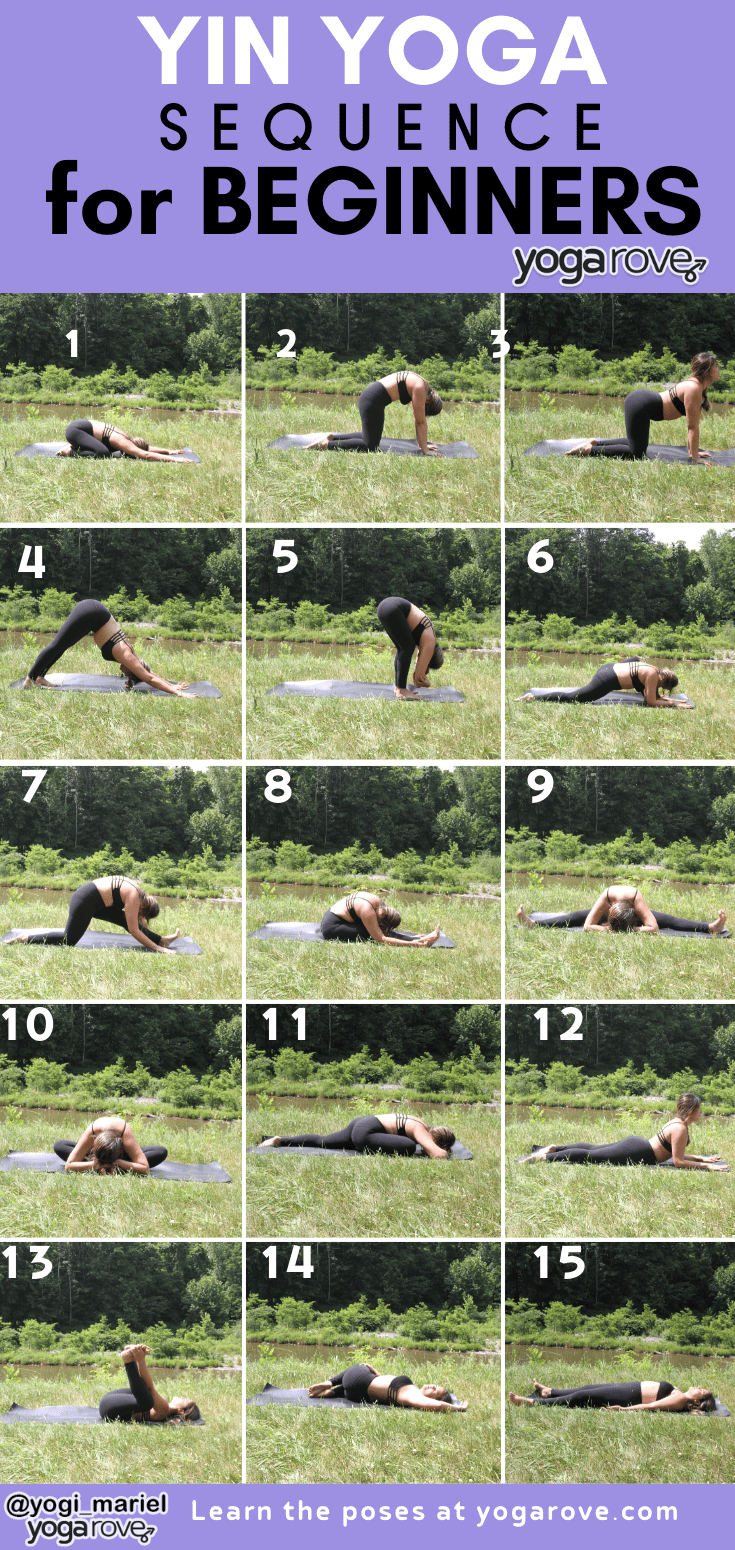
Beginner Yin Yoga Sequence
Below is a simple beginner-friendly yin yoga sequence anyone of any level can try! No need to warm up prior to the sequence, as that helps you get deeper into the connective tissue.
1. Child’s Pose
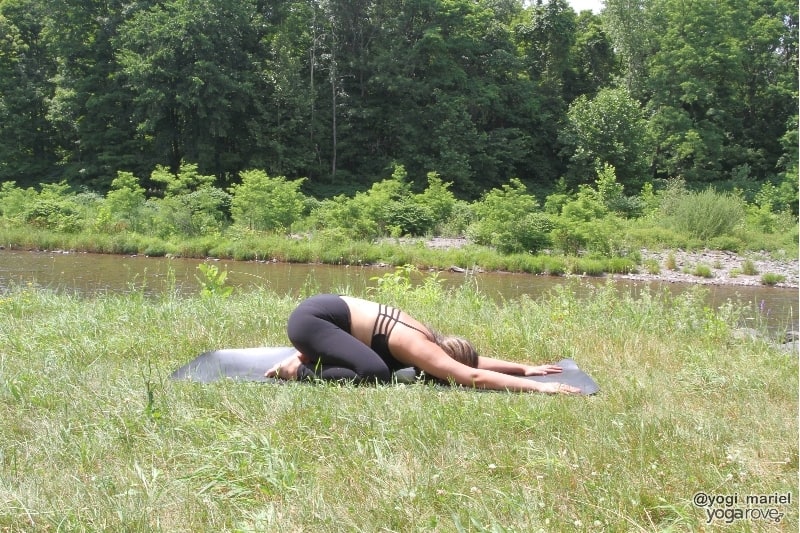
- Take your knees apart mat-width distance, walk your hands forward and rest your forehead on the mat.
- Bend your elbows slightly to release any tension in the neck and shoulders and allow your hips to sink down to your heels.
- Stay for 3 minutes and find softness in your joints, muscles, and breath.
Modifications: Use a bolster or pillow in front of you and allow yourself to hug or lay your upper body over the pillow. Roll up a blanket and place it behind you and allow your hips to rest on the blanket.
2. Cat/Cow
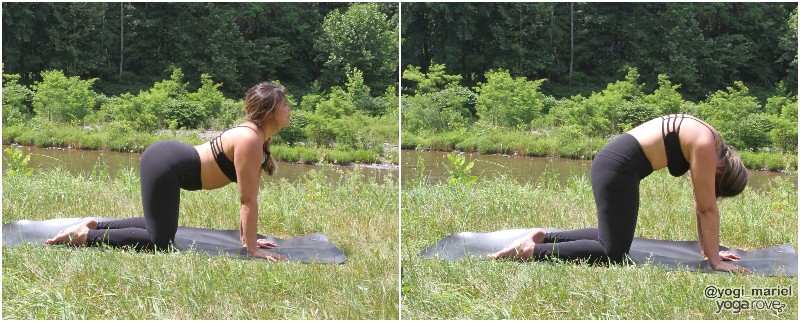
- From child’s pose, begin to walk your hands back toward you and come onto all fours.
- Check that your fingers are spread wide underneath your shoulders, and that your knees are underneath your hips with your toes relaxed back and the tops of your feet on the mat.
- On an inhale, lift your chin away from your chest, arch your back, and lift your heart up.
- On your exhale, round your spine, draw your belly in, and look toward your belly button. Repeat 5 rounds of breath.
3. Downward Facing Dog
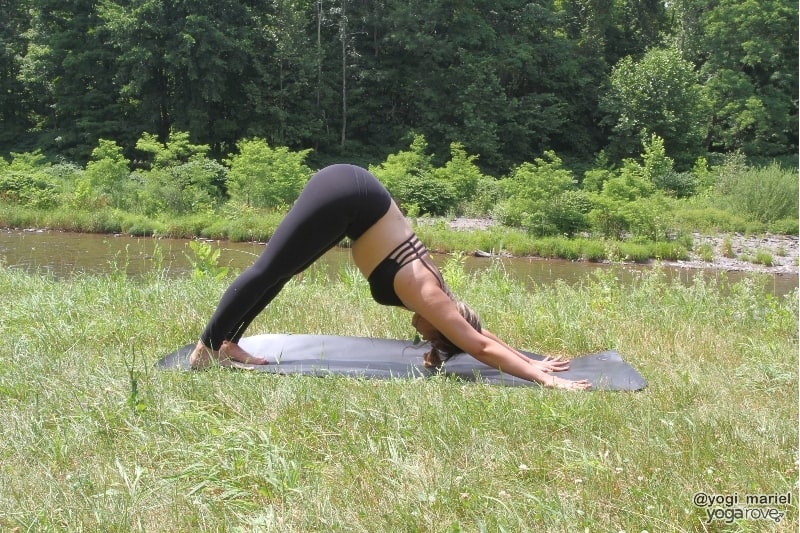
- Walk your hands a few inches forward to the top of your mat and spread your fingers wide.
- Curl your toes under, lift your knees off the mat, and your hips up toward the ceiling.
- Take a few knee bends or any other movement that feels good in your body.
- Find stillness in downward dog and check that your feet are hips-width distance, hands shoulder-width distance, fingers spread wide, and spine is long. Stay for 5 deep breaths.
Modifications: If your spine tends to round in downward facing dog, bend your knees, lift your hips up higher, push the mat away, and think of bringing your stomach closer to your thighs. Find more length in your spine and your side body by lifting your hips and pushing the mat away.
4. Ragdoll/ Dangle
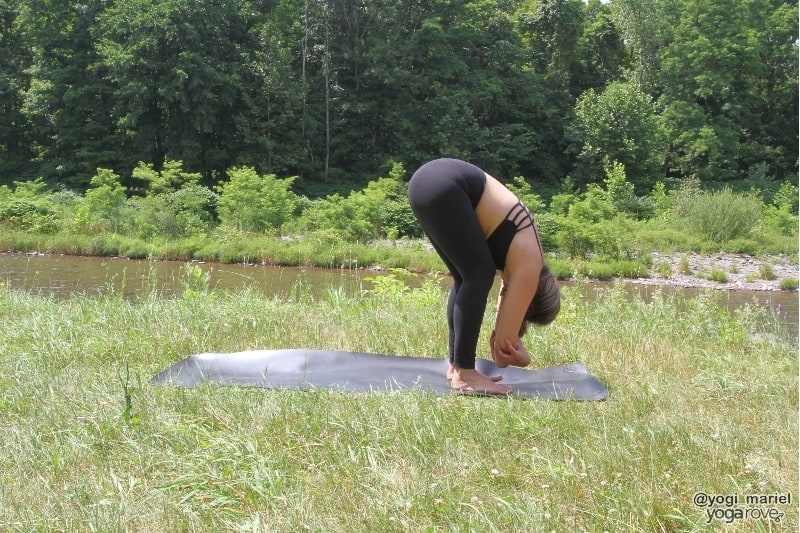
- Walk your feet forward to the top of your mat and take your feet apart hips-width distance. If you are unsure about the distance, measure two fists between your feet.
- Soften your knees and bend them deeply so that your stomach rests on your thighs. Relax your head and neck and grab for opposite elbows.
- You can find movement here, releasing any unnecessary tension in your body. Keep your knees bending, roll the weight slightly forward to the balls of your feet, and engage your thigh muscles by lifting your kneecaps up and hugging your muscles to the bone. Stay for 5 breaths.
Modifications: Interlace your fingers behind your body to open your shoulders, or behind your head to traction your spine. You can also place a block in front of you and rest your hands on the block for more height.
5. Gecko/ Dragon Pose
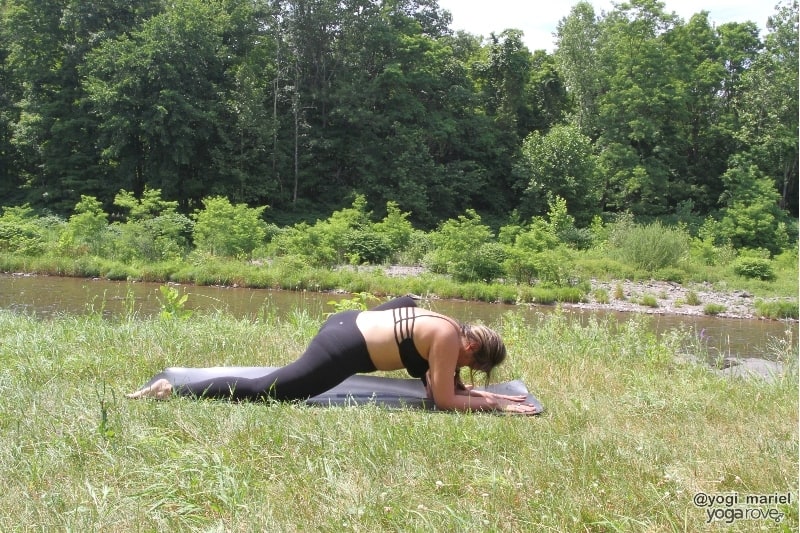
- From Ragdoll, plant your palms back down on the mat and walk your feet back to downward facing dog.
- Lift your right leg up, bend your knee, and open your hip.
- Keep your shoulders squared to the floor. Step your right foot forward to the outside of your right hand and place your left knee on the ground.
- Make sure that your right foot is flat on the floor and that you have a wide stance. Feel free to move your left knee back to create more space to open up.
- Walk your hands forward and rest your hands or elbows on the mat. Allow your upper body to be heavy and let your shoulders relax away from your ears.
- Allow yourself to be as comfortable as possible in this pose.
- Start with 2 minutes on each side and stay for up to 5 minutes on each side. Repeat on the left side.
Modifications: Use as many blocks as you need to create more height to rest your hands or elbows. If you have knee issues, roll up your mat or place a blanket underneath your back knee for cushion and support.
6. Half Split/Runners Dragon
- From downward facing dog, step your right foot forward in between your hands.
- Place your back knee on the mat. Begin to straighten out your right leg as you walk your hands back toward your hips. Lift your right toes off the mat but keep your heel on the ground.
- Place your hands on blocks on either side of your hips or further down toward your thigh. Allow your upper body to round down over your right leg.
- Start with 2 minutes on each side and stay for up to 5 minutes on each side. Repeat on the left side.
Modifications: Roll up your mat or place a blanket underneath your back knee for support. Use as many blocks as you need to support your hands and upper body.
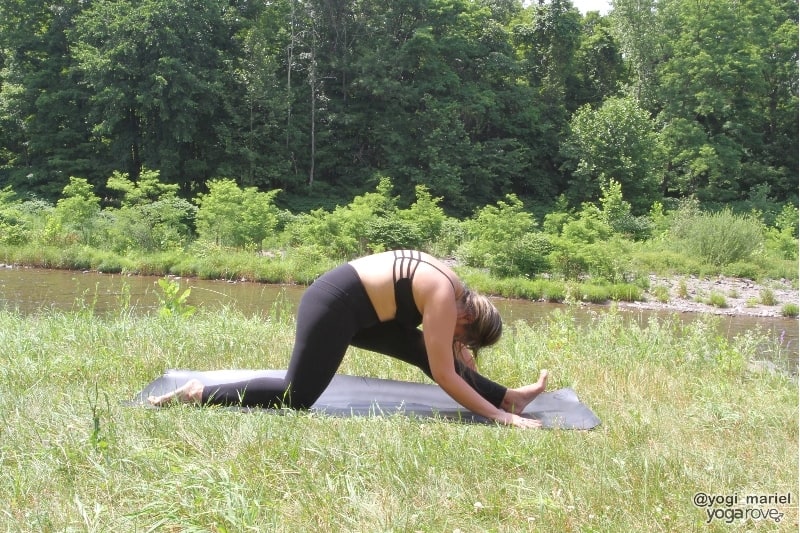
7. Head to Knee Forward Bend/ Half Dragonfly
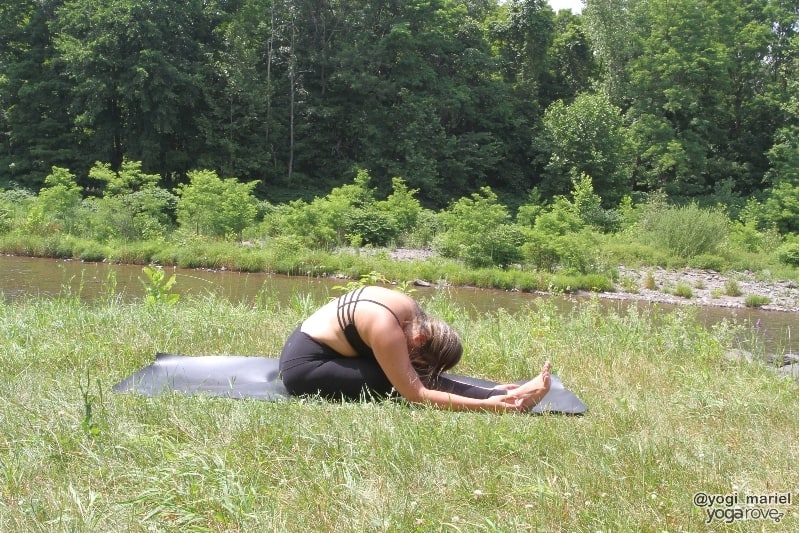
- Sit down on your mat and take your right leg out to the side at a slight angle. Bend your left knee in and place the sole of your foot to your inner right thigh.
- Take two blocks and place one block on each side of your leg. Turn your upper body to face your right leg and begin to fold over your leg, resting your hands or elbows on the blocks.
- Allow your upper body and head to be heavy and begin to feel your forehead coming closer to your right knee. Let your entire body relax over your right thigh without reaching, grabbing, or pulling on your toes or ankle.
- If you have pretty flexible hamstrings, you may not need the blocks, and can rest your hands or elbows on the mat. Start with 2 minutes on each side and stay for up to 5 minutes on each side. Repeat on the left side.
Modifications: If you have tight hamstrings, roll up a blanket and place the blanket underneath your knee. Feel free to use as many blocks as you need to support your hands or even your head. You can also place a bolster to the inside of your right leg and fold over your bolster.
8. Wide Legged Straddle/ Dragonfly
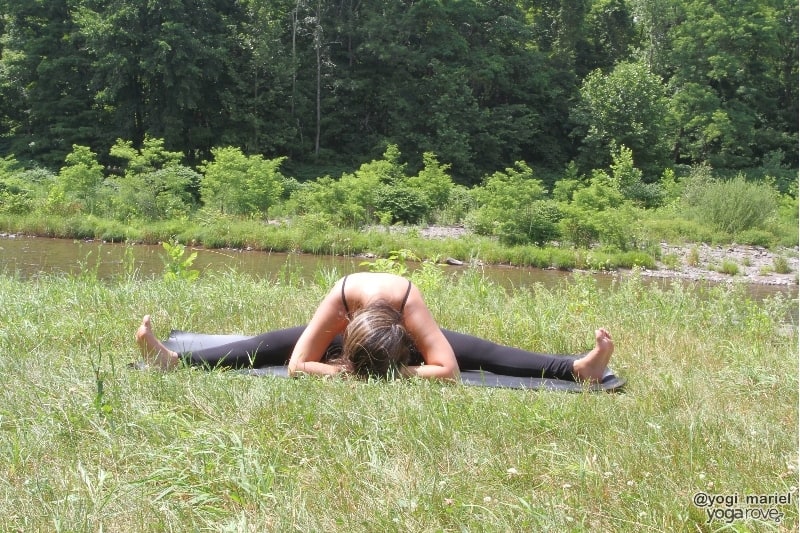
- Take your legs apart into a V shape and allow the knees to bend slightly.
- Begin to walk your hands forward, resting your hands or elbows on blocks or the mat.
- Allow your shoulders to soften and your upper body to relax forward, while keeping your legs and ankles soft.
Modifications: Sit on a blanket or block if you have tight hamstrings. Place a bolster in the between your legs and allow your upper body to lay over the bolster.
9. Butterfly
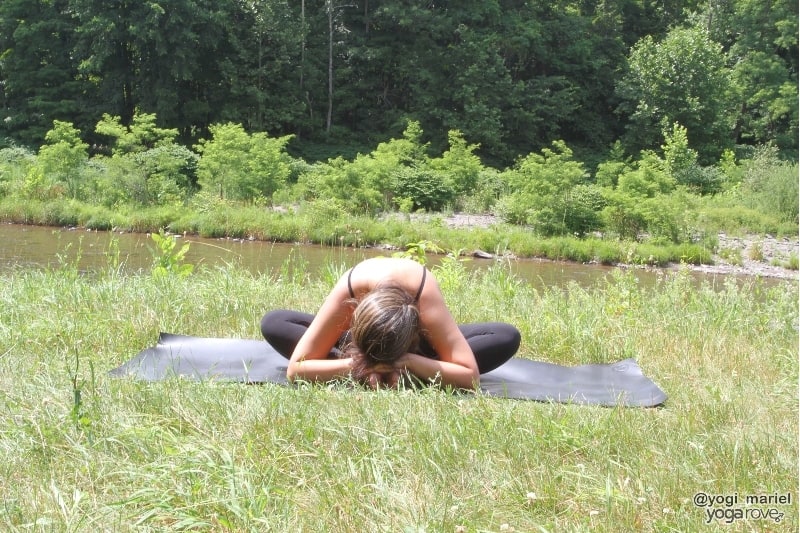
- From Dragonfly, take your legs together and give them a little shake to release.
- Bend your knees and bring the soles of your feet together and your knees out in a diamond shape.
- Place one or two blocks on top of your feet and being to round forward, resting your forehead on the blocks.
Modifications: If your hips or inner feel very uncomfortable in this pose, place one or two blocks underneath each knee for support.
10. Pigeon/ Sleeping Swan
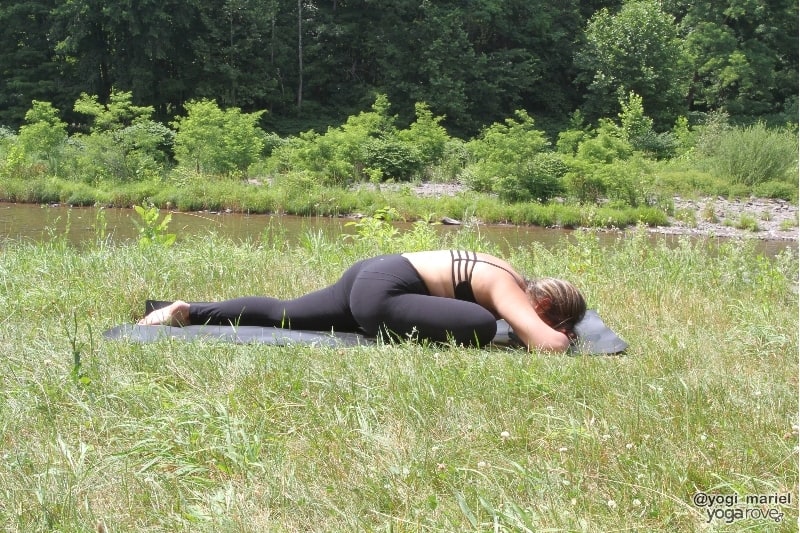
- From butterfly pose, gently make your way back to downward facing dog.
- Lift your right leg up and bend your knee. Take your right knee behind your right wrist and extend your left leg back behind you.
- Check that your left toes are pointing straight back with the top of your foot on the floor. Square your hips and make sure that you are not sitting on your right foot.
- Begin to walk your hands forward and rest your hands, elbows, or forehead to the floor. Start with 2 minutes on each side and stay for up to 5 minutes on each side. Repeat on the left side.
Modifications: Use blocks to support your upper body, or a block underneath your hips for more height and to ensure that your hips stay square.
11. Sphinx
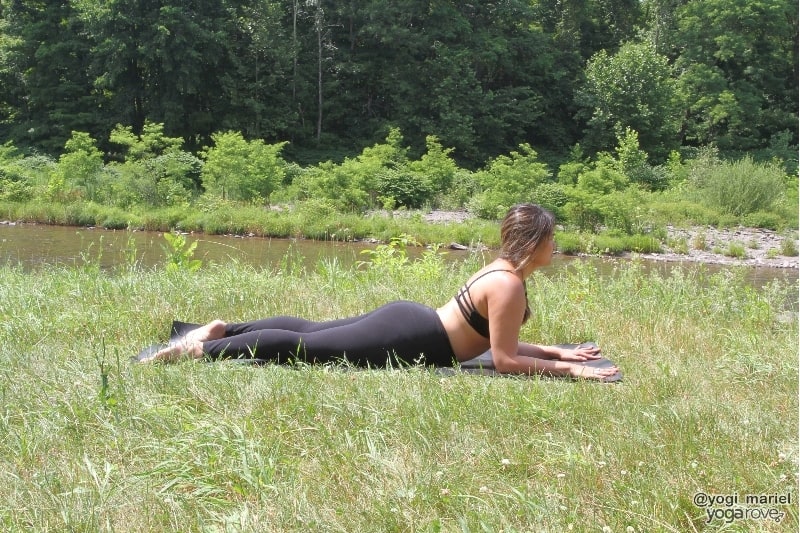
- After the left side of pigeon pose, make your way back to downward dog and then lower yourself down to the mat, laying down on your belly.
- Extend your legs back behind you with the tops of your feet on the floor. Bend your elbows and place your forearms on the mat with your palms flat on the floor and fingers spread wide.
- Lift your chest up keeping your elbows and forearms on the mat. Roll your shoulders back and lift your chest up. Close your eyes and stay for 5-10 deep breaths.
12. Happy Baby
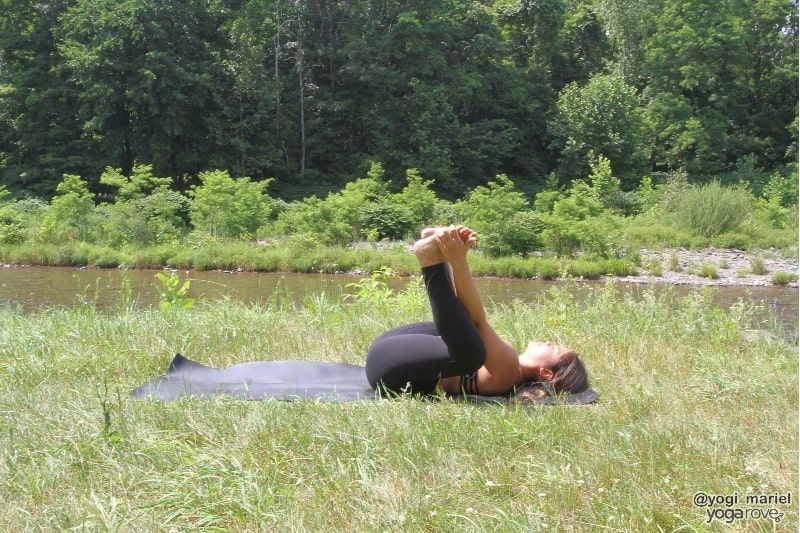
- Lower yourself back down on the mat and flip over to your back. Bend both of your knees, take your feet apart, and reach of the sides of the feet with your hands.
- Flex your toes, take the soles of your feet up to the ceiling and begin to gently pull your knees toward the floor.
- Keep your tailbone and head on the mat and soften your shoulders away from your ears.
Modifications: If it is challenging to grab the sides of your feet, reach for your ankles or calves.
13. Spinal Twist
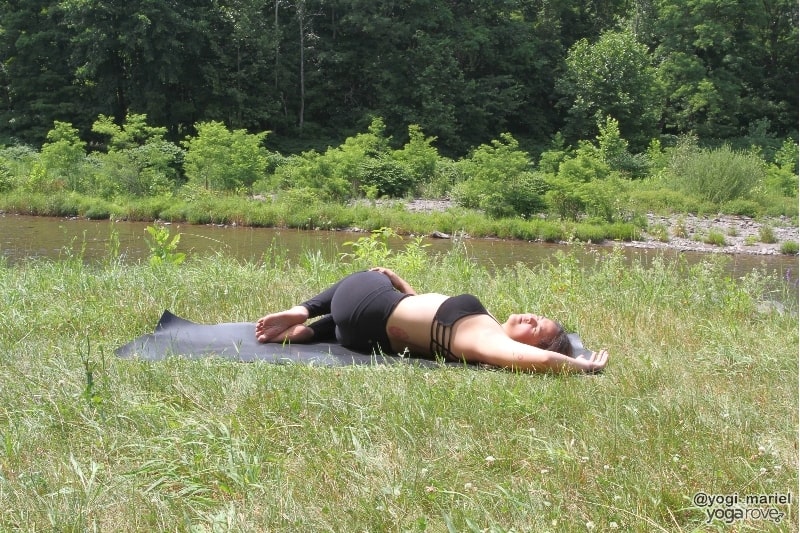
- Take your knees together in to your chest. Open your arms out in a T shape with your palms facing down to the mat.
- Relax your knees to the right and stack your left hip on top of your right hip.
- Turn your head to face the left side of the room and keep your left shoulder on the mat. Stay for 2 minutes and repeat on the left side.
Modifications: Don’t worry about having your knees touch the mat in this twist. It is more important to keep your shoulders on the mat. Use a block or two to support your knees if they are far away from the ground.
14. Savasana
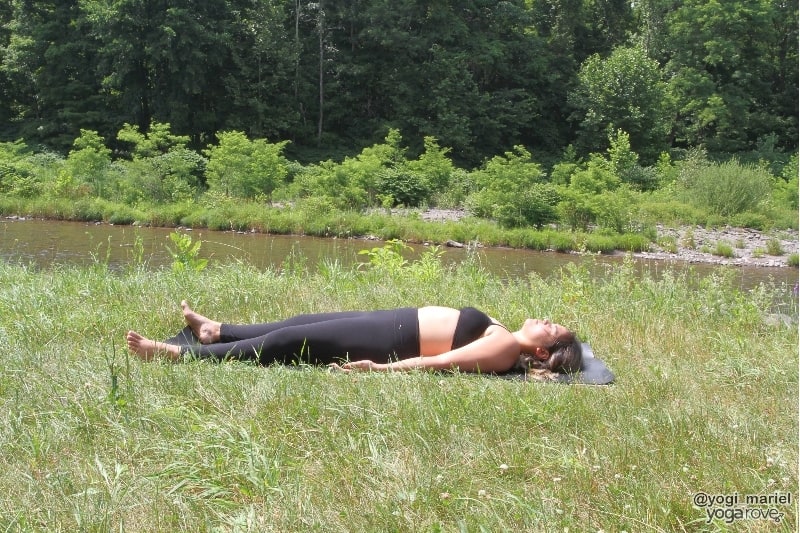
- Stay on your back and relax everything down to the mat. Allow your feet to fall open, palms to face up, and close your eyes.
- Soften your breath and let everything relax. Stay for as long as you’d like.
Modifications: Roll up a blanket and place the blanket beneath your knees for extra support.
Pin this routine to save for the next time you practice!
Related Questions
What is restorative yoga?
Restorative yoga is very similar to Yin Yoga, however, in Yin Yoga, yogis may feel a little more discomfort and intensity in the poses. Yin Poses open and passively stretch the body and while restorative yoga does the same, the poses can be less intense because total comfort in each posture is encouraged.
What is fascia?
Fascia is mostly made of collagen and is a sheet of connective tissue beneath the skin that stabilizes, attaches, and separates your internal organs and muscles.
Mariel is a writer and NYC-based yoga teacher. She has been teaching for a decade and is a life-long student of the ancient practice.
Thank you. I’m new to your site but loving what you share
Thanks – Dinelle
Happy to hear you’re enjoying our content Dinelle! Feel free to email us anytime with questions or comments 🙂
Hello Ally,
A big thank you for the clear instructions for YIN beginners.
I have been struggling with knee mobility due to a motorcycle accident but the poses are slowly paying off.
My knee extension and flexion is slowly improving.
Are there any pose plans specific for knees you can direct me to?
Be well,
Tim Casting
[email protected]
514 824 7722
Hi Tim! We have an article on knee modifications in yoga and poses to strengthen the knees that you can check out here but I would highly suggest looking up The Knees Over Toes Guy on YouTube- he is an excellent resource for improving mobility after knee injuries!
Thank you for the excellent detailed step by step explanations and pics for the Yin
for Beginners series. Looking forward to adding to my routine.
So happy to hear that Sandra! Hope you enjoy 🙂
thanks for the sequence and explanations of yin in a simple and welcoming way.
So glad you liked it Annalisa! 🙂
So…Wow! Thank You 🙂
I can’t wait to try this routine 😃
It is much like my go to routines, I just didn’t know it was Yin yoga. Lol so now I’m way more motivated to stay consistent 😃.
I am grateful for having found you guys… I think I mentioned it before but I lacked some confidence with sharing yoga with others (would love to teach 1on 1 ) and since connecting with Yoga Rove have realized that I’m in much better shape to do that than I thought 🙏🏼
Thanks again!!!
That is so wonderful to hear Tara! So happy we are able to help you along your journey 🙂
I’m so happy that I find this page. i can’t wait to start doing this sequenses.
thank you
You’re so welcome!
I after the exercise feel together and at peace.
Glad you enjoyed it!
Liven this so much! Thank you!!
Glad you enjoyed it 🙂