

This post may contain affiliate links. Please read our disclosure for more info.
Restorative yoga is a practice missed by many, that should be practiced by everybody. Every single person, no matter who you are or what shape you are in, will benefit from this practice.
If you suffer from anxiety, stress, feel achy, or just can’t seem to find a way to let go and relax, this sequence is 100% for you.

A lot of people flock to yoga for the hot, sweaty flows to stay in shape and get a good workout. But people seem to forget how much their body needs a soft, relaxing flow from time to time to rejuvenate and unwind.
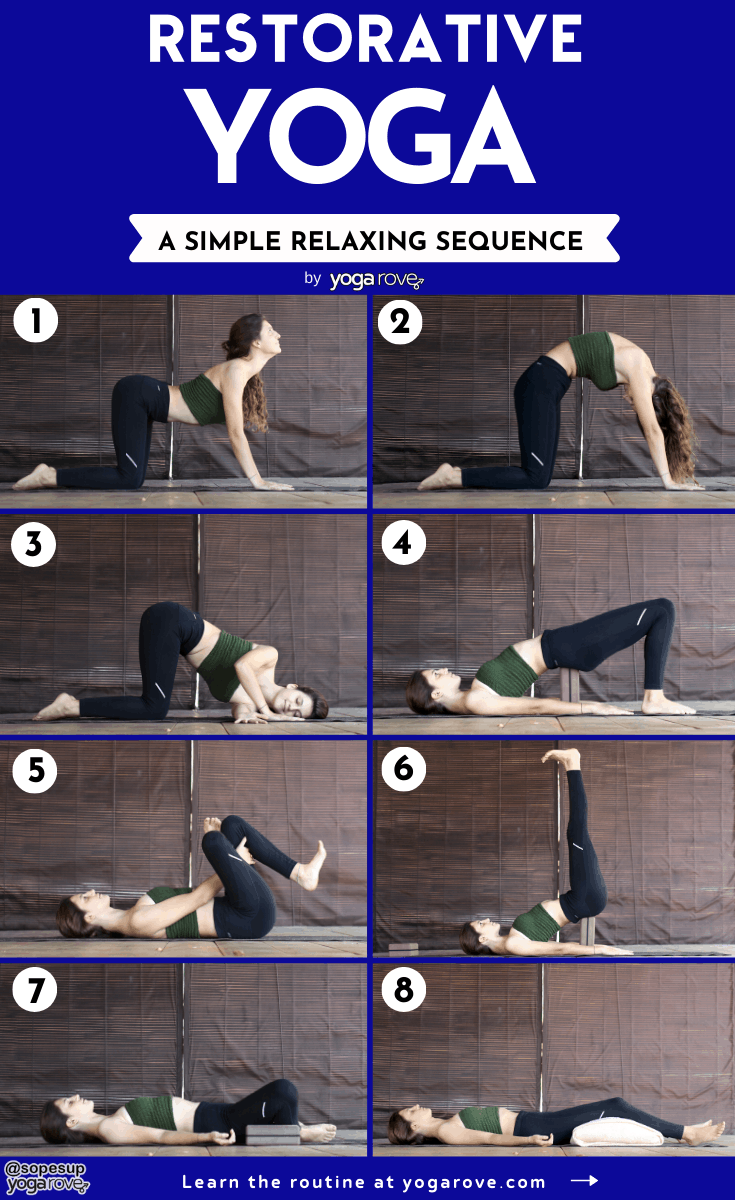
The follow restorative yoga sequence is very easy to follow as it only consists of 7 simple poses:
- Cat-cow– 3 to 5 minutes
- Thread the Needle– 1 minute each side
- Supported Bridge– 2-3 minutes
- Reclined Pigeon– 2 minutes (both sides)
- Supported Shoulderstand with Block– 3 to 4 minutes
- Reclined Bound Angle– 1 minute
- Supported Savasana with Bolster– 5 minutes
But before we get into the sequence, let’s get into a few of the basics of Restorative Yoga for those of you who have never tried it before.
What is Restorative Yoga?
Restorative yoga is a type of yoga that is practiced to relax and restore the mind and body. This type of yoga incorporates props to support and completely relax the body, although props are not mandatory. Poses are typically held longer than in other practices, anywhere from 1-5 minutes.
The difference between your regular vinyasa flow and a restorative yoga sequence is that restorative yoga poses are held longer, and the use of props is much more common to help you completely relax into each pose.
The props are used for mainly supportive measures, and you are unlikely to practice strengthening yoga poses while doing a restorative sequence.
Before I get more into it, if you are wondering if you should give restorative yoga a try, here are a few reasons why you should.
Benefits of Restorative Yoga:
- Improves flexibility safely and gently: The use of props in these gentle yoga poses allows your body to release tension and sink deeper into each asana, resulting in improved flexibility.
- Relieves aches and pains: Restorative yoga brings awareness to areas you didn’t realize were tight, and allows you to completely relax
- Stimulates the parasympathetic nervous system: When you completely relax into a pose, you are brought into a state of complete relaxation and the parasympathetic nervous system is activated, promoting a sense of calm.
- Promotes mindfulness and patience: You are using your breath a great deal in this type of practice, and are staying in poses for a much longer time, which overtime will improve your patience and build the mind-body connection.
- Relieves anxiety: The slow, steady, relaxed pace of this practice is perfect for unwinding and promoting you to stay in the present moment, providing ultimate anxiety relief.
- Improves circulation: Relaxation in general improves circulation due to blood vessels dilating. This type of yoga also involves many supported inversions, which are great for promoting blood flow to the heart.
- Can be done at any age and with any body type: Restorative yoga is a practice that can be practiced by any level yogi, with no experience of any asanas needed. The use of props and promotion of medications for comforts make it a great practice for all levels.
Is Restorative Yoga Good for Back Pain?
Restorative yoga can be very beneficial for those that experience back pain. I actually practiced this type of yoga when I began to experience back pain from working long shifts as a nurse and it helped me tremendously.
Although those that have serious injuries definitely should consult with a doctor before practicing, many have found relief through practicing Restorative Yoga due to the way it gently stretches and relaxes the body, including the spine.
It also helps promote body awareness, helping you focus on problem areas that are tighter than others, which in turn can help you better alleviate the root cause of where your discomfort is coming from.
Related: 10 Minute Beginner Yoga Routine to Relieve Back Pain
How Often Should You Practice Restorative Yoga?
Restorative yoga can be practiced everyday, but it is entirely up to you how often you decide to practice. I definitely recommend incorporating at least a couple restorative yoga sessions into your schedule every month.
Not only will you benefit physically from changing up your routine and treating your body with relaxing postures, but you will benefit mentally as well, as it causes you to slow down and calm your mind.
What You’ll Need for Your Restorative Practice
You do not need tons of props to enjoy a solid restorative yoga sequence.
Although props are not mandatory, they definitely do help. These are the two we recommend having for this sequence.
If you don’t have a block or bolster, you could always opt for a firm pillow or blanket you have at home. I find bolsters much more effective though due to their firmness.
And if you don’t want to use any props, that’s completely fine. Each of the poses below can easily be practiced without a prop, they are mainly just there to provide you with support and help you relax deeper into the poses.
What Should You Wear While Practicing Restorative Yoga?
Wear the comfiest clothes you have! You’ll want to dress in loose fitting clothes that are extremely comfortable, a much different style than when you practice your sweaty vinyasa flows.
The goal of restorative yoga is exactly how it sounds: to restore. Some sequences may start with a few strengthening poses, but mainly the focus is on relaxing poses that gently stretch your body and relax your mind.
So, get your tools, get in a pair of comfy clothes, and let’s begin!
1. Cat-Cow
The flow between Cat and Cow is wonderful for bringing awareness to the spine and waking up any tight areas that mind need a little extra attention.

How to do Cat-Cow:
- Start on all fours in tabletop position with a neutral spine. You can choose to tuck or untuck your toes.
- For Cow: On your inhale, lift your gaze, drop your belly, arch your back, and lift your tailbone.
- For Cat: Drop your gaze, hollow your belly, round your spine, and tuck your tailbone.
- Move through the two poses for three to five minutes, allowing your breath to guide you through the duration and pace of the poses.
To make this pose more comfortable: Place a blanket, towel, or roll up your mat underneath your knees to provide more support. If your wrists are tight, you can place a blanket under them as well or use yoga blocks to lessen the intensity.
2. Thread the Needle
Thread the Needle pose gives you shoulders a nice gentle stretch while opening up your chest and slowing down the mind.
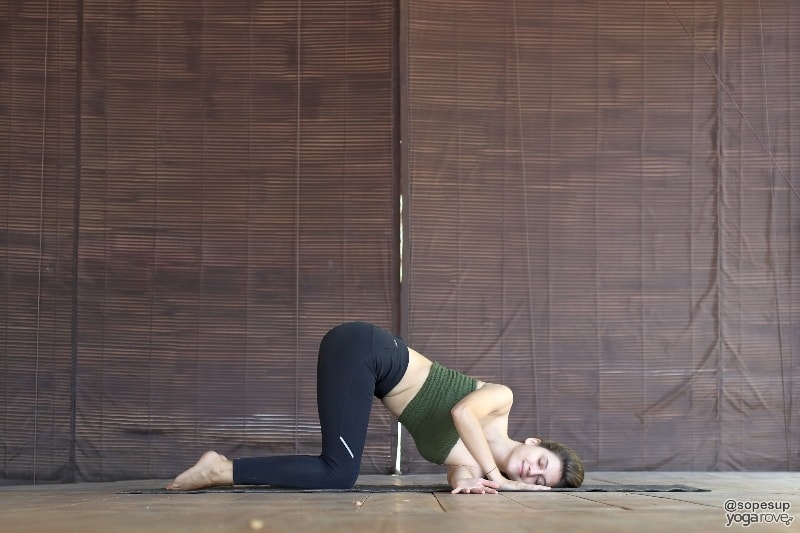
How to do Thread the Needle:
- Come back to neutral spine from your cat-cow’s into tabletop. Untuck your toes if they are tucked.
- On your inhale, lift your right arm up towards the ceiling and open your chest towards the right side of the rooms, allowing your gaze to follow.
- On your exhale, bring your right arm down beneath your chest and through your left arm. Allow your right ear or cheek to rest on the floor, or bring your gaze upwards.
- Walk your left hand forward until you stretch out your left arm in front of you.
- Stay here for 1 minute, then repeat on the other side.
To make this pose more comfortable: Place a blanket or towel underneath your threaded shoulder and a block underneath your extended arm for more support and lessen the intensity of the stretch if needed.
3. Supported Bridge
This is a great mild backbend to do to relieve tension in the lower back and passively open up the chest.
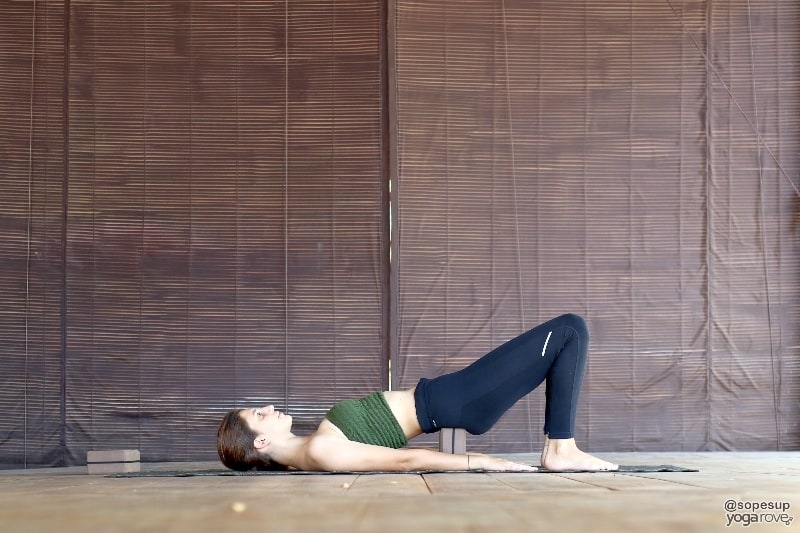
How to do Supported Bridge:
- Start by lying on the ground with your feet flat on the floor and knees bent.
- Lift your lower back up just enough to place the block underneath. Depending on how you are feeling, you will want to adjust the height of the block. The taller you make the block, the deeper of a backbend you will create. If you are doing this for the first time, I suggest starting at the lowest position.
- After you have the block in place, rest your body onto the block and allow yourself to completely relax.
- Stay here for 2 to 3 minutes. Carefully remove the block and slowly come to the ground.
4. Reclined Pigeon
Reclined Pigeon is a great relaxing pose and provides a great stretch in the hips.
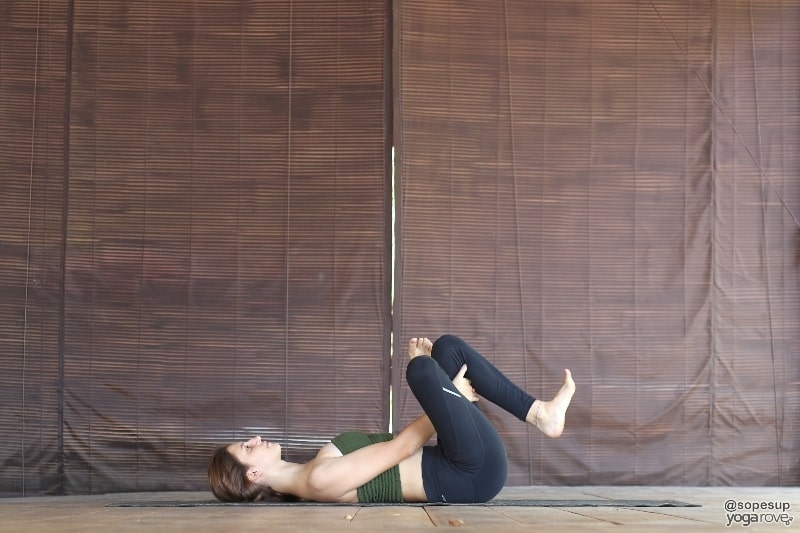
How to do Reclined Pigeon Pose:
- After lowering from Bridge, keep your knees bent and feet planted, then bring your right ankle to rest on your left thigh.
- Keeping your upper body grounded and shoulders relaxed, wrap your hands around left thigh, right behind your knee.
- Slowly lift your left foot off the ground and bring it in towards your chest. Bringing it in closer will deepen the stretch and bringing it farther away will make the stretch more mild.
- Breathe in this pose as you slowly deepen the stretch by pulling you leg in closer towards you, keeping both feet flexed.
5. Supported Shoulderstand
Promote better circulation and ease stress and anxiety with this relaxing inversion.
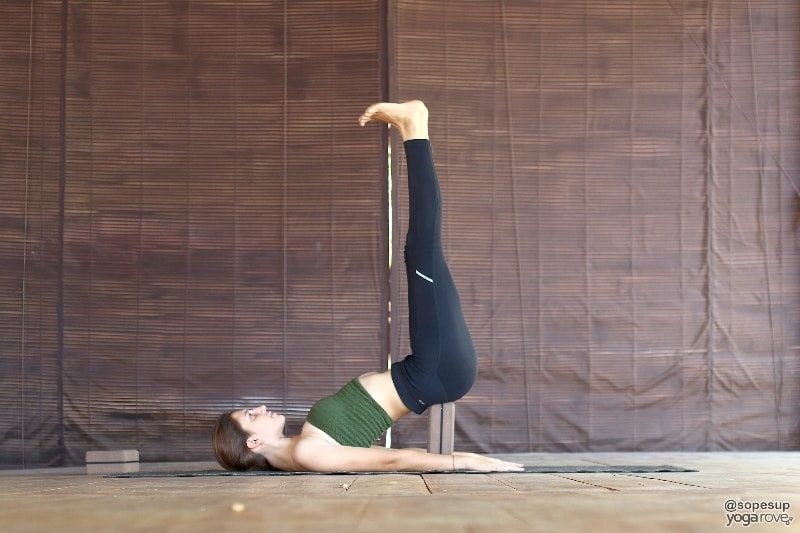
How to do Supported Shoulderstand:
- Lying on your back again, bring both knees into your chest.
- Roll backwards just enough to allow yourself to place your block under your tailbone. Just like in the previous pose, adjust this to your liking. In this pose, making the block taller will help your legs straighten more into the air if you have tight hamstrings.
- After you have your block in place, bring your legs up straight into the air. You want the block to be in a position where it does not feel like a struggle to keep your legs lifted. Adjust the block until you feel you have reached a comfortable spot.
- Let your arms lay flat by your sides and keep your head and neck neutral.
- Stay here for 3 to 4 minutes.
To make this pose more comfortable: Adjust the height of the block by rotating it to suit your comfort. If you have tight shoulders and find it difficult for your arms to touch the ground, use a blanket or pillow on either side for support.
6. Reclined Bound Angle
Reclined Bound Angle is a wonderfully relaxing pose that calms the mind and the body. Using blocks to support the knees is a great way to gently open up the hips.
How to do Reclined Bound Angle Pose:
- From your supported shoulderstand, roll your body slowly down to the ground with your knees bent and feet resting flat on the ground.
- Relax your upper body with your hands resting by your sides, palms facing upwards.
- Allow your legs to slowly fall to each sides, bringing the soles of your feet to touch.
- Place a block underneath each knee to provide support.
- Stay here for 2-3 minutes, breathing deeply.
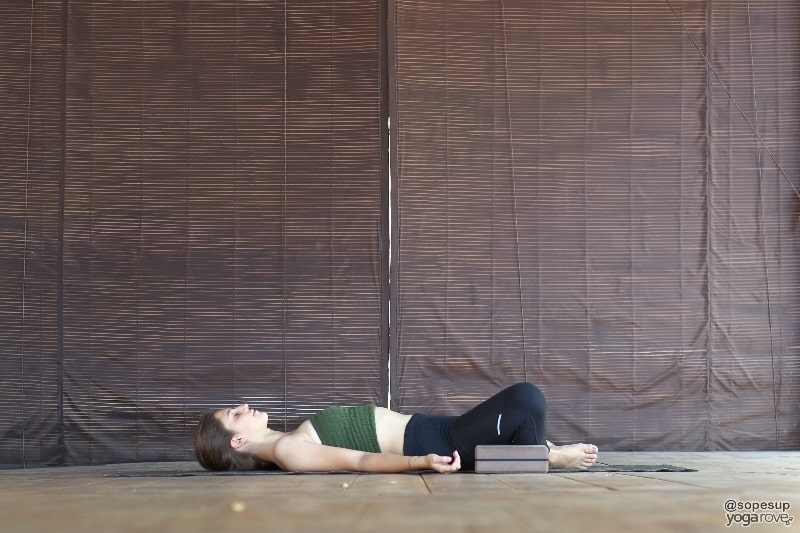
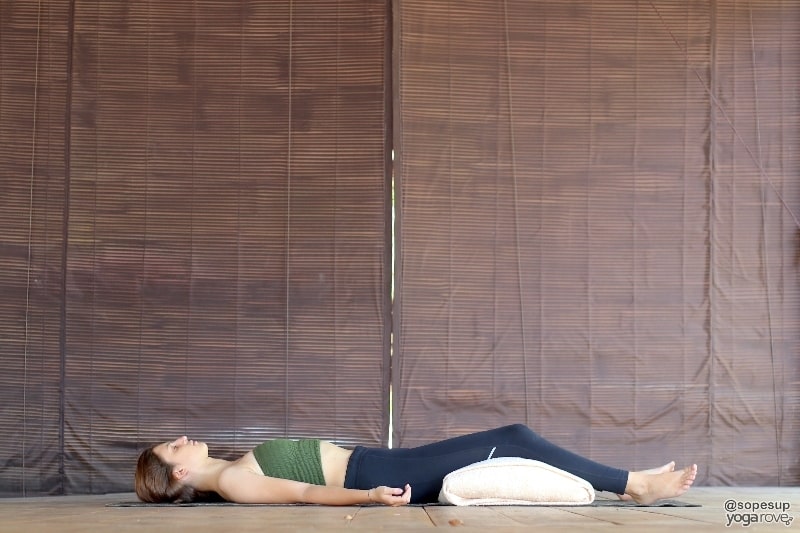
7.Supported Savasana
To end this restorative yoga sequence, come into Savasana, the ultimate resting pose. For this sequence, we will be using a variation with the bolster to provide support for your knees and hamstrings.
How to do Savasana:
- Come down to the ground from your Plow Pose, and lay flat on your back, with legs stretched out in front of you.
- Get your bolster and place it under your knees (you can use a pillow if you don’t have a bolster).
- Relax your entire body and breathe. Stay here for 5 minutes.
To make this pose more comfortable: Place a blanket or pillow on either side to support your arms, place a blanket over you to rest and provide comfort, or place the blanket underneath your head and neck for more support.
I hope you enjoyed this sequence, and it leaves you feeling relaxed, restored, and rejuvenated. Try to take the time at least a couple times a month to step back from your fast paced flows to treat yourself with this relaxing and calming sequence.
What other poses do you practice when you need to destress and release tension?
Ally is a Registered Nurse, Registered Yoga Teacher, and Co-Founder of Yoga Rove with her husband Victor. She first started yoga over 7 years ago when she started her nursing career to combat the physical and mental strain, and now loves to teach and help others.
I like very much your site and your yoga steps.
Thank you and Good work
Marcella
So glad you are enjoying it Marcella! Feel free to email us anytime with any suggestions for any tutorials, routines, or questions you’d like answered!
Thank you for the Yin Yoga and Restorative Yoga. I feel like this is what I need to get started.
Trying to get back in shape. These hit the spot.
Ronald
So glad you found it helpful Ronald!!