This post may contain affiliate links. Please read our disclosure for more info.
Have you ever seen – like, really, actually paid attention to – what yogis can do? From holding their own body weight in crazy contortions to performing push-ups (chaturangas) seemingly every few minutes throughout class, yoga’s strength is often totally underrated. In fact, it’s often not until people take their first yoga class until they realize how much strength it actually requires!
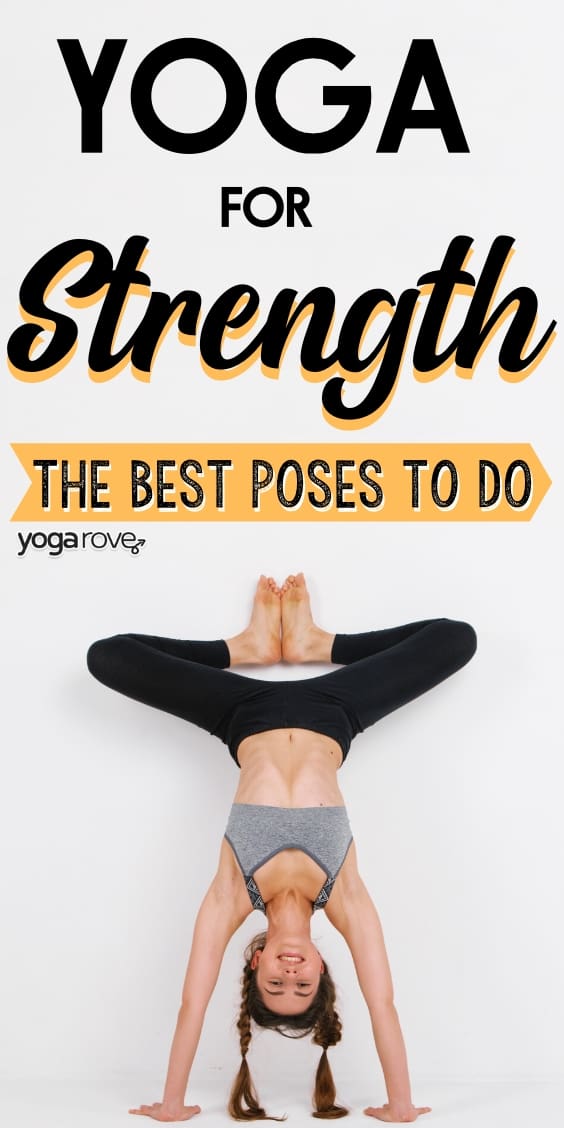
Can yoga help you build strength?
Absolutely. However, the amount of strength that yoga helps you build is directly related to the type and level of class you take, so be mindful of your strength-training goals when choosing the classes that you take. Later on in the article we are going to talk about the different types of yoga that are best for strength.
Is Yoga Strength Training?
When most people think about yoga they think about a person that is able to put their feet behind their head and bend in all different types of directions.
Yoga is a combination of meditation, breathwork, flexibility, and strength training in the form of bodyweight training. Studies have proven that bodyweight training is just as effective as weight training for gaining muscle mass and leaning fat.
Now if you are the type of person that wants to develop more bulk with your muscles you will want to focus more on lifting heavy weights more often then yoga (body weight training). Regardless of your goal you should always incorporate yoga into your training because it provides the most balance to your body when developing strength.
You don’t have to be strong to take a yoga class – yoga isn’t about the pose, it’s about the journey to and into the pose – just showing up on your mat is all it takes; the strength will follow.
By introducing all different kinds of movement into your life you will develop a stronger and healthier version of yourself. Yoga goes beyond the mat because of its ability to calm and relax the mind.
Yoga has strengthened my mind by allowing me to focus more on my tasks because of the stability it has brought my body and mind. The body and mind are connected on a very deep level and by practicing yoga you strengthen this connection with all the different movements you create with your body.
In the end the goal is to work on what makes your body feel happy. When in doubt, see what your body is telling you for journey.
Which Type of Yoga is Best for Strength?
Any type of yoga class that requires you to hold your body’s own weight will be the best strength training yoga. The following classes will require considerable strength and are considered the hardest types of yoga. These are ordered from lesser strength requirements to most:
1. Vinyasa Flow
Vinyasa flows are generally all-level classes (unless otherwise specified) and are totally customizable – always feel free to modify. You’ll do a lot of Sun Salutations, which are basically yoga push-ups coupled with a flow that brings the heart rate up.
There will usually be an even balance of flexibility and strength training in Vinyasa classes, and often a bit more “play time” where the instructor will offer inversions practice, arm balance practice, or a rest.
2. Power Yoga
Think of Power Yoga as Vinyasa on steroids – it usually moves a bit faster, yet holds the bodyweight poses (such as planks, hovering in push up, etc) for a bit longer.
There is usually more focus on consistent movement (cardiovascular) and strength than on flexibility.
3. Any Arm Balance Workshop/Class
Arm balances require you to put all your bodyweight into your hands, instead of your feet. They also require a SEVERE amount of core strength, which most people don’t realize until they start practicing.
How to know if you’re ready
If you can hold:
- Boat pose: 30 seconds or more
- Forearm and regular plank: 60 seconds or more
- Dolphin pose: 30 seconds or more
- Four-limbed staff (hover in chaturanga): 15 seconds or more
4. Any Inversion Workshop/Class
Inversions such as Pincha Mayurasana (forearm stand), handstand, and headstand all require you to support your entire body weight, upside down – so you’re working your strength and stability at the same time.
Inversions aren’t only strength-building, they’re also exhilarating – they turn your world upside down and leave you feeling energized.
You’re ready to try an inversion workshop/class if you can hold:
- Boat pose: 30 seconds or more
- Forearm and regular plank: 60 seconds or more
- Dolphin pose: 30 seconds or more
- Four-limbed staff (hover in chaturanga): 15 seconds or more
You’ll notice that these suggestions are the same as forearm balances – in arm balances, your bodyweight is parallel to the ground, so you are requiring a ton of core strength;
In inversions your bodyweight is completely perpendicular to the ground, requiring core strength coupled with trunk strength and the ability to stabilize your limbs in space.
As you extend yourself away from your center of gravity, it gets harder to stabilize. In arm balances, you are generally compressed, making your center of gravity easier to achieve, while in inversions, your limbs are extended skyward – very far from your center of gravity.
What yoga won’t help build strength?
There are dozens of kinds of yoga available on local schedules at any given time, each kind boasting its own benefits, but if you are seeking strength-building as the main component, the following types are classes you should not attend on the days that you’re feeling like flexing your muscles:
- Yin or Restorative Yoga: a gentle class that eases the body into positions where the muscles can release tension, while breath work slows the heart rate and declutters the headspace. This is a highly relaxing class that many students will literally say they felt like they had a massage when the class if over – certainly not a strength training class!
- Beginner Flow: usually an intro to Vinyasa Flow, with slower movements and basic walk-throughs of Vinyasa Flows to prepare you Vinyasa class.
- Hatha Flow: Similar to a Beginner Flow, this is generally the step before Vinyasa – it’s a slower pace that is focused on connecting the breath with balance. Sometimes there won’t even be any sun salutations!
- Iyengar: B.K.S Iyengar created yoga to answer to his own physical needs in the form of modifications, as he was quite ill (physically and internally). This yoga centers entirely around proper alignment of the human anatomy, and is heavy on prop use to achieve it.
- Kundalini: a more devotional form of yoga that centers largely around meditation and mantra chanting; it is said to awaken all of the energy centers in your body and it is quite energizing, but it does not focus on strength.
Why should I practice yoga for strength training?
The Office of Disease Prevention & Health Promotion recommends 180 minutes per week of muscle-strengthening physical activity for healthy children and adults – that’s 60 minutes at least 3 days per week. Strength-based yoga is an excellent form of muscle-strengthening that will help you reach this target – it’s as easy as attending 3 classes per week!
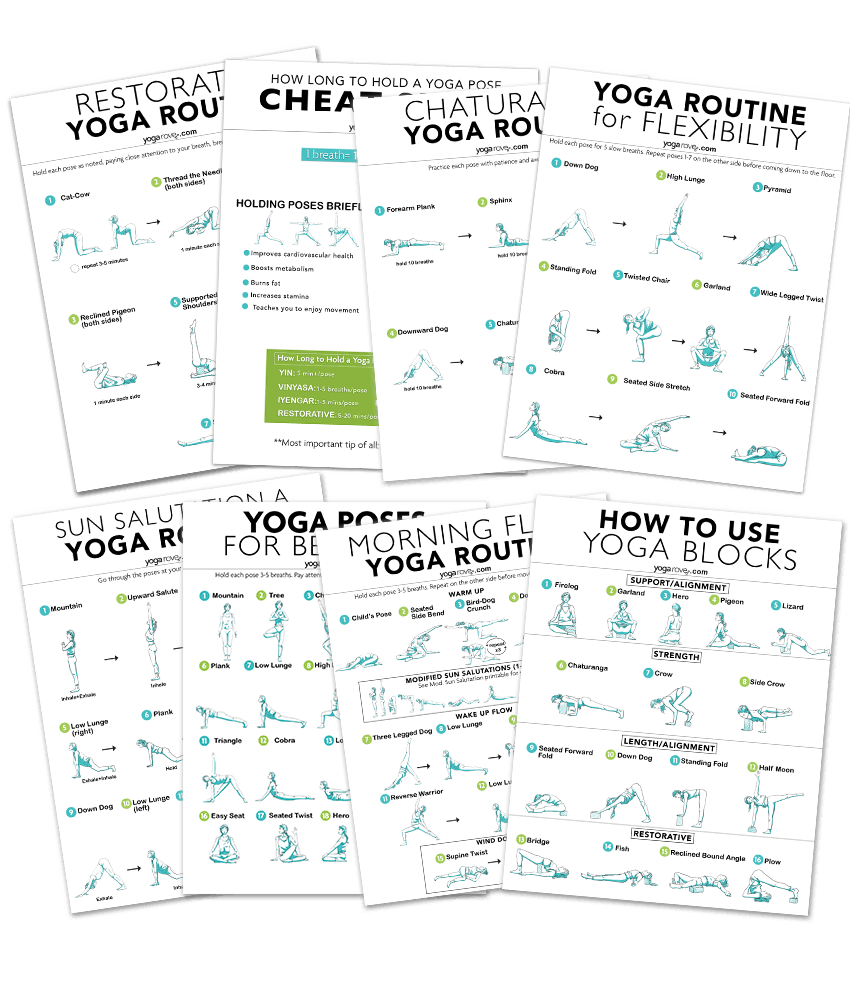
With our free printables in our Resource Library, you don’t even need to leave your living room to meet your quota.
By incorporating yoga into your strength training routine you are diversifying how you develop muscle and strength throughout your body. Switching things up will give you a better understanding of your body and help you develop strength.
Focusing on just one method to obtain a certain level of fitness is only one path. Adding more exercise opportunities gives you more room to grow and to keep things interesting. Being engaged is probably the most important thing because you always want to get excited about anything that involves movement. Getting to this point will make being healthy and the weight you desire to be at, part of who you are.
Also, some people just can’t stand going to a gym and lifting weights repetitively – if you’re anything like me, you get bored and discouraged. When you’re taking yoga, you’re so immersed in the experience of the class, the flow of the breath, and the combination of movement, strength, and flexibility, that you really are not giving it any thought (until the next day, when you’re sore in places you didn’t even know you had muscles!).
Can yoga be my only strength training?
If you want it to be, yes. Your physical activity routine revolves around you, and no one else. If your yoga is making you feel good and you don’t want to touch a single weight, keep on keepin’ on with your chaturangas! I personally only practice yoga for my strength (as opposed to any additional weight training or lifting), and I find that it serves my body – physically and mentally – best.
The Best Yoga Poses for Building Strength
If you are more of a stay-at-home yogi, you can include these postures in your practice regularly to build strength over time. We have dived the poses into three sections; lower body, core, and upper body. Pick a specific pose combination you want to work on if you are just starting out. Hold each pose for 3 to 5 breaths. If you feel up to it attempt to hold all the poses for 5 breaths. Lets begin:
Lower body strength training:
High lunge
High lunge is great for developing the legs and arms. This is a great foundational pose to work on for your practice because it help you work on your balance. Balance is important because it gives us a sense of more stability in our body and since the body is connected to the mind, it strengthens the stability in our mind.
Instructions:
- Start in Mountain Pose with the feet hips distance apart.
- Inhale your finger tips to the sky, exhale into a forward fold.
- Bring your finger tips to the mat and step your left foot back into runners lunge.
- Find your footing in this position. Engage both inner thighs by hugging them both toward the center of the mat so both of your hip lines face forward. *The goal is to make sure you have a strong base before you lift up.
- Bring your finger tips toward your waist line and stay open with your chest. Press into your front leg and lift up.
- Inhale and reach with your finger tips forward and above your head. Sink into the pose a little deeper. Make sure your palms are facing each other.
- Take five deep breaths
Modifications: If holding your hands above your head is hard you can keep them on your waist line. Also having a chair next to you will help if your balance isn’t where you want it to be.
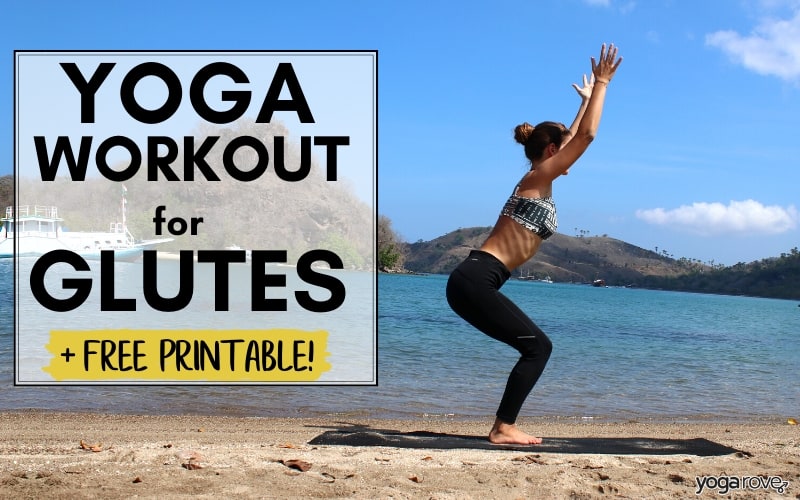
Chair (Utkatasana)
At first this pose may seem like it is not very hard but the longer you hold it the harder it becomes. Your thighs will feel like they are on fire and your legs and glutes will get a lot stronger over time. The stronger you get the longer you will be able to hold the pose. This is also a great pose for the upper body as well because holding your arms above your head will help strengthen your shoulders.
Instructions:
- Start in Mountain Pose with your feet together and palms facing forward.
- Begin to balance your weight onto the heels of your feet as you sink your seat down towards the ground, keeping a straight spine and lifted chest.
- Raise your arms up overhead and sink deeper with each exhale, being mindful to keep knees and hips even.
- Take for long deep breaths.
Modifications: If its hard for you to go deep in this pose back off a little. Slowly progress over time into a deeper hold. You can also keep your arms on your waist if you can’t hold them for the duration of the pose.
Goddess Squat
Some instructors may refer to this pose as a horse stance pose. This is a really good pose to develop the glute muscles and really open up the hips. The deeper you go into this pose the more it begins to work your inner thigh muscles.
Instructions:
- From Mountain Pose, step your feet out wide with your toes facing outward and heels inward.
- Ground through your feet, tuck your pelvis, then sink your seat until your thighs are parallel to the ground.
- Make sure your knees do not roll in and stay aligned with your heels.
- Bring your arms into cactus arms or straight up overhead while lifting through your chest.
- Hold for 5 deep breaths and sink deeper with each exhale.
Modification: Adjust how deep you sit into this pose. If you are not used to holding this pose it will take time to develop the muscle strength to hold this pose.
Warrior II
This is a great foundational lower strengthening pose. Holding this pose may not be as hard as high lunge and it may be a pose you want to work on more so that you can deepen your high lunge. The more you practice the stronger you will become.
Instructions:
- Begin in a wide stance with your feet past your hips facing forward. Make sure you feel balanced with a strong foundation. Going to wide will throw you off balance.
- Turn you left toes inward and your right toes outward facing the front of your mat.
- Bring your naval in and lengthen you spine.
- Inhale your arms up parallel to the floor with the palms facing the floor.
- Exhale and sink into the front knee slowly. Make sure your knee does not go past your ankle and that it does not cave in.
Modification: If your front leg becomes tired try to not deepen the pose as much. Listen to your body and push it according to how you feel.
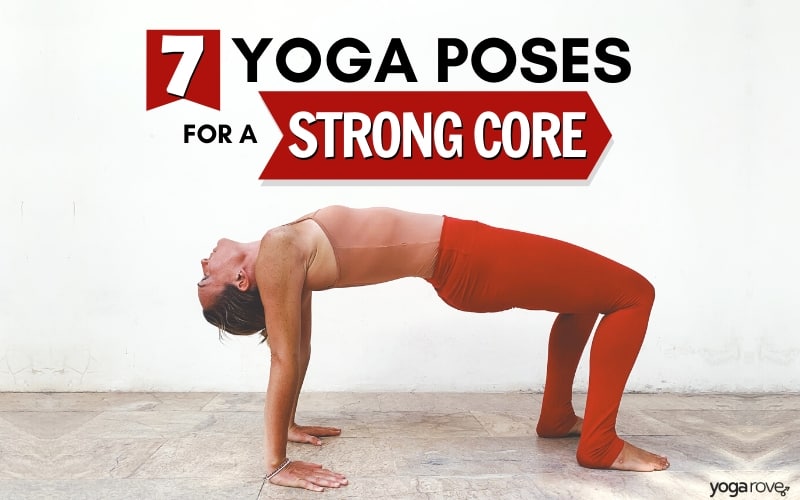
Core and trunk strength training:
Plank
Plank pose is one of the best upper body and core poses. Holding this pose for a long period of time is actually better for your core then doing sit-ups. Focusing on practicing this pose a couple times a week will show great improvements in core strength and if you have lower back pain will greatly reduce the pain you are feeling. A strong core not only reduces pain but helps prevent future injuries from occurring. Take the time to practice this pose.
Instructions:
- Start on all fours with your wrists under your shoulders and fingers spread.
- Step one foot back at a time with your legs together.
- Engage your core and slightly pull up through your belly button, making sure to create a straight line of energy in your spine.
- Ensure to keep your hands inline with your shoulders and keep your gaze slightly forward. Also keep your shoulders away from your ears.
Modifications: This is a very hard pose to hold if you have not developed your upper body strength. If that is the case start on your knees and gradually build up to the pose. A flow you may want to try is holding plank for 10 seconds and Childs pose for 10 seconds. Work back and forth and focus on increasing your plank time little by little. Try to aim for 1 minute in this pose as a goal.
Boat
This pose always challenges my core in a good way. Working on this pose will greatly increase your core strength and allow you to hold other poses for longer periods of time. Take the time to develop your core strength because you use it in many poses and in your every day life.
Instructions:
- Start in a seated position with your legs straight out in front of you.
- Bend one knee at a time, still keeping your feet flat on the ground. Place your hands slightly behind your hips.
- Begin to lift one leg at a time while you lean back slightly until you start to feel your core engage.
- Bring both feet up to a 90 degree position and bring your arms straight along your sides. Lift through your chest and make sure you do not hunch over.
- You can stay here or straighten your legs for more of a challenge!
Modification: Instead of bringing both feet up to a 90 degree position try bringing one foot up at a time to begin building up the strength for boat pose.
Superman
If you want to work on developing your posture this is the pose you need to work on. Getting into this pose will be like nothing you have experienced before. Taking the time to get into poses and working on movements you have never done before will bring balance to your body.
Instructions:
- Start lying face down on the ground, and stretch your arms out in front of you.
- Take a deep inhale, then on your exhale, lift everything off the ground as much as you can.
- Stretch through your fingertips, your chest, actively try to lift your thighs off the ground while extending through your toes.
- Be conscious to keep your shoulders away from your ears.
- Hold here for 3 to 5 breaths
Modification: If you can’t lift your legs and arms at the same time try lifting one side at a time. Start with your arms and keep your legs on the ground. Place your arms on the ground and try lifting just your legs. Build up slowly to this pose until you can hold both your arms and legs up at the same time.
Dolphin
This is a full body pose that works you from your head to your toes. Through out the pose you will not only be strengthening your arms, core, and legs, but you will also be stretching out your legs and arms. Activating your different muscles at the same time is really going to help you develop your body and strengthen your body overall.
Instructions:
- Start on all fours with hands on the ground shoulder width apart and toes tucked.
- Come down onto your forearms, with either hands parallel or clasped together.
- On your exhale, push your hips back as you would in Downward Facing Dog.
- Engage you core and continue to extend through your heels and send your hips back, balancing the weight between your upper body, core, and legs.
Modifications: Only attempt this pose when you feel more comfortable with downward dog. The goal is for you to slowly build up your strength and if you can not do a pose focus on a pose you can do that will allow you to progressively move forward to the pose you want to hold.
.
Upper body strength training:
Forearm plank
This pose is taking plank to the next level. Holding plank pose will be a little easier than holding a forearm pose because in the pose you will find yourself lower to the ground causing you to engage in your core and upper body muscles a lot more.
Instructions:
- Start on all fours with hands parallel, then come down to your forearms.
- One at a time, send your feet back to straighten out behind you, touching together.
- Engage your core and lift through your belly button, maintaining a flat back.
- Breath deeply for 5 breaths
Modifications: To reduce the amount of weight that your upper body holds you should get on your knees. If holding plank pose is easier for you work on lengthening the time in plank pose before attempting forearm plank.
Side plank
Take your time with this pose. When I first started working on this pose I kept falling in and out of it. This is the pose you need to slowly work into. Rushing into this so you can hold it will only cause you to lose balance. Focus on stabilizing your muscles and moving with a controlled intention will develop the arm strength that is required to hold side plank.
Instructions:
- Start on all fours with hands underneath shoulders.
- Step one foot back at a time straight out behind you to come into Plank Pose.
- From here, move your weight onto the right side of your body as you begin to float your left hand into the air, pivoting onto the side of your right foot, stack your left foot on top.
- Lift up through your hips and float your chest open, looking up towards your left hand.
Modification: You can bring you right knee onto the ground, or plant both sides of your feet on the ground instead of stacking them.
Chaturanga
What makes this pose very hard is moving from plank pose and bringing your chest very close to the ground. Since we are incorporating movement you will begin to notice your arms shaking more than usual. This is because you are using muscles you have not used before and this is a good sign because now you are finally beginning to use them. Stay inspired and stick with it, take your time and you will get stronger!
Instructions:
- Start on all fours, then come into a plank.
- Hug your elbows in towards your sides, and make sure your entire body is engaged.
- Slightly float your body forward with your toes as you bend your elbows to a 90 degree angle and hover the ground.
- Keep your elbows tucked and be mindful not to collapse your chest.
Modifications: In table top position lift your knees up instead of getting into a plank pose. In doing so you will greatly decrease the tension you are feeling and it will give you a place to start building up your Chaturanga. To learn more about modifications for chaturanga for beginners, read our article Why is Chaturanga So Hard?
Crow Pose
Here is a pose that is going to take time to learn. Please do not get discouraged because with enough practice you will build up the pessary strength to get into this pose. Each and everyone of us has their own path and you should not compare your practice with someone else’s. Stick with it and you will get to where you want to be.
Instructions:
- Start in Yogi Squat Pose, or Malasana.
- From here, plant your hands out in front of you, parallel to each other.
- Begin to shift your weight by allowing your knees to rest on your upper arms, squeezing in towards each other. You arms should have a slight bend in them.
- Try experimenting lifting one leg off the ground at a time until you feel you have found a good balance.
Modification: Have a block next to your feet and focus more on developing your arm strength and balance before lifting into a full crow pose. You can also build up by lifting one foot off the ground. Change each foot and study what you need to do within yourself, to improve your balance.
Things to Keep in Mind When Combining Yoga and Strength Training
- It’s not you – it is hard. Don’t get discouraged! Remember that the only people that tell you that yoga is easy are the ones that are either taking easy classes or have never taken it at all.
- Yoga doesn’t have to be about building physical strength. If that is your goal, that’s great, but yoga is also about building mental strength and emotional resilience. Even if that’s all you walk away with, that’s strength in its own right!
- You’re not going to be a bodybuilder. Yoga strength is a functional strength, not a pile it on for a body competition strength. Yoga works the entire body as one, so your muscles intuitively balance and counterbalance each other. You will have a balanced, strong figure, not a spot-strengthened figure.
- Time constraints exist. If you don’t have 60-90 minutes to spare 3x per week for a yoga class, you may decide that a quick weight session is more practical for you.
- Don’t push yourself TOO hard. You just watched your mat neighbor go from a headstand, jump back into a double push-up, then somehow finish in an arm balance… while you’re still attempting to hold plank. This is your practice, and the only thing that matters is what’s happening within the four corners of your mat.
Previously a dancer, Ashley has been practicing yoga for over 15 years and teaching for 5.
She balances an executive-level “corporate” position during the day with healthy, mindful wellness practices in her free time to stay grounded; she lives on celery juice and cold brew, and can’t live without her dark chocolate!

