This post may contain affiliate links. Please read our disclosure for more info.
Sun Salutations are how I began my yoga practice, with a little printed piece of paper taped to my mirror. They are a great way to get your yoga practice started and introduce you to the many benefits of yoga.
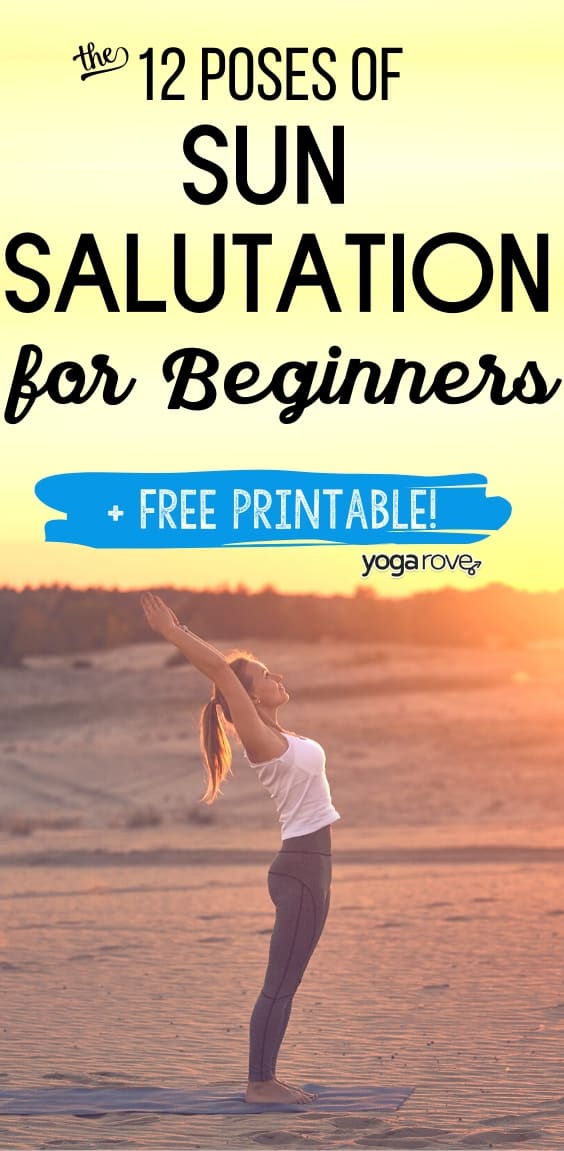
Today I want to share with you the Sun Salutation for beginners which helped me begin my practice, in hopes it will help you begin or improve yours! I started mine with Sun Salutation A, which is made up of 12 poses.
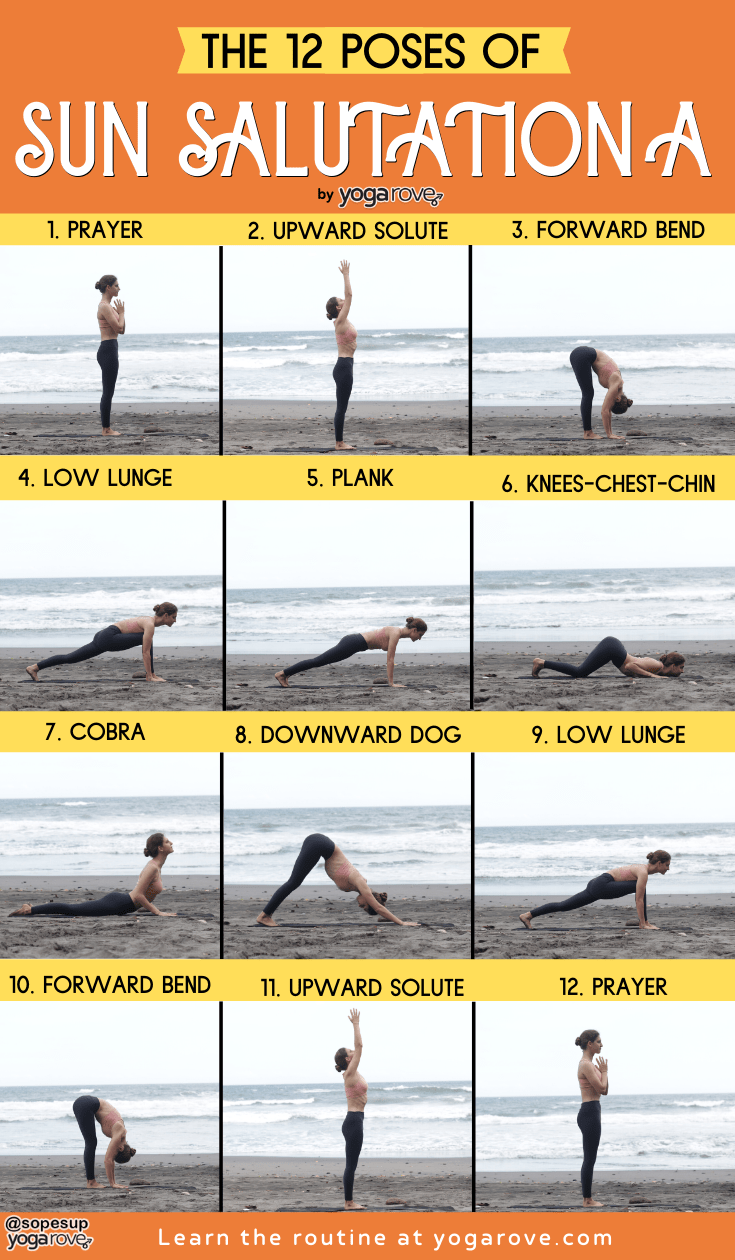
The 12 Sun Salutation Yoga Poses:
- Prayer Pose (Pranamasana)
- Upward Salute (Hastauttanasana)
- Standing Forward Bend (Hasta Padasana)
- Low Lunge (Ashwa Sanchalanasana)
- Plank (Phalakasana)
- Knees-Chest-Chin (Ashtanga Namaskara)
- Cobra (Bhujangasana)
- Downward Facing Dog (Adho mukha śvānāsana)
- Low Lunge (Ashwa Sanchalanasana)
- Standing Forward Bend (Hasta Padasana)
- Upward Sslute (Hastauttanasana)
- Prayer Pose (Pranamasana)
What is a Sun Salutation?
A Sun Salutation, also known as Surya Namaskar, is a traditional yoga practice that in today’s modern culture is made up of 12 poses that are linked together to form a flow.
Sun Salutations originate over 3,500 years ago and were traditionally a spiritual practice and used as a way to worship the sun, and therefore were traditionally practiced at sunrise.
In today’s culture, Sun Salutations are commonly used in yoga practice as a warm up or are intertwined into yoga routines, especially Vinyasa classes.
There are 3 different types of Sun Salutations: A, B, and C. Sun Salutation A is the most traditional of the three, and the one you will be learning today!
There are also variations to Sun Salutation A that make it either more advanced or more beginner friendly. We’ll be showing you the beginner friendly version, but will include variations to make certain steps more challenging.
Benefits of Sun Salutations
- Increases energy: Sun Salutation poses increases circulation to all parts of the body due to the focused movement with the breath. Many people practice this sequence in the morning as a warm up prior to their full yoga practice.
- Strengthens muscles & improves flexibility: When practiced regularly, this sequence will build strength and improve flexibility. The poses focus on a variety of different areas of the body, and the constant movement helps relieve stiffness and improve range of motion.
- Promotes weight loss: The constant movement in Sun Salutations, especially in the morning, boosts your metabolism and burns more fat than compared to practicing isolated poses.
- Calms the mind and improves focus: Vinyasa flows such as Sun Salutations push you to get out of your head and focus on the present moment. You are focusing on coordinating movement with your breath, like a moving meditation, which is what yoga is. Flowing sequences like this are great for stress and anxiety relief as well.
- Increases stamina: Sun Salutations can be hard work! Especially if you’re doing as many as 108 rounds in a row. Practicing multiple rounds regularly can give you a great cardio workout and improve stamina.
How long should Sun Salutation take?
This depends on a few factors like which Sun Salutation you are practicing, how long you hold each pose, and how many rounds you do. One Sun Salutation is said to take about four minutes.
Sun Salutation A has fewer poses than Sun Salutation C, so of course Sun Salutation A will probably take less time.
Some practices of Sun Salutation say to stay in each pose only for a breath or two, while others have you hold each pose for 10-15 breaths.
This all depends on what your preference is and what makes you feel the best.
The amount of rounds depends on this as well. Some people do as many as 108 (!) Sun Salutations during the changing of the seasons or other big events like marriage or the new year as 108 is seen as a very sacred number that appears in many disciplines relating to yoga.
I suggest starting off with 2 rounds of properly implementing the poses and then building up from there.
How many Sun Salutations should you practice a day?
To obtain optimal benefits, I would suggest aiming to practice at least 12 sets (one set equals two rounds practiced on opposite sides). But starting out with 2 rounds and building up from there is definitely a great way to start.
If you are practicing Sun Salutations for weight loss, keep in mind the more sets you do, the more calories you burn. Twelve rounds of Sun Salutation is said to burn as much as 156 calories! Imagine how many you burn when you do 108!
Sun Salutations can be an excellent cardio workout when practiced this way.
When to Practice Sun Salutation
Sun Salutation is commonly practiced at sunrise, hence the name. It’s traditional name “Surya Namaskar” translates to “Sun Offering” which refers to offering respect to the sun.
Some people say that if the moon is visible when you practice Sun Salutation, it then becomes Moon Salutation, which is basically the same sequence with one additional pose added in (Child’s Pose).
But honestly, if you don’t have time to wake up at sunrise or if you want to practice Sun Salutation after work or in the morning after a cup of coffee, I say go for it. Do what makes your mind and body feel good.
Tips for Practicing Sun Salutation as a Beginner
- Printout the routine. It’s going to be hard to memorize the poses in this routine at first, especially as a beginner (I go over tips for memorizing the sequence at the end). You don’t want to have to keep stopping to look up which pose is next on a computer, and you’ll want visual reference. The printable I created below is perfect to follow when first starting out.
- Practice the routine in front of a mirror. I started this routine with a printout I taped on my mirror. Why my mirror? Because that is exactly where I practiced in front of for many months. You want to make sure you are doing each pose correctly with proper alignment. It can be hard to notice poor posture or alignment on yourself, and if you are practicing at home and don’t have a yoga teacher observing you, you’ll need to pay attention to ensure you are practicing correctly.
- Go at your own pace. Don’t think you need to go a certain speed to do this sequence “correctly”. There’s no right way- each pace you practice has its own benefits.
- Pay attention to your breath. This sequence, like most flowing sequences, but this one in particular, focuses highly on the breath. Each pose in this sequence is meant to be aligned with either the inhale or exhale of your breath. Be mindful of your breathing throughout the sequence and try to keep it even.
- Don’t strive for perfection the first time. Don’t expect to do every pose perfectly, or to feel amazing the first time practicing. You might forget steps, get tired, and feel like you got your butt kicked the first time around. Don’t give up! The more you practice, the better you will get. The results are so worth it.
How to Do Sun Salutation Illustrated:
The following are how to do the 12 poses of Sun Salutation. I have opted to share the version that incorporates more beginner friendly poses in some steps, but explain how to switch it up if you’re feeling up for a challenge.
How long to hold each pose: You’ll see that with each pose, it instructs you to come into it either on your inhale or your exhale. You can stay in each pose for as many breaths as you’d like, but make sure to come into each pose incorporated with your breath as instructed.
**Tip: If you hold each pose longer, it will focus on helping you build muscle and strength, while holding each pose just for one or two breaths will give you a great cardio workout.
Preparing For Sun Salutation
Here are a few tips to get you ready and enjoy your Sun Salutation practice to the fullest.
1. Practice on an Empty Stomach
When you practice this routine first thing in the morning you should always do so on an empty stomach to obtain the full benefits. Practicing on a full stomach may cause you to not feel good and create a more sluggish feeling after you are done.
We are firm believers in working out in the morning while intermittent fasting. The benefits you will receive from fasting are enough to motivate you to start.
2. Set Good Intentions
Visualize the sun’s rays beaming down on you and giving you lots of energy. I get that some of you may find this strange but you would be surprised when you use your imagination to enhance your routine and how you feel afterwards.
Energy flows where the mind goes! Experiment with this concept. Maybe on one day you set no intention and on another day you set a positive intention. See how you feel and do what works best for you. We highly recommend setting a good intention because it really starts your day off right.
3. Go With The Flow
When starting off with this routine you will become confused at first and that is all right. Don’t be so hard on yourself! The more you practice this routine the better your flow will become.
Every time we do the same thing over and over again we enforce the neurological path ways in our mind causing that habit to become stronger.
Repetition is the mother of skill and the more times you repeat this sequence the better you will get. You got this!
Sun Salutation Steps:
Below you will find the 12 poses of Sun Salutation A, along with variations for a few of the poses.
1. Prayer Pose (Pranamasana)
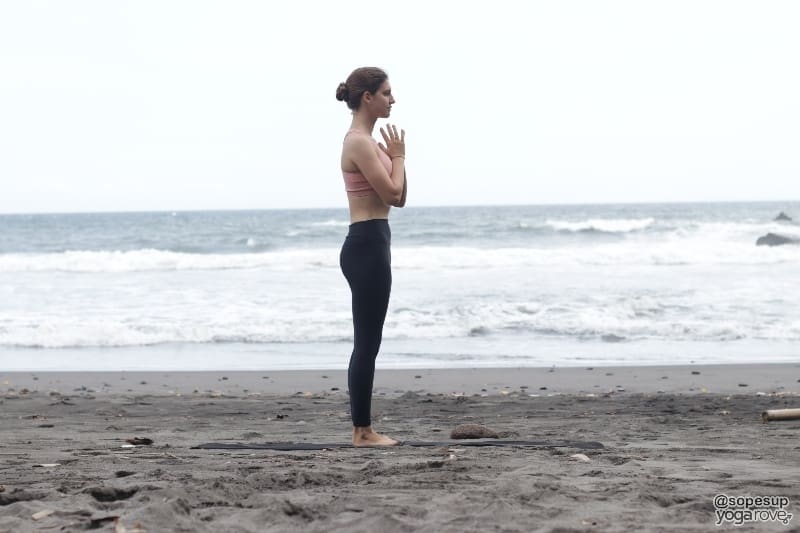
- Start in a Standing position with feet together, back straight, and looking forward.
- Bring your hands together at center into a prayer position and bring your gaze forward or close your eyes.
- Take this time to observe your breath and even out your inhales and exhales.
Benefits of Prayer Pose:
- Calms the mind and body
- Improves posture
- Enhances focus and concentration
2. Upward Salute (Hastauttanasana)
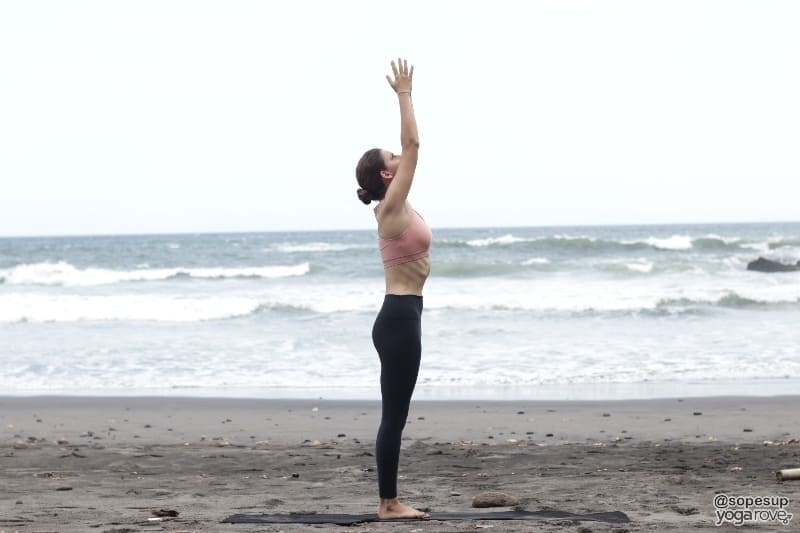
- On your next inhale, lift your arms up overhead, arch you back, and lift your gaze, coming into a slight backbend.
- Only bend as much as is comfortable for you.
- Hands can touch or palms an be facing each other.
Benefits of Upward Salute:
- Stretches the chest and abdomen
- Creates space in the lungs
- Improves digestion
- Relieves anxiety and fatigue
3. Standing Forward Bend (Hasta Padasana)
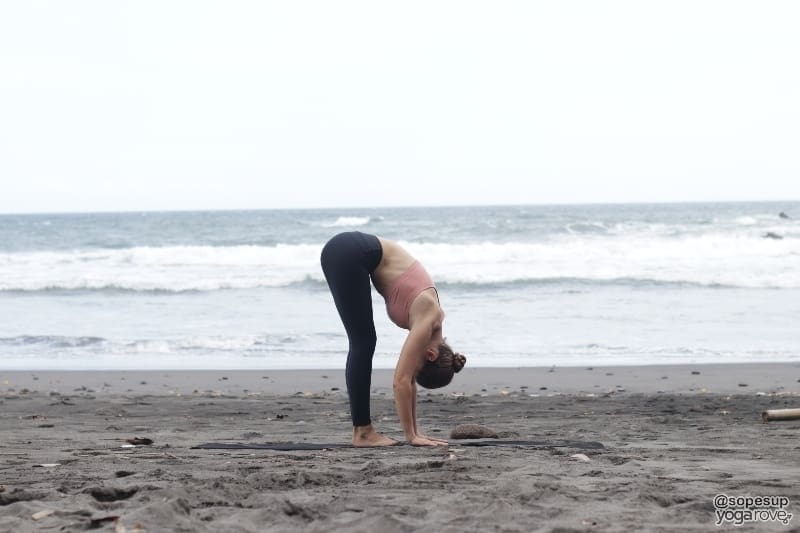
- On your exhale, bring your hands to prayer position again as you dive down through your midline.
- Make sure as you dive to keep your chest lifted and you back straight.
- Bring you hands or fingertips to the floor, shins, or ankles.
Benefits of Standing Forward Bend:
- Stretches spine, hips, hamstrings, and calves
- Reduces stress, anxiety, and fatigue
- Relieves neck and back tension
4. Low Lunge (Ashwa Sanchalanasana)
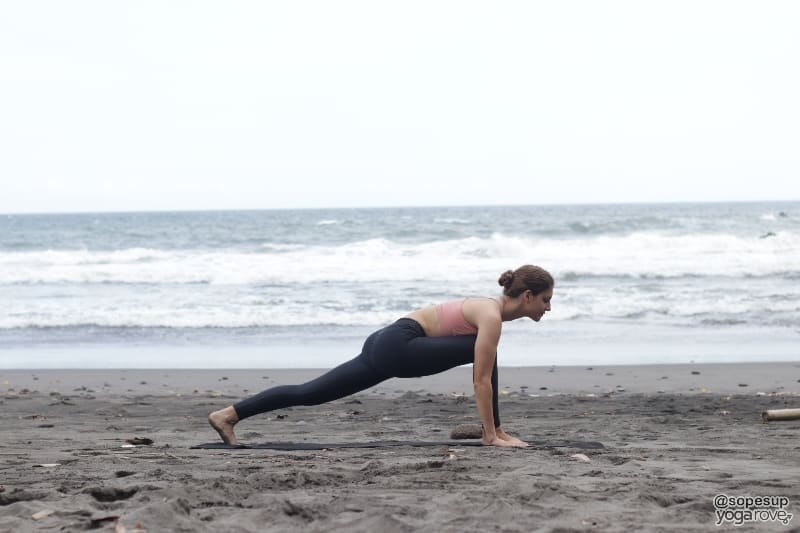
- On your inhale, lift your head up to look forward, ground your hands, and step your right foot back behind you.
- Your front foot stays grounded and your left leg bends.
- You can choose to drop your knee and untuck your toes like in the picture or you can keep the leg lifted with toes tucked for more of a challenge.
Benefits of Low Lunge:
- Stretches the quads, psoas, and hips
- Strengthens your knees and abdomen
- Improves mental power
5. Plank (Dandasana)
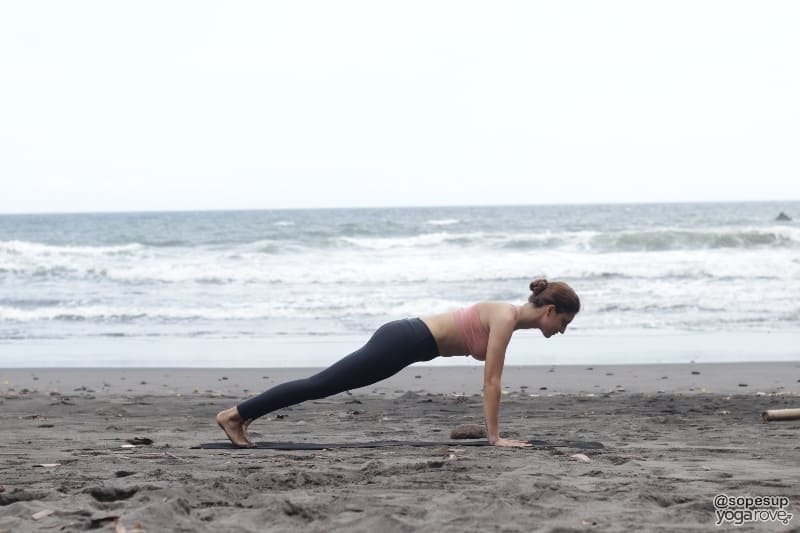
- Ground both hands, tuck your back toes and lift your back leg.
- Send your left leg back to meet your right leg, coming into plank position.
- Be mindful to keep proper alignment, with hands under shoulders, and tailbone in a neutral position with the rest of your body.
- Hold your breath here before going to the next pose.
Benefits of Plank:
- Strengthens, arms, shoulders, wrists, and core
- Improves posture
- Increases balance and focus
6. Knees-Chest-Chin (Ashtanga Namaskara) or Four Limbed Staff (Chaturanga Dandasana)
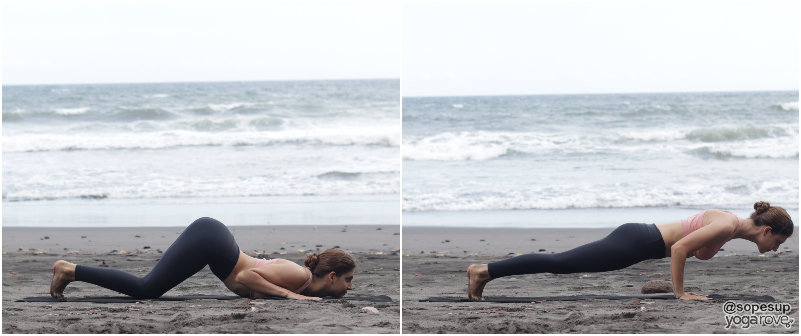
- Exhale as you drop your knees slowly to the floor, then hug you elbows in and drop your chest and chin to the floor, gazing forward.
- Keep your arms tucked into your sides and you stomach, thighs, and shins lifted.
- The only body parts that should be on the ground are your toes, hands, knees, chest, and chin.
To make this step more advanced, you can come into full Chaturanga instead by hovering your entire body from the ground with elbows bent at 90 degrees. But if Chaturanga is too challenging at this time, no worries! Stick to knees-chest-chin.
Benefits of Knees-Chest-Chin:
- Opens the chest and improves spine mobility
- Strengthens the core, legs, and chest
- Develops upper body strength
7. Cobra (Bhujangasana) or Upward Facing Dog (Urdhva Mukha Svanasana)
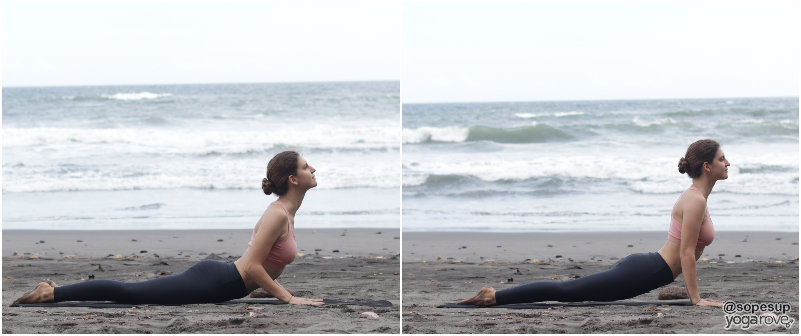
- On your inhale, slide your entire body onto the ground, untucking your toes, and lift up through your chest, straightening your arms, coming into Cobra.
- In full cobra your head, chest, and abdomen are lifted. If this is too much of a backbend for your comfort, come into Baby Cobra, where you arms are bent and the backbend is much milder.
- Keep your shoulders dropped away from your ears and continue to lift through your chest.
- Press your legs and the tops of your feet into the mat.
Benefits of Cobra:
- Stretches shoulders, chest, and abdomen
- Firms and tones the glutes
- Relieves tension in the back and spine
8. Downward Facing Dog (Adho mukha śvānāsana)
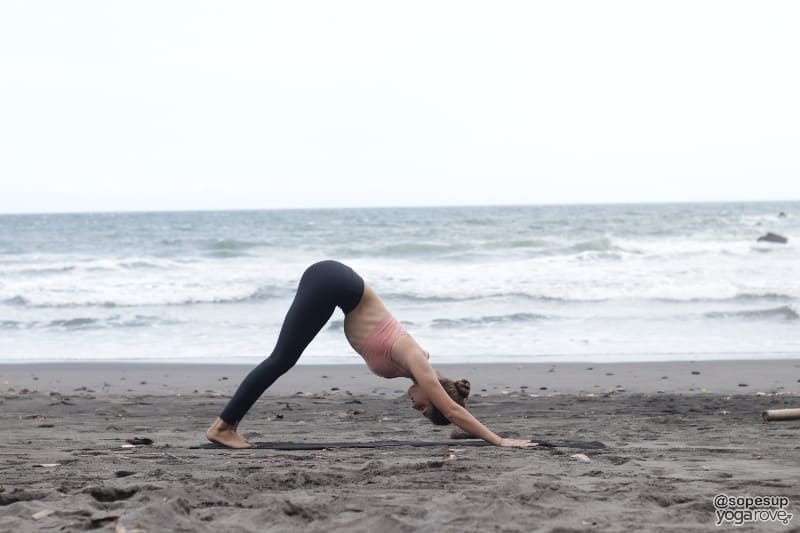
- On your exhale, tuck your toes, and send your hips up and back into Downward Facing Dog.
- Send your chest towards you thighs and lengthen through your arms and shoulders, staying grounding in your hands with finger spread.
- Engage your core and thighs. Press your heels towards the ground as much as you can.
Benefits of Downward Facing Dog:
- Strengthens arms, core, legs, wrists, and shoulders
- Stretches hamstrings, spine, and shoulders
- Energizes the body and mind
9. Low Lunge (Ashwa Sanchalanasana)
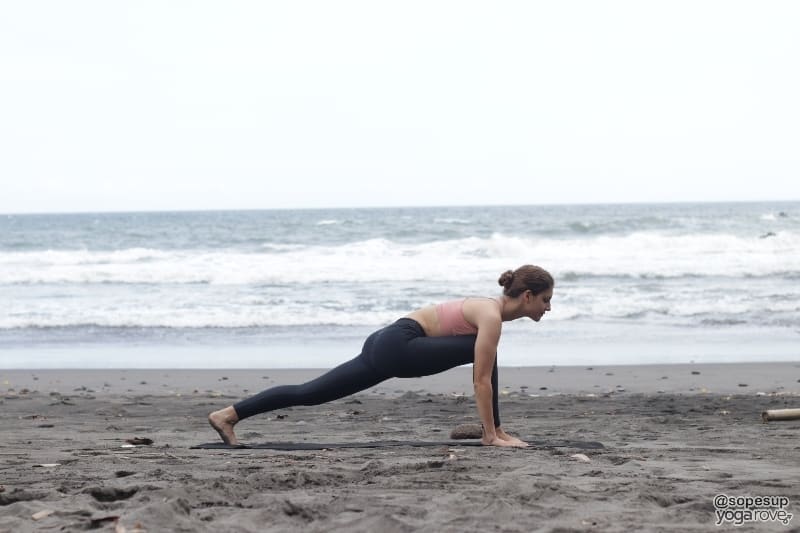
- On your inhale, come back into low lunge.
- Bend the knee and ground through the foot.
- Remember, to make this more challenging, you can lift the back leg and tuck the toes.
10. Standing Forward Bend (Hasta Padasana)

- On your exhale, come back into standing forward bend by stepping your left foot up to meet your right, then straightening both legs as you fold.
- Possibly try to fold a little bit deeper this time, as your body may be a bit more warmed up now.
11. Upward Salute (Hastauttanasana)

- On your inhale, reverse dive upwards into upward salute by spreading the arms wide as you lift your body upwards into a backbend.
- Bring your arms up overhead either to come together or with palms facing each other.
12. Prayer Pose (Pranamasana)

- On your exhale, come back to center into prayer pose.
- You have now completed a full round of Sun Salutation!
You did it! I hope you enjoyed it and are full of energy after practicing. If you found it difficult to get through even just 1 round, don’t feel discouraged.
I could barely get through one round when I first began, but with consistent practice I saw so much improvement and was able to do multiple rounds.
How to Memorize Sun Salutation A
After practicing this sequence, you might be thinking “how the heck am I going to remember all of these poses?”.
Because this is a flowing sequence that you may want to do at a faster pace at some point, it is much more convenient if you can learn to memorize the poses.
Downloading the free printable I created of the sequence is a great place to start. I used something very similar to that when I started practicing it and had it taped right on my mirror.
But I think it definitely is possible to memorize this routine pretty quickly, especially if you can get down the first four poses.
We are going to memorize this sequence by chunking it into the 3 phases.
First memorize steps 1 through 4, the first phase:
Prayer Pose to Upward Salute to Standing Forward Bend to Low Lunge
Chunk this together and fully understand it.
Once you understand this phase you have also learned the last phase because the last four steps are the exact same, but backwards:
Low Lunge to Standing Forward Bend to Upward Salute to Prayer Pose
Once you understand that you learn the second phase by remembering the middle four poses:
Plank to Knees-Chest-Chin to Cobra to Downward Facing Dog
For me, these became easy to remember by linking them together as the four poses that are done on the ground, while the other poses are standing poses.
The more you practice, the easier it will be to remember the poses and soon enough, you will be able to do them without even looking at anything for reference.
10 Reasons To Practice Sun Salutation
Need more reasons to start your Sun salutation practice in the morning? Here’s 10:
- This is a simple routine that is a staple in the yogi community.
- This routine awakens your inner power to get you started for the day.
- It will help reduce anxiety and stress because it serves as meditation in motion.
- Jump starting your metabolism with this sequence will keep you on track towards losing weight, especially if you are intermittent fasting.
- Having a staple routine will bring clarity to what you have to do in the morning if you are unsure of where to start with your yoga practice.
- Best way to start the day.
- Set a goal with the amount of rounds you want to accomplish a go for it. Doing so will challenge you to keep you motivated.
- Gets the blood flowing and clears the mind.
- Improves balance in your body. Going through these different variety of poses on each side of the body will help balance your muscles that help with posture.
- Practice outside when the sun is rising and focus on how much energy the sun is providing you. Maintaining this positive mindset will bring good energy into your life through out the day.
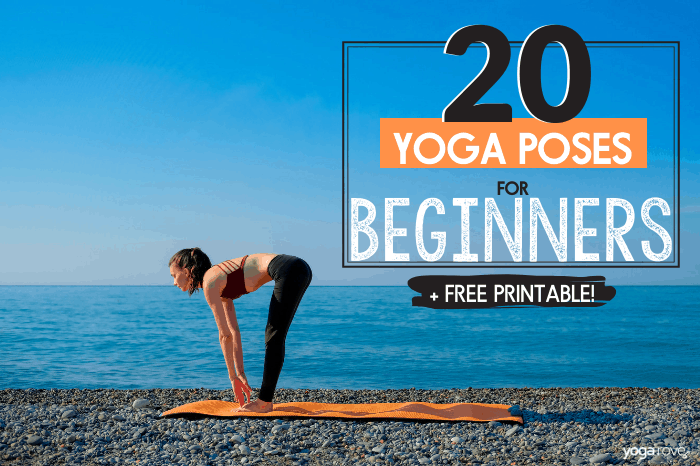
Want to save this for later to get your Sun Sal on? Pin it!


Hi Ally,
I am very confused I have put my email in at least 15 times and eveytime I got to print a PDF like sun salutations it asks me to enter the password which I do then just takes me back to “enter email address” it’s becoming frustrating, please help
Hollie
Hi do you have the salute to the sun as a youtube tutorial? Can you please send me a link if you do as I cannot find it😊
Thank you
Sonia
Not yet but that is definitely on our list of videos to make!
Definitely trying this out tomorrow morning ☺️.Great Content . Thanks for sharing Ally.?
Awesome! Enjoy! So glad you found it helpful 🙂
Hi Ally, You are an absolute star. I started using your pdfs a couple of months ago and am still enjoying the routines. I doubt I will every achieve full flexibility, I am still really enjoying using your printables. I have suffered for many years with extreme pain in my legs, especially at bedtime. I am now free of that pain, as long as I complete a few sun salutations before I retire. Thank you, thank you, thank you! x
That is amazing Julie! I’m so glad you are finding so much relief and finding the yoga printables helpful!
Hi Ally:) Tanks for your detailed explanation for Sun salutation A. your explanations are great. I have one question about Half lift? It is optional ? as I saw the asana in the pdf but do not see in your tutorial.? Is there any special thought behind that
thanks a lot
Hi Yeliz! I left out the picture in the article for some reason when I created this- I’ll have to update it! I definitely recommend including half lift. It is a great way to lengthen through the spine and wake up the core as well. When this article was first created we actually focused on the variation with Low Lunge, but in other Sun Salutation A’s they leave out Low Lunge and go from Standing Forward Fold into Plank. I’ll have to make another printable for both variations 🙂 Hope that helps!
I thought the same thing about the half lift being missing as I do it during any of my in studio classes. Thanks for clarifying 😊. Love 💞 you folks!🥰🙏🏼
No problem and thank you Kristina!
Thank you so much for this amazing resource! Your time, effort, talent, and generosity are greatly appreciated!
Glad you found it helpful Kara!
Thank you so much for this resource.
I am facing a problem. I practice surya namaskar and other yoga exercises in morning, but after that I feel dizzy,sleepy after 2-3 hours of doing yoga. I feel tired..
Can you please help me out
Hi Viswasmayee, this is a common problem and I’ve experienced it myself. There are multiple reasons you could be feeling tired after yoga which we go over in this article here: https://yogarove.com/why-do-i-feel-tired-after-yoga/
If you feel dizzy for prolonged periods of time though you may want to check in with your physician just to be safe!
Amazing post! I used to save pic and video about yoga but rarely I practice it. Today I wake up with intention and I have found your image. Just for mistake, while I’m practicing, I click on it and I was redirected to your article, and Wow. It gives me a more clear understanding. For sure, I will practice it more often and especially with more consciousness. Thanks a lot for your post!
That is so wonderful to hear Carola! I am glad you found it helpful!
Thank you, I am learning to become a Yoga teacher and your instructions are just so clear and totally connected with me. I appreciate this so much. Thank you again
You’re very welcome Jill 🙂
Hi Ally. I have printed out your pdf for Sun Salutation A and read your notes for each pose which were really helpful. However I don’t have any notes for the Half Lift pose. Could you please tell me what I should be focusing on in this pose? Should I be holding it as a full pose or is it an inbetween move from Standing Fold to Low Lunge? Many thanks. Perry
Hi Perry,
There’s a couple different ways people practice Sun Salutation A but either is fine 🙂
In the version that includes Half Lift you are inhaling as you lift- you would be inhaling as you come into the pose and exhale as you come into the next pose which depending on the variation would be either Standing Forward Fold or stepping back to Low Lunge.
A good rule of thumb to help you remember is when a pose requires lifting you are inhaling and if a pose requires folding, you are exhaling.
Hope that helps 🙂
Hey! So, I just recently became interested in meditation and working with crystals on Chakras. While I was on the Solar Plexus Chakra it mentioned Sun Salutat!ons as an exercise to balance the aforementioned Chakra. I stumbled across your page and I want to say thank you very much for the easy to read and understand details. Also, the photos, tips, and tricks. Thank you for being a apart of my awakening and my recovery.
So happy you found it helpful Kathy!
Namaste Ally,
Thank you for sharing your guidelines and experiences with this beautiful practice of Sun Salutations. Enjoy creating your rhythmic, focus and form!