This post may contain affiliate links. Please read our disclosure for more info.
No one wants back pain. But unfortunately in today’s ever evolving busy society, many of our daily tasks contribute to it.
Back pain relief and relief of aches and pains in general are one of the many reasons people begin looking into yoga, because they have heard it can be effective in treating it, and it is true!
Yoga has changed so many people’s lives. People who thought they would never be able to enjoy their daily activities again that have initiated yoga into their routines can now thrive in their daily lives, and you can too.
You don’t need to be able to do all those fancy yoga poses or be super flexible to be able to use yoga effectively to relieve back pain, although improving your flexibility definitely does help!
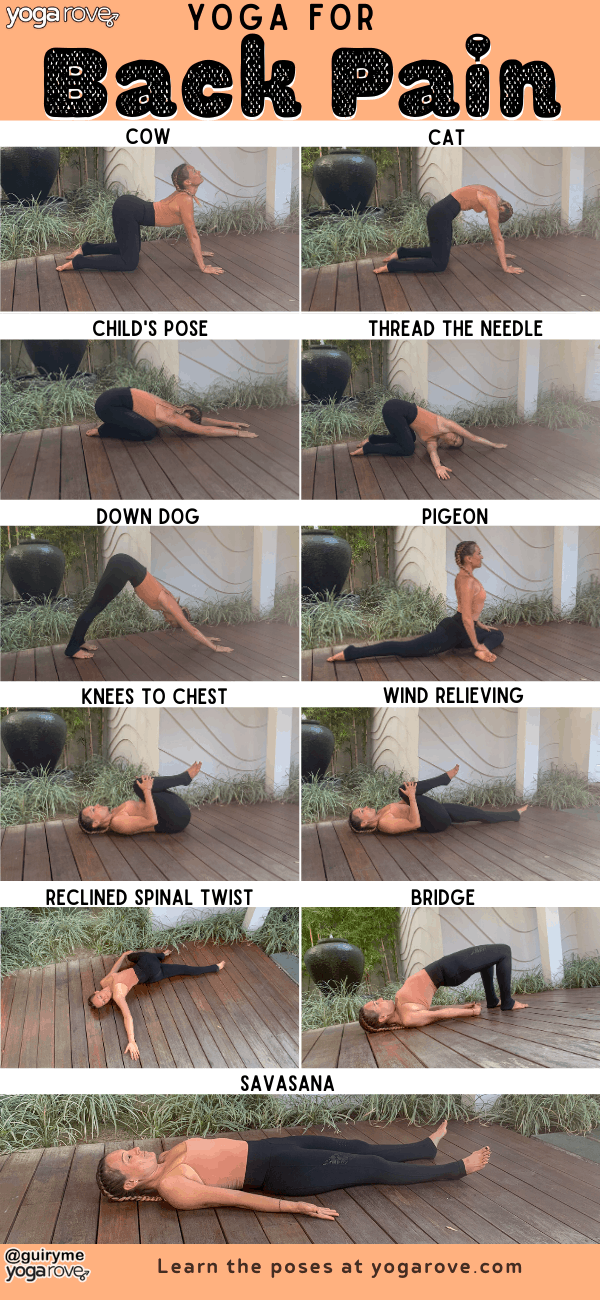
This 10 minute beginner yoga routine is made up of 10 basic and gentle yoga poses that are perfect for beginner yogis trying to release tension and pain in their back.
Move through the poses slowly, and hold each pose for about 30 seconds, which equates to about 8 to 10 slow breaths. After practicing on your right side, make sure to repeat on your left.
1. Cat and Cow
This is made up of two poses, Marjariasana and Bitilasana, that are extremely effective in warming up your spine and identifying any sources of where the pain is coming from.
Remember, just because you feel pain in one spot, does not mean that is where the pain is originating from. Often symptoms like lower back pain are actually caused by tight hamstrings.
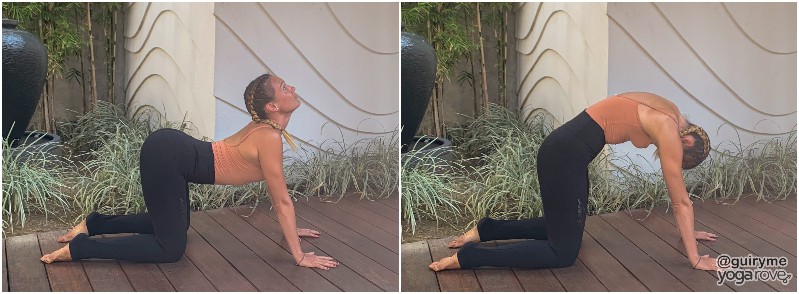
- Start on all fours, with hands under shoulders and knees inner hip distance apart.
- On your inhale, arch your back, lift your tailbone, and bring your gaze upwards. This is Cow.
- On your next exhale, hollow your belly, round your back, and bring your gaze downward. This is Cat.
- Go through each pose on your inhale and exhale at your own pace for a total of about 30 seconds, or longer if you’d like.
- Bring awareness to the spots where you feel the most tension and try to focus on relieving the tightness using your breath.
2. Child’s Pose
Child’s pose is often used as a resting pose, and is great for stretching the lower back and hips.
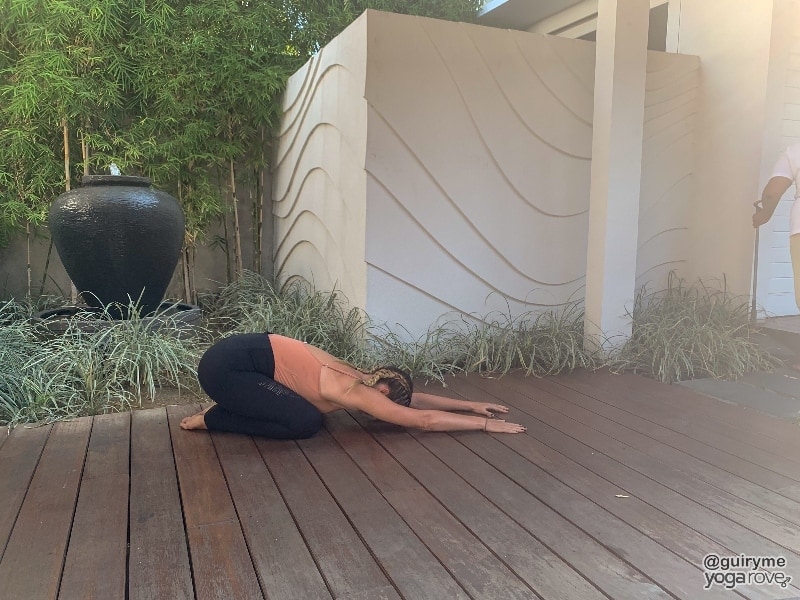
Come back to a neutral position on all fours and untuck your toes.
Take a deep inhale, then as you exhale send your hips back onto your heels.
You can spread your knees a little bit wider to get a deeper hip stretch as well.
Spread your arms in front of you and walk your hands forward for a stretch.
Stay here and take slow, deep breaths, focusing on releasing tension on your exhales.
3. Thread the Needle
Thread the Needle Pose provides a great gentle upper back stretch while also releasing tension in the neck, which is very intertwined with back pain!
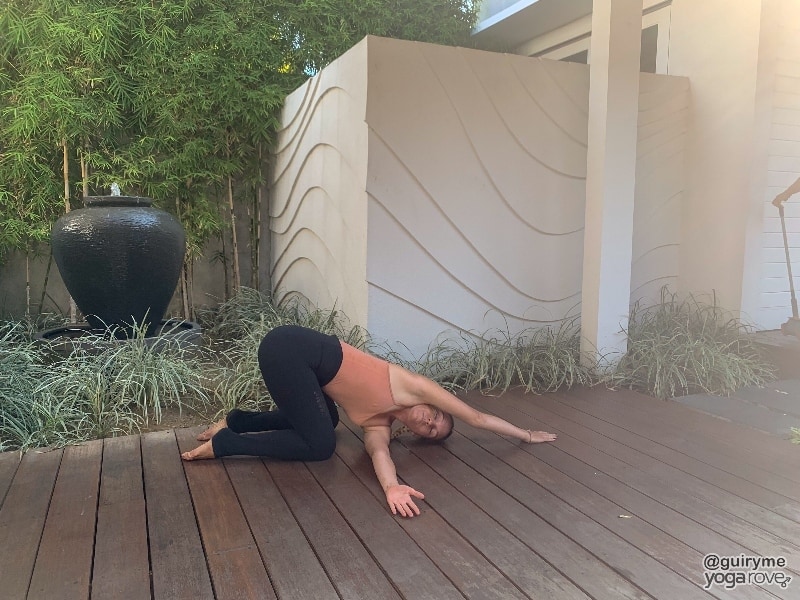
- From Child’s Pose, inhale as you lift your right harm up towards the sky, slightly twisting to the left for a brief moment.
- On your exhale, thread your left arm under your body towards the right side of the room, bringing your cheek to the ground if possible.
- Walk your right fingertips forward to deepen the stretch.
- Repeat on the other side.
Complete this on the other side by coming back to Child’s Pose in between, then repeating on the other side.
4. Downward Facing Dog
This is going to feel like the most strenuous pose in this sequence, but it is so good for stretching and strengthening your back, hamstrings, and core, which are all contributing factors to back pain!
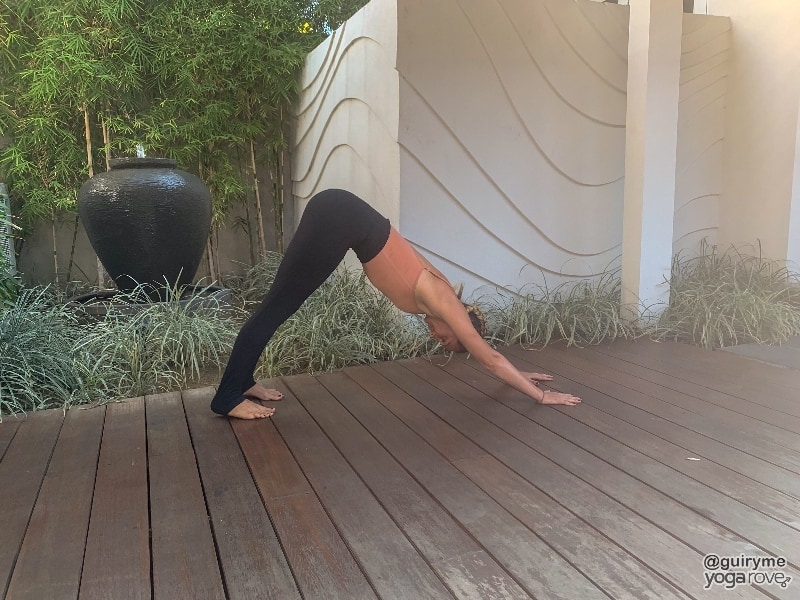
You do not have to straighten your legs all the way if you feel it is way too much of a stretch doing so. Instead, pump one leg at a time by straightening one while you bend the other. This will give your hamstrings, back, and hip a nice stretch without feeling too strenuous.
- To get into down dog, get back into a neutral position on all fours, then push your hips up and back into the air.
- Another thing you can do to make this pose less strenuous if you are really feeling it is use a yoga block underneath each hand so instead of your hands being directly on the floor, they will be grabbing the blocks.
- This helps make it a bit gentler for people who feel discomfort in their wrists, hands, or shoulders in this pose.
5. Pigeon
Pigeon is a hip opening pose, and is extremely beneficial for your back. When you have tight hip flexors, your pelvis is pulled forward and exaggerates the curve of your back, causing pain.
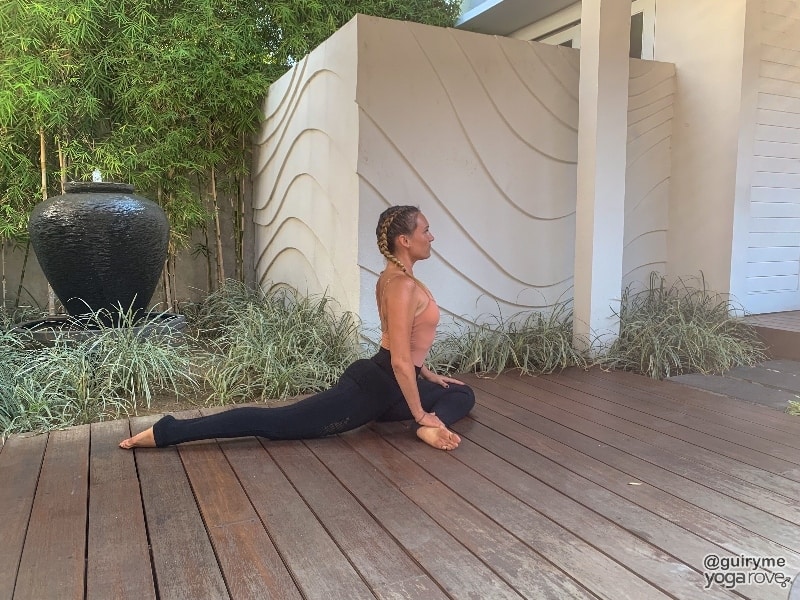
- From Downward Facing Dog, crunch your right leg into your chest and bring it up towards the front of your mat, as parallel to it as you can get it without forcing. Your knee should be by your right hand, and your foot should be by your left hand.
- If you have tight hips, you will need to bend your knee in towards yourself a bit more to find a comfortable stretch.
- You can stay here if this is enough of a stretch for you, or you can choose to fold forward over your leg for a deeper stretch.
- Be sure to keep your hips level and not let your weight sink to one side. A yoga block would be very beneficial to use here.
Repeat on the other side by coming back to Downward Dog and repeating Pigeon on the other side.
6. Reclined Knees to Chest
This is a great stretch for the neck and shoulders as well as the back, and allows you to provide your back with a gentle massage before going into twists.
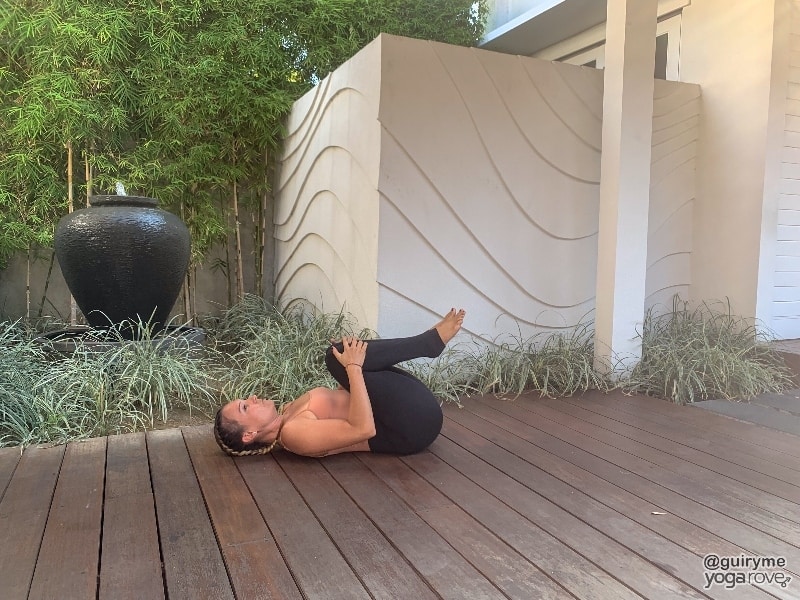
- From the previous pose, bring the other knee into your chest, grabbing each knee with one hand, pulling them in deeper with each breath.
- You can simply stay like this, or you can choose to add in spinal rotations by moving your body in clockwise and counterclockwise motions, or rocking back and forth for a light back massage.
- Afterwords, hug your knees and bring your head inwards towards your body, choosing to stay still or rock back and forth.
7. One Knee to Chest
The next three poses all involve the knees and focus on relieving tension in the lower back as well as improving range of motion in the joints.
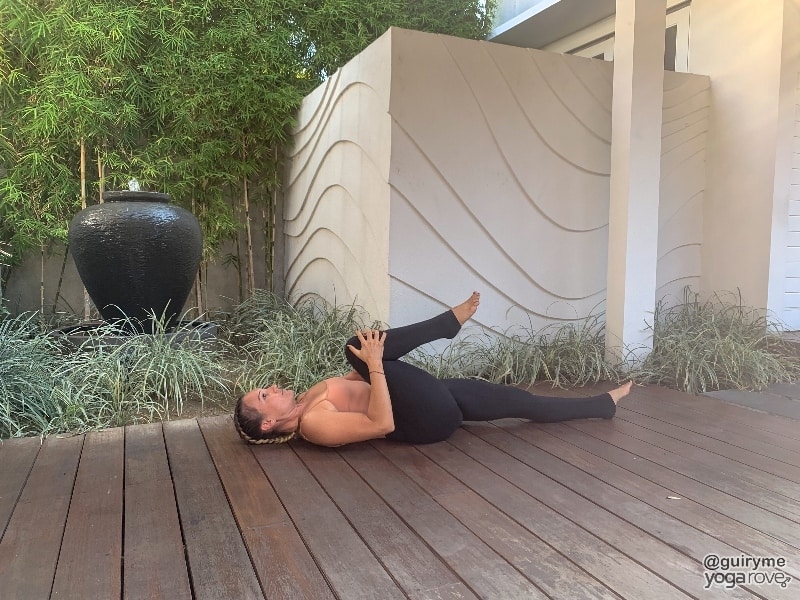
- First start by lying on your back with legs straight.
- Bring your right knee into your chest, then take hold of it with both hands, pulling back to get a deeper stretch.
- Keep using your hands to deepen the stretch with each exhale for the duration of the pose.
8. Reclined Spinal Twist
Spinal Twists are relaxing and great for relieving built up tension and stress in the back.
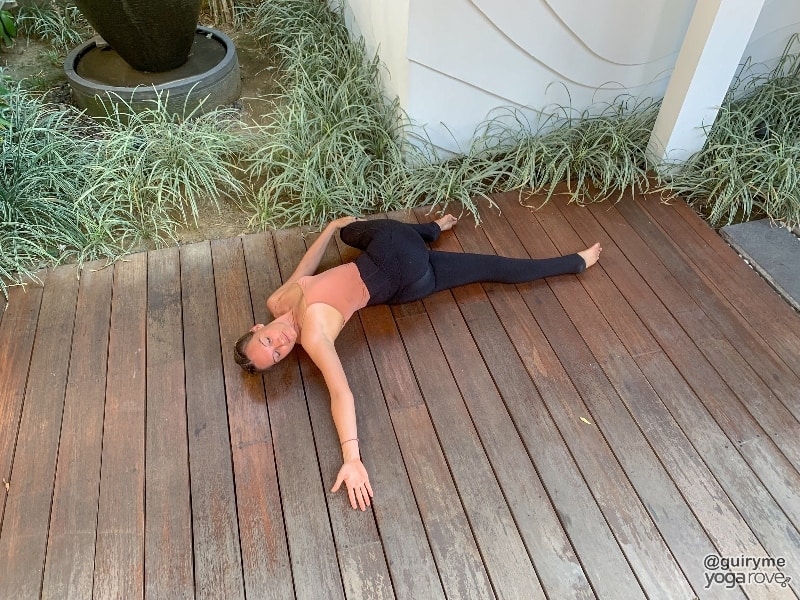
- From Wind Relieving Pose, take your left hand to your right knee and gently pull it towards the ground on your left. Keep your right leg straight.
- Try to keep your right shoulder on the ground, and only bring your leg across your body as far as is comfortable. Allow your gaze to fall over your right shoulder.
Stay here for 8-10 breaths then repeat on the other side by coming back to knees to chest, then Wind Relieving, then repeating Reclined Spinal Twist on the other side.
9. Bridge
This will relieve a lot of tension in the lower back, as well as build up your core and glute strength to balance the distribution of your body weight, which will help ease your back pain.
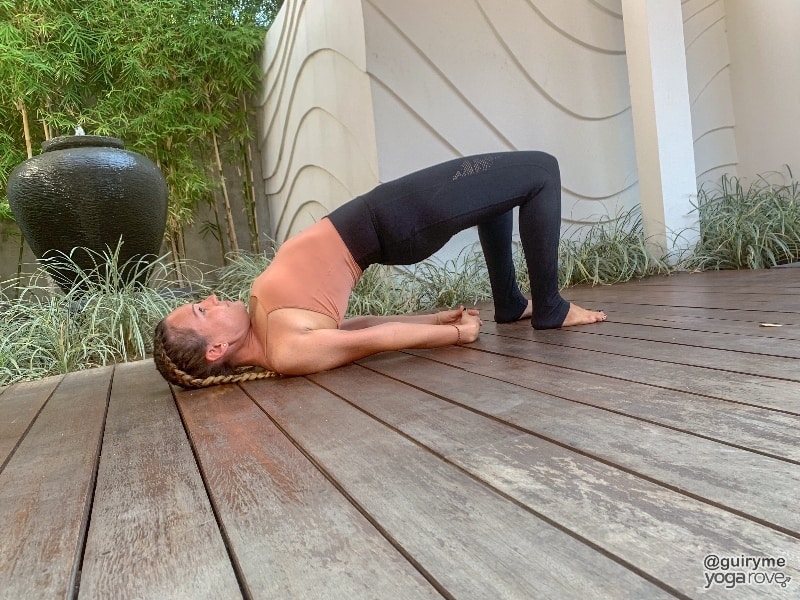
- Bring your feet down to the floor with your knees bent. Place your hands flat on the floor by your sides.
- Shimmy you shoulder blades slightly under you so you can touch your heels with your fingertips.
- On your next exhale, lift your pelvis up, engaging your core. Keep your shoulder flat and your head slightly tucked towards your chest.
10. Savasana
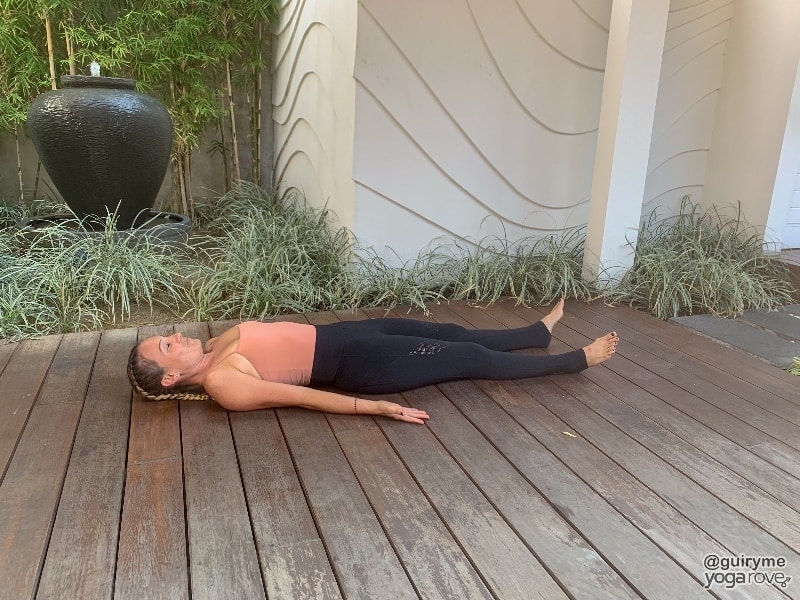
- Release your body to the ground and let everything just relax.
- Bring your attention to your breath and notice how your body feels.
- Now rest, you earned it!
Never push yourself too much to the point of pain. Remember to go through this sequence slowly, paying close attention to your body.
I hope this routine was helpful to you and helps you relieve all your aches and pains as it helped me!


Good
Glad you enjoyed the routine Chanchal! 🙂
Hi, Do you know if these exercises are suitable for those with hip and knee arthritis? The physiatrist I saw poo pooed activity and I am not agreeing with him . Thanks!
Hi Ariel!
I’m not sure what your specific situation is so definitely listen to your PT or doctor if they tell you otherwise, but in some situations many yoga poses can be modified to suit your body. In this specific sequence if you have hip and knee issues, I would definitely say to have a blanket under your knees in poses such as Cat-Cow, Bird Dog, and Tabletop. I would also suggest replacing Downward Dog with either Puppy Pose with a blanket under your knees or Child’s Pose. I’d also recommend not doing Pigeon or Plow as these poses may put too much stress on the knees and hips. You could opt for Reclined Pigeon on your back- this is a much gentler version and still provides a great stretch in the hips and lower back. The most important thing though is to listen to your body and make sure you never do anything that doesn’t feel good to you!
Thanks Aly this is just what I needed. You keep me focused.
So happy to be able to help Rae!
So amazing I love this so fantastic
glad you enjoyed it!
Great! Thanks.
Absolutely! Glad you liked the sequence <3
that is great and simple! thank you very much!!
You’re very welcome Anna! 🙂
Thank you so much for this routine! I have had left hip pain for about two years now, sometimes worse than others, and low back pain for the last couple of months. I started this routine and couldn’t believe the difference it made after just the first day! I knew my muscles had tightened up, but didn’t know exactly what to do to help. This was the answer and I am so thankful!
So happy it helped Tanya!
I do this EVERY morning!! It’s easy and quick and REALLY WORKS:)) thank you so much!
So glad you enjoy the routine Cat!