This post may contain affiliate links. Please read our disclosure for more info.
Yoga is one of the best practices you can implement in order to increase and maintain your mobility. Mobility is vital to maintaining a good quality of life, because it is what helps you move! If you feel like you are lacking mobility or have noticed it had decreased, we’ve got you covered with this 10 minute beginner yoga routine for mobility.
What Is Mobility?
Mobility is the ability to move smoothly and freely. Specifically speaking of our joints and how they move. It’s what physically lets us move from task to task and activity to activity, throughout the day.
Our joints have an optimum range of motion which is the distance and direction a joint can move. Most of us don’t give it a second thought but as we age, we naturally lose mobility. To help us age gracefully, it’s imperative that we practice mobility exercises, this is what keeps our bodies healthy and active.
There are specific areas of the body to focus on when you are looking to increase mobility. These areas include:
● Shoulders
● Wrists
● Elbows
● Hips
● Groin
● Knees
● Ankles
Benefits of Mobility Training:
● Improves range of motion for joints and muscles
● Improves posture
● Improves flexibility
● Can alleviate aches and pains
● Prevent knots
● Prevents injury
● Prevents joint deterioration
● Keeps joints healthy and fluid
● Keeps you active
● Promotes a healthy lifestyle
Why Do We Lose Range of Motion?
- Injuries: Any sort of injury can affect range of motion. Bruises, dislocations and sprains will cause the muscles surrounding the joint to contract, limiting your range of motion
- Getting older: As we age, the tissues surrounding our joints become less flexible which affects your range of motion
- Muscle/fat mass: If you have too much muscle or fat surrounding your joints, it will literally get in the way of a normal functional joint
- Body asymmetry: Sports like tennis, baseball, golf, racquetball, surfing and snowboarding can lead to less range of motion in your dominant shoulder or knee due to overuse.
- Disease: Things like arthritis, bursitis, Lou Gehrig Disease and Lymes Disease all result in inflammation of the joint causing limited range of motion.
- Sedentary lifestyle: When joints don’t get used, they become stiff and start to deteriorate.
- Infection: Infections like the flu, staph and other bacterial infections can also cause swelling and inflammation of the joints, making them feel stiff and uncomfortable to use.
Does Yoga Improve Range of Motion?
Yes! Yoga is able to improve flexibility and mobility, including range of motion. A big reason for limited mobility is tight muscles. This could be from daily activities like sitting in an office chair all day, too much or too less exercise, repeating the same exercise over and over, or an injury.
Even stress can be a factor in having tight muscles, especially in the back and neck. One of the biggest components of yoga is that it improves your flexibility.
Flexibility is the amount a muscle can stretch and lengthen and muscles contractions are what allows joints to move. When most people think of flexibility they imagine someone being able to touch their toes, however you can be flexible on one area and not in another. Being flexible on some level is important as it aids in mobility.
Our bodies are so connected that when one joint doesn’t work to the best of its ability, the rest can’t either! This can easily lead to chronic pain, injury and/or poor posture. In the long run it can lead to a decrease in independence as you age.
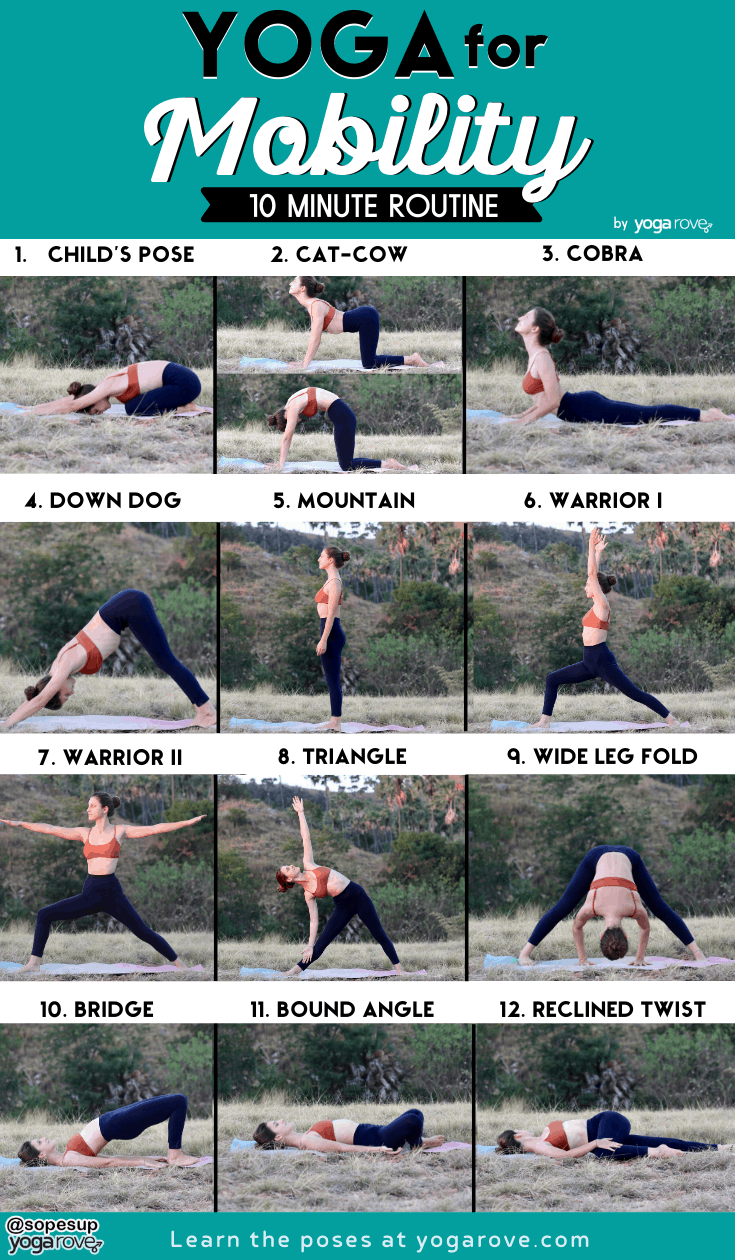
10 Minute Yoga Routine That Will Improve the Mobility of a Beginner Student
The following routine is perfect for any level yogi who wants to improve their range of motion, flexibility and mobility, and feel good. This is a great routine to start off with if you are new to yoga are feel you lack mobility or flexibility.
For the poses that are two-sided (have one foot in front) hold them for the time listed then transition to the other side.
1. Child’s Pose (Balasana): 10 breaths
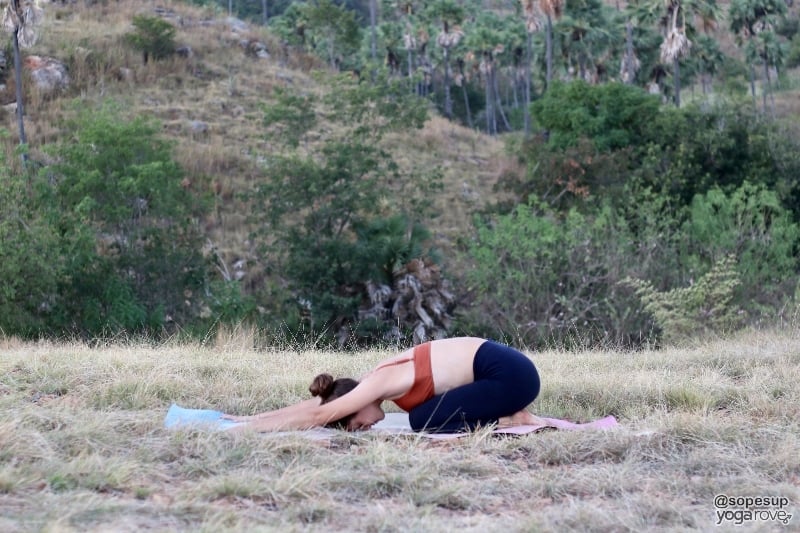
How To:
- Start in tabletop position with arms under shoulder and knees hip distance apart with toes untucked.
- Press your weight back to send your seat over your heels and stretch your torso forward.
- Walk your fingers to the top of your mat and spread them out and drop your chest and forehead towards the mat.
- Press your palms down to deepen the stretch in your chest and shoulders and lengthen your tailbone towards the ground.
- Close your eyes and take deep breaths in and out of your nose.
Modification: Make the distance between your legs wider if you have tight hips. You can also place a blanket or block under your seat for comfort.
Variations:
- Bring your left arm under your right armpit and lift your left hand up toward the sky to deepen the twist.
- Switch sides by walking your fingers towards the left and right to get a deeper stretch in your side body.
Benefits:
- Relieves tension in the spine and neck
- Creates space between the vertebrae
- Creates space in your shoulders
- Increases blood circulation
2. Cat-cow (Chakravakasana): 5 full rounds
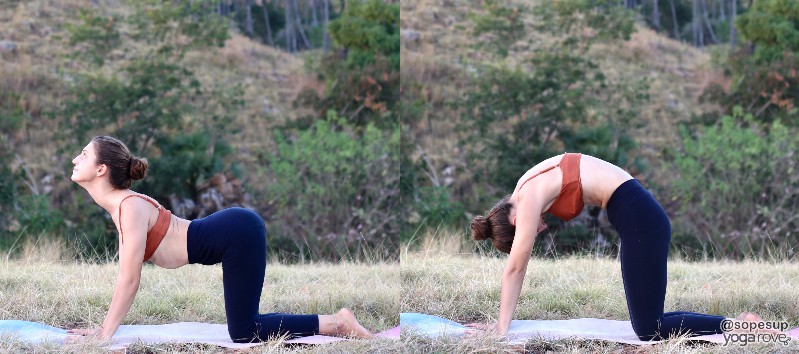
How To:
- From child’s pose, bring your shoulders above your wrists and your hips inline with your knees and come to a neutral spine.
- Take a breath in and drop your belly towards the ground as you lift your gaze up to come into Cow.
- As you exhale, curl your spine towards the ceiling and bring your head and gaze towards the ground to come into Cat.
- Continue through this flow for up to 5 full rounds.
Benefits:
- Gently engages the core
- Stimulates internal organs
- Promotes flexibility in the spine and neck
3. Cobra (Bhujangasana): 10 breaths
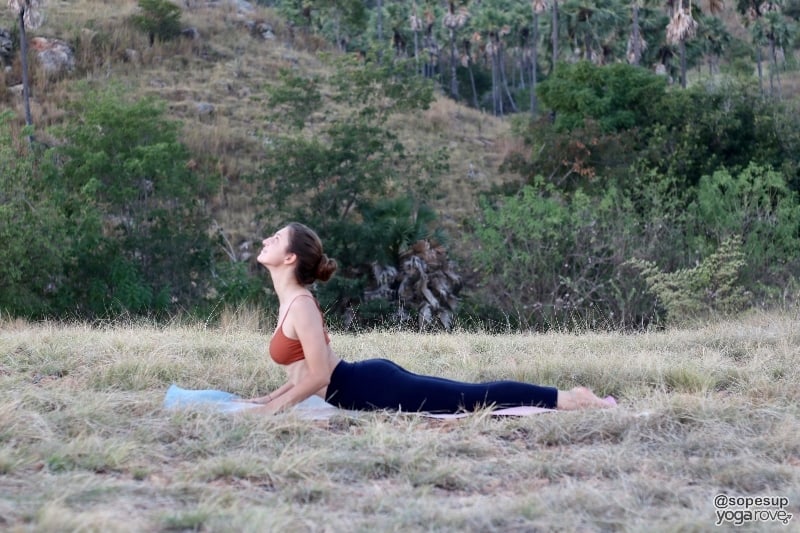
How To:
- From cat-cow first come to a neutral spine, then slowly drop your belly to the mat as you straighten your legs out behind you.
- Bring your feet hips width distance apart with the tops of your feet pressing towards the ground.
- Bring your hands just under your armpits, right by your ribs with fingers spread.
- Keeping your hips on the mat, lift your chest up towards the ceiling, sending your gaze upwards. Keep a small bend in your elbows and press your shoulders back.
- Gently drop your head back for a deeper stretch.
Modification: If full Cobra is not an option for you, come into Baby Cobra by slightly lifting your chest off the ground and hovering your hands above the mat.
Benefits:
- Stretches back, shoulders and chest
- Strengthens back, shoulder and chest
- Strengthens spine
- Firms glutes
- Stimulates internal organs
4. Downward Facing Dog (Adho Mukha Svanasana): 10 breaths
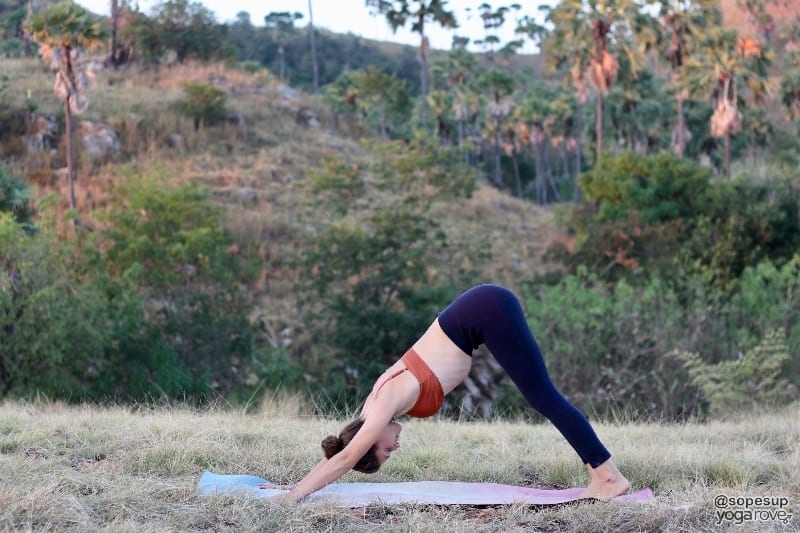
How To:
- From Cobra, tuck your toes and lift your hips up toward the sky, straightening the legs and arms.
- Spread your fingers wide, ground through the hands, and drop your shoulders away from your ears.
- Bring your feet hips width distance apart and pedal out your legs one at a time or keep a slight bend in your knees if you have tight hamstrings.
- Extend through the crown of your head as you engage your core and extend your tailbone back and continue to extend through the heels.
- Let your gaze fall between your knees.
Modifications: If you lack flexibility to do full Down Dog, trying using yoga blocks underneath both hands for support.
Variations: Lift your right foot towards the sky, flex your toes towards your face and from here you can also bend your knee and open your hips by stacking your right on top of your left to come into Three Legged Dog Hip Opener.
Benefits:
- Stretches and strengthens arm, legs, shoulders, back, calves, hamstrings ankles and wrists
- Tones arms, legs, stomach
- Relieves tension in the neck and lower back
5. Mountain (Tadasana): 10-15 breaths
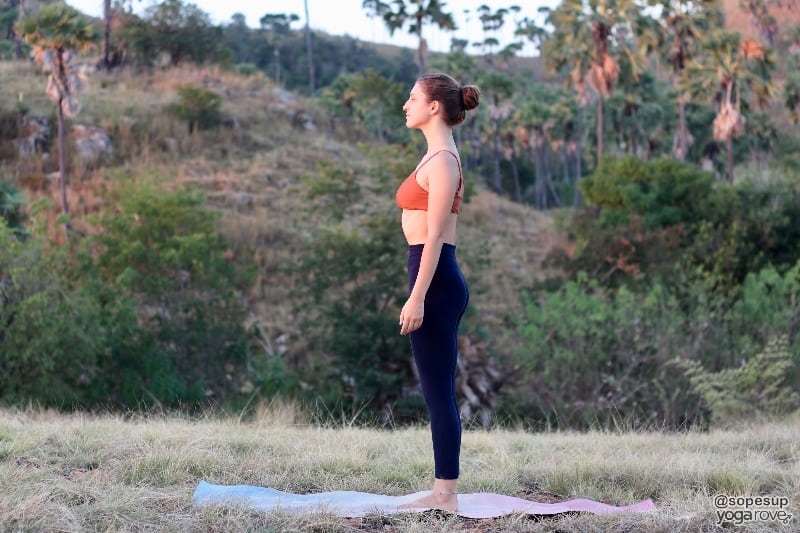
How to:
- From Downward Dog, walk your hands back to meet your feet.
- Bring your big toes to touch, and keep a small space between your heels.
- Stand tall, holding your head high, then bring your hands to your sides, palms facing forward.
- Press your shoulders down and back, and pull your belly button back towards your spine, engaging your core.
- Press down through your heels and slightly hover your toes off the ground.
Variations:
- Bring your hands above your head and wrap your right hand around your left wrist and pull to the right side for a side body stretch. Switch sides.
- Bring your hands to heart center, palms pressed together with your thumbs to your chest
Benefits:
- Improves posture
- Tones stomach and butt
- Evokes power from stillness
- Strengthens legs
6. Warrior 1 (Virabhadrasana I): 8 breaths each side
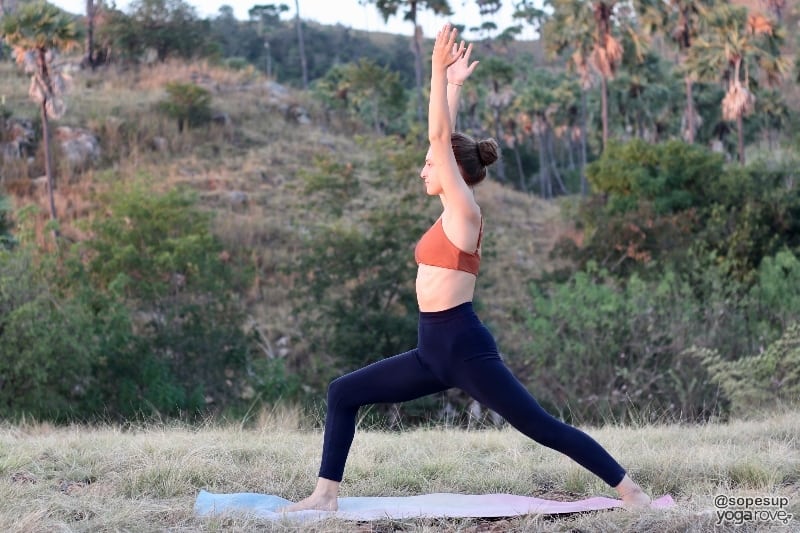
How to:
- From Mountain Pose, step your right foot forward about 2-3 feet.
- Bend your right knee so that it comes to line up with your right ankle, making sure your are able to look down and still see your big toe.
- Spin your back foot parallel to the back edge of your mat, toes pointing to the left side of your mat.
- Rotate your hips so they face forward and are even.
- Lift your hands to the sky and spread your fingers wide, dropping shoulders away from ears and lifting through the chest.
Modification: If you have tight shoulders and raising your arms straight above your head is uncomfortable, bring your hands to your hips, into goal post arms, or to prayer position at your heart.
Variation: For a deeper stretch in the hip, press your front knee forward and pick up your heel of your front foot.
Benefits:
- Strengthens and tones legs
- Strengthens and tones arms
- Tones the stomach
- Stretches thighs, calves and ankles
7. Warrior 2 (Virabhadrasana II): 8 breaths each side
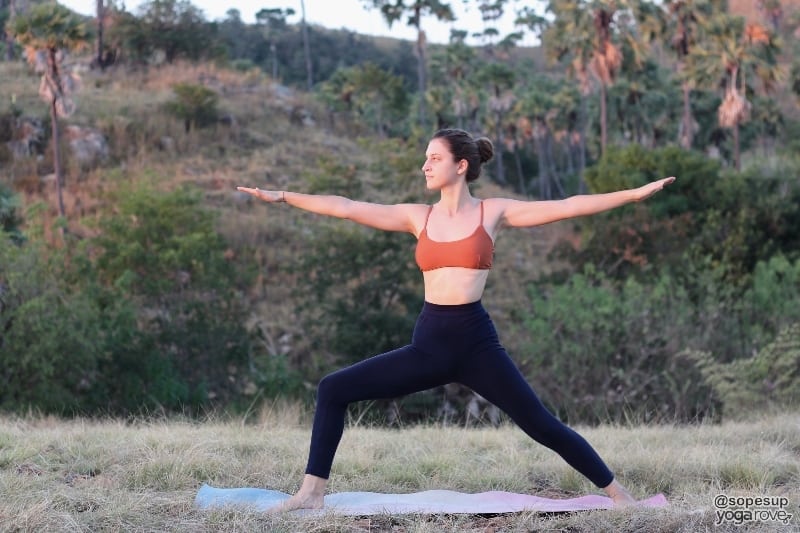
How To:
- From Warrior 1 exhale your arms down so that they are parallel over the mat.
- Rotate your hips so they are facing the long edge of your mat.
- Make sure your right arm is in front of you and left arm is behind you, spread your fingers wide.
- Press your shoulders back, squeezing them together and look over your front fingertips.
Benefits:
- Strengthens and tones arms and legs
- Tones your belly and butt
- Stretches chest and shoulders
8. Triangle (Trikonasana): 8 breaths each side
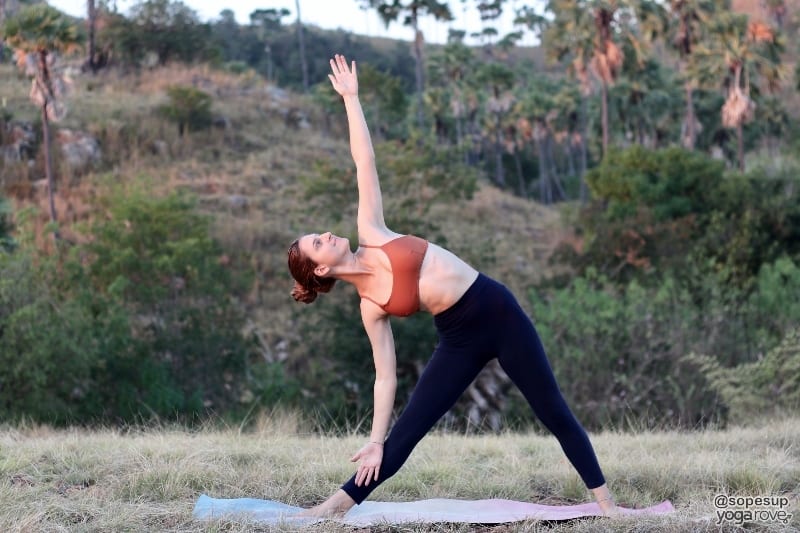
How To:
- From Warrior II straighten your front leg.
- Reach your right hand forward and then down to your mat, ankle or shin.
- Lift your left hand up towards the ceiling and spread your fingers open, bring your gaze up towards the ceiling.
- Lift through your chest and engage your core to keep your body in one straight line of energy.
Modifications: Use a block under your bottom hand for more support (as shown in our Yoga Blocks Beginner’s Guide), and if it is uncomfortable for your neck to look up or challenges you balance too much, look down to the mat.
Benefits:
- Stretches hips, thighs, groin, shins, ankles, hamstrings and calves
- Stretches back, shoulders, arms and chest
- Strengthens and tones arms, legs and back
9. Wide Legged Forward Fold: (Prasarita Padottanasana): 10-15 breaths

How To:
- From Triangle, turn your front foot so it is facing parallel to your back foot and slowly fold forward from your hips.
- Drop your fingertips, hands, or head to the mat.
- Look between your knees directly behind you and shift the weight into your heels.
Modifications:
- Use a block under your head or forearms for support
- Bring your feet closer together if you have tight hips or hamstrings
- Bend your knees a little bit to release tension in the spine
Variations:
- Bring your hands behind your back and lace your fingers together.
- Bring your right hand to the mat and lift your left hand towards the sky, then switch sides.
- Wrap your peace fingers around your big toes or hold the outer arch of your foot and gently pull your head to the ground.
10. Bridge (Setu Bandha Sarvangasana): 5-10 breaths

How To:
- Bring yourself to the ground and lay down on your back.Bend your knees so that your heels are near your butt and you can touch them with your fingertips.
- Bring your feet hips width distance apart and press into your heels.
- Shimmy your shoulder blades underneath you, then on your next exhale, tuck your pelvis and lift your lower body up towards the sky.
- Continue to press through your palms and shoulders. Come out of the pose by rolling down one vertebrae at a time.
Modifications: Bring a block, bolster or blanket under your lower back to rest on, or place a block between your knees for better knee alignment.
Variations:
Come into full Wheel Pose after bridge by bringing your hands by your ears with your fingers facing your feet, pressing into your hands and feet, and lifting your torso to the sky.
Benefits:
- Opens your chest and heart
- Stretches your shoulders
- Tones your glutes, legs and stomach
- Strengthens your ankles
11. Reclined Bound Angle (Supta Baddha Konasana): Hold for 1-2 minutes
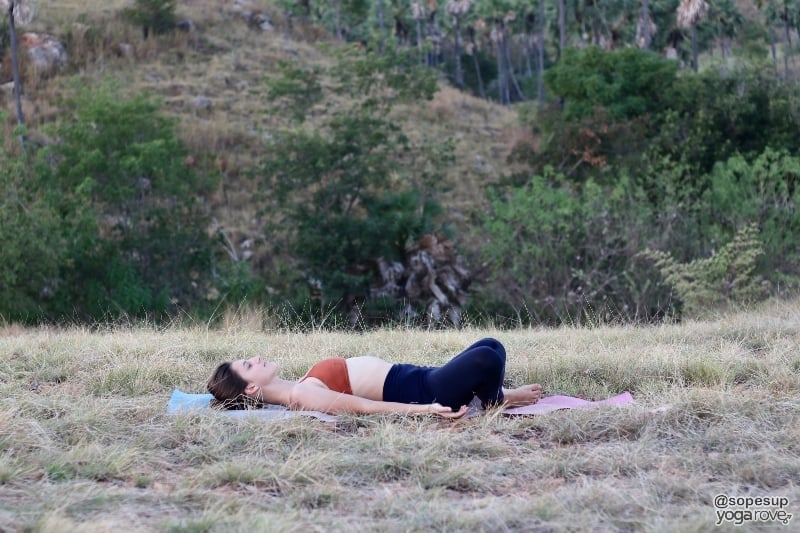
How To:
- From bridge, drop your hips to the mat and bring your heels together. Let your knees fall wide.
- Bring one hands to rest on the mat with your palms facing up and your upper body relaxed.
- Close your eyes and take deep breaths in and out of your nose – filling your lungs completely before you exhale.
Modification: Bring a block or blanket underneath your lower back and/or knees for support and comfort. If it is too much for your hips to do this pose reclined, you can do it in a seated position as well.
Benefits:
- Stretches your groin and hips
- Stimulates internal organs
- Improves blood flow
- Improves digestion
12. Supine Twist- 10-15 breaths both sides
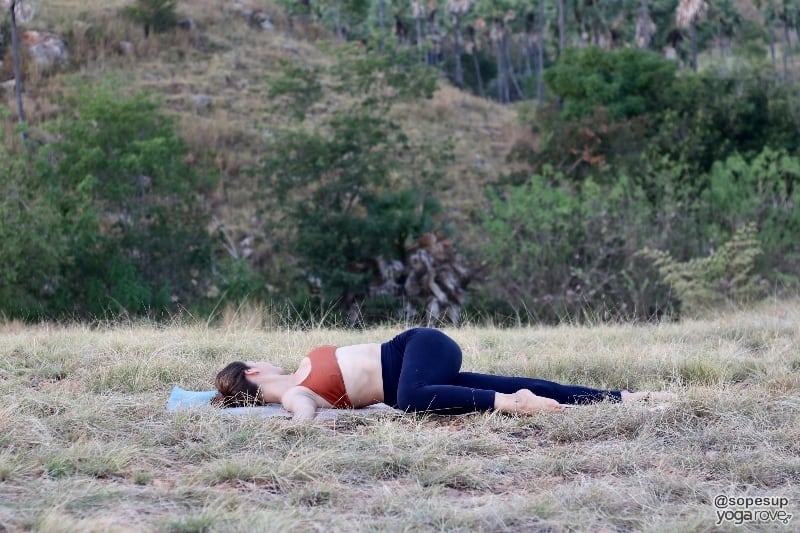
How To:
- From Bound Angle, extend your left leg straight out in front of you and bend your right knee in towards your chest.
- Flex your toes towards your face and press your hands into your shin
- Take a few deep breaths in then drop your knee to the left side of your mat by using your hands to pull it towards the left.
- Extend your left arm to the side and look over your left shoulder.
Modification: If this is too deep of a stretch for you, try bending both knees to make it milder.
Benefits:
- Stretches the spine, shoulders, and chest
- Brings calmness to the mind
- Increases circulation throughout the body
I hope you enjoy this sequence and it serves you well! Try dedicating 10 minutes out of your day to practice this at least 3 times a week. If you’d like to save this for later you can download the free printable or pin this infographic for later:
Amanda has been teaching yoga since 2013. When she’s not teaching or writing she loves to run and surf and is obsessed with dogs.