This post may contain affiliate links. Please read our disclosure for more info.
Many people underestimate the power yoga has on working out your entire body, but this full body yoga workout will make you think otherwise!
Yoga is well known for its ability to destress and unwind, but when you put the right poses together into a flowing sequence, you can create a powerful routine that both strengthens and tones your entire body.
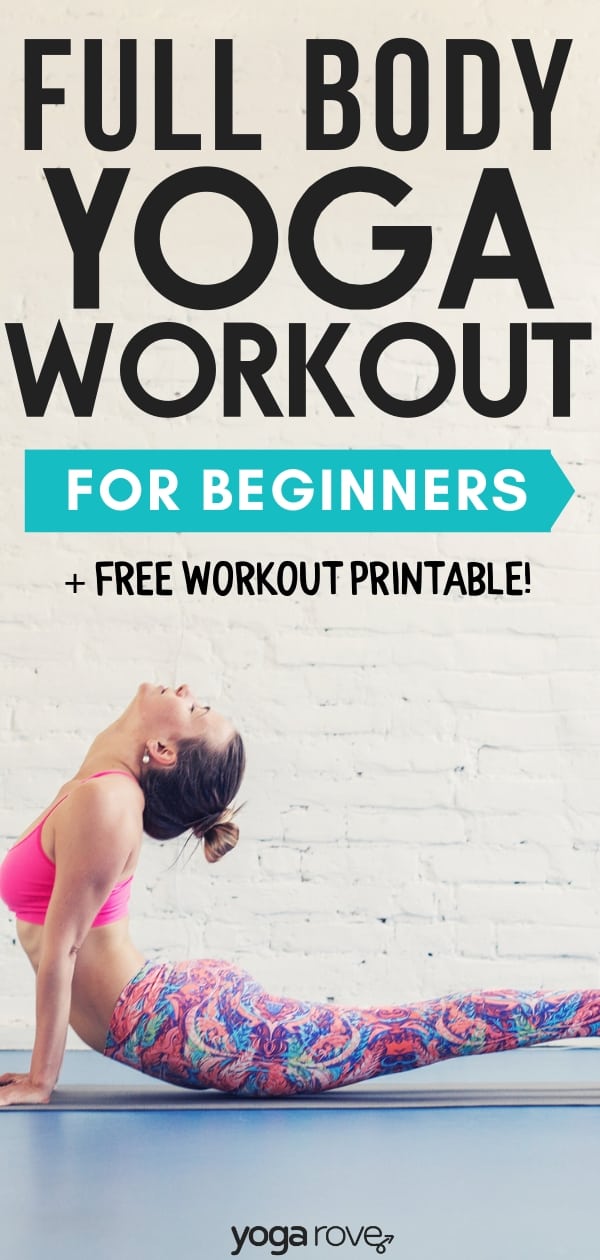
Practicing flowing sequences like the one we are about to show you not only strengthens your body, it challenges your endurance and can aide in weight loss as well.
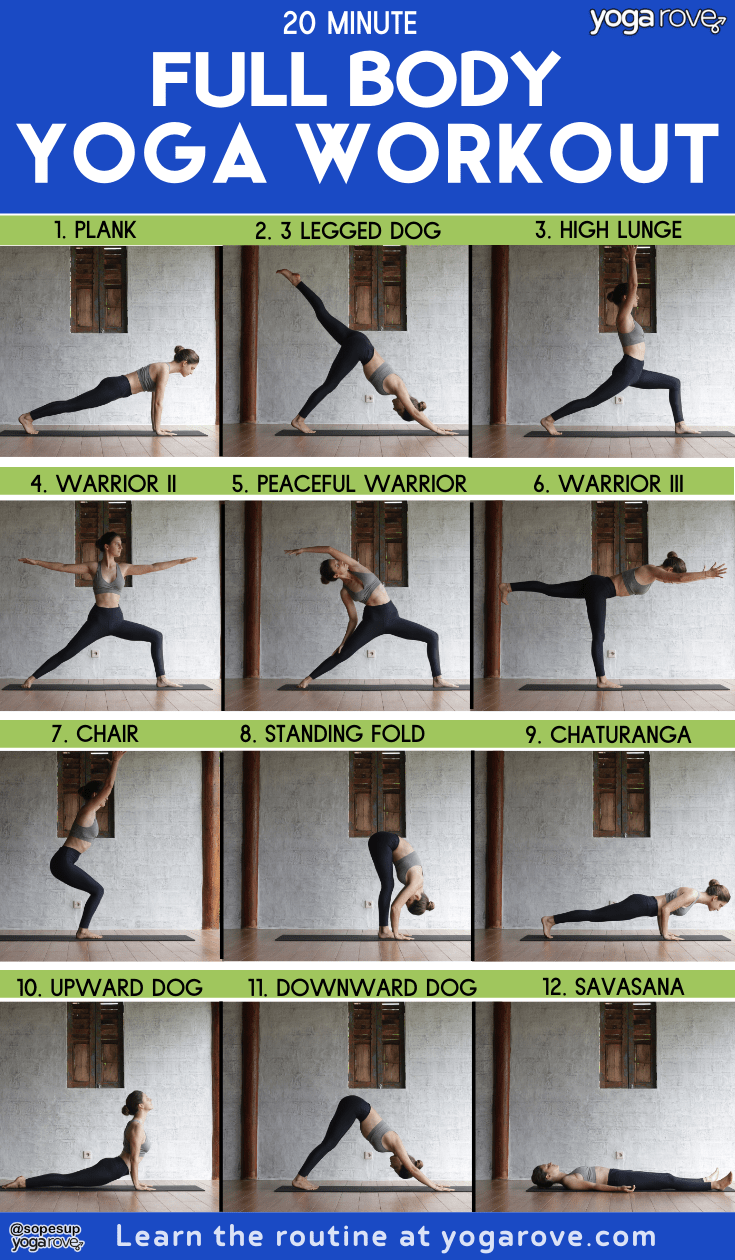
This full body yoga workout involves 11 poses total that create a “flow”, which means each move smoothly transitions to the next to create fluid movement throughout the entire sequence.
The poses for this full body yoga workout for beginners are:
- Plank- 5 breaths
- Three Legged Dog- 5 breaths
- High Lunge- 5 breaths
- Warrior II- 5 breaths
- Peaceful Warrior- 5 breaths
- Warrior III- 5 breaths
- Chair- 5 breaths
- Standing Forward Bend- 5 breaths
- Chaturanga- 3 breaths
- Upward Facing Dog- 5 breaths
- Downward Facing Dog- 5 breaths
Repeat the sequence 4 times (2 times on each side) and then finish in Savasana.
You want to move quickly in this sequence, flowing from pose to pose, to create momentum and build up your heart rate.
This sequence is very beginner friendly and can be tailored to any level. Try starting off slow then picking up the pace as you go through a few rounds, or even try adding on a few more rounds to test your endurance!
The most important thing is to listen to your body and challenge yourself. You will never get the results you want without a bit of struggle and challenge!
1. Plank
Plank is great for strengthening your core and upper body, and building up endurance. If you are also trying to build up to push-ups this is a great pose to start in.
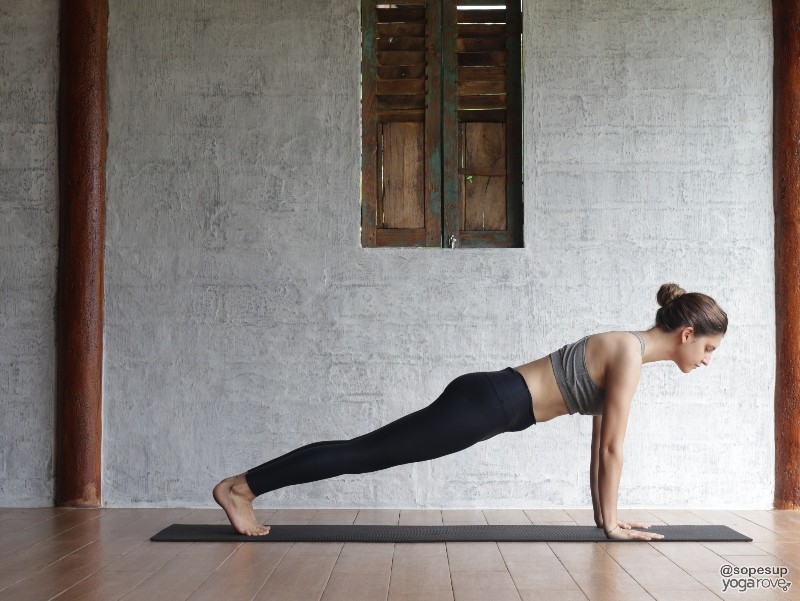
- Start on your all fours, with hands directly under your shoulders and knees parallel to each other.
- Straighten your legs out behind you one at a time.
- Make sure your back is straight and that you aren’t arching or rounding it, as this takes away from the benefits of the pose.
- Engage your core, legs, and arms throughout the pose and looks slightly forward and in between your hands.
- Hold this pose for 30 seconds.
Plank Modification: Place your knees on the ground if this pose is too difficult. Slowly build up your strength to 30 seconds and continue to challenge yourself by increasing it to 1 minute.
Tip: If it’s mentally hard for you to stay in a static plank, try shifting your weight from side to side in dips or forward and back. It will work more or your core and make the time go by faster!
2. Three Legged Dog
Instead of coming into regular Downward Facing Dog, we are going to put a twist on it to challenge your strength!
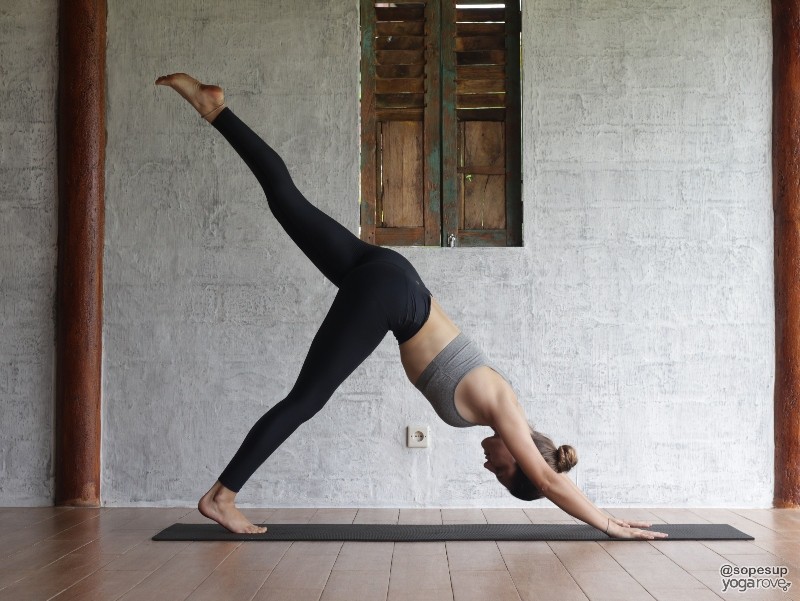
- From plank, push back into your Downward Dog as you simultaneously lift your right leg high up into the air.
- Make sure to engage your core in this pose so all the weight doesn’t fall onto your arms.
- Really push the leg in the air higher and higher as you ground through your foot on the mat.
- You will feel a big stretch in your glutes and hamstrings in this pose.
- Remember to hold three legged dog for 30 seconds.
Three Legged Dog Modification: If it is difficult for you to hold your leg in the air keep it on the ground and hold downward facing dog for the same amount of time.
Tip: Engage your lifted thigh and core as much as you can to avoid straining your back and putting extra stress on your hip flexor.
3. High Lunge
High lunge is a great pose for building leg strength, and according to Yoga Journal, it is very effective in relieving pain related to sciatica as well.
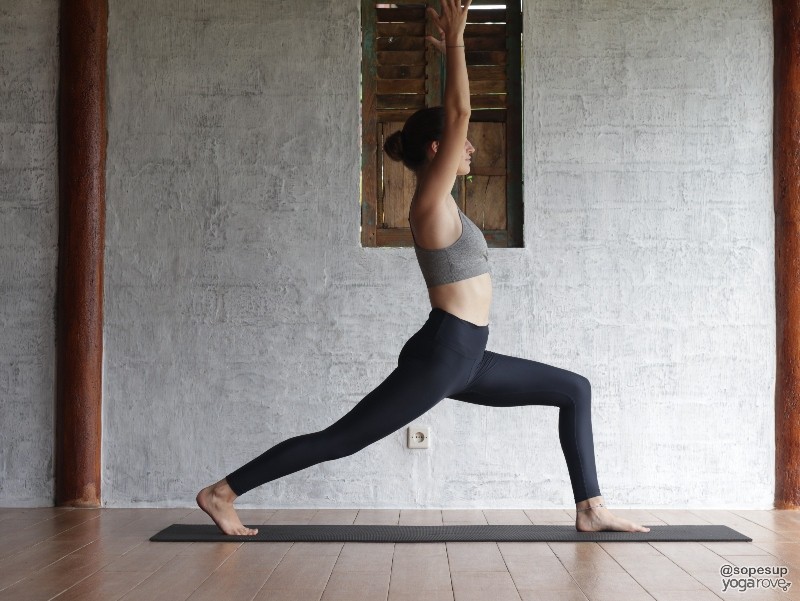
- Bend your right knee and curl it into your chest and then place your foot between both hands.
- Ground your right foot with your front knee bent as you rise up into High Lunge.
- Push through your back heel and extend through your arms as your deepen into your front knee.
- Hold high lunge pose for 30 seconds.
High Lunge Modification: If it hurts you to hold your arms that long place them down at your side. If you need to, hold the pose for a shorter period of time. Gradually build up your time holding the pose to 30 seconds.
Tip: Engage your core super tight to avoid arching your back and to take all the focus off your burning thigh muscle!
4. Warrior II
The transition from High Lunge to Warrior II is an all time favorite because of how fluid the movement is, and will give you thighs a good burn!
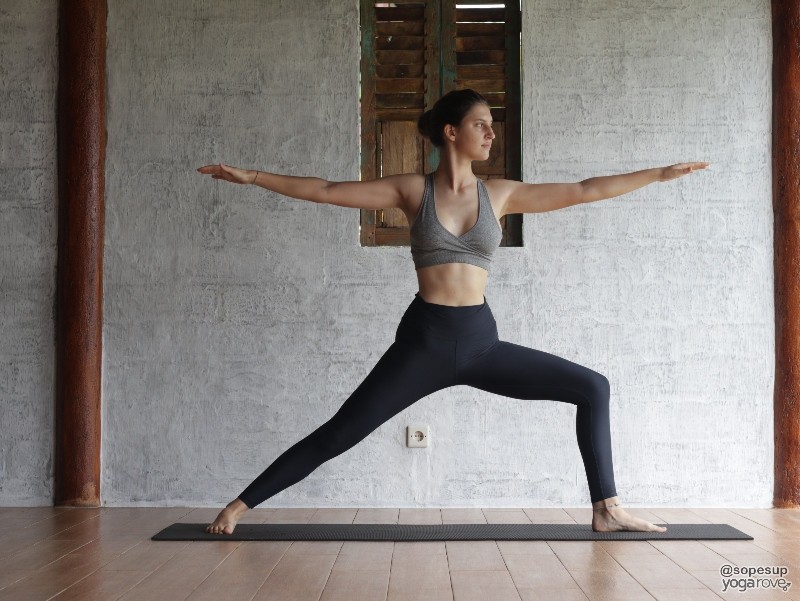
- Ground your back foot at an angle as you open your body up to the left side of the room and sweep your arms from above your head to straight out and shoulder height.
- Let your gaze fall over your right fingertips.
- Don’t let your front leg lose the bend! Try to sink deeper with each exhale and ground through both feet.
Warrior 2 Modification: Again if your arms are tired place them on your side and get out of the pose if you have to. The goal is to slowly build up your strength to hold these poses for longer periods of time.
Tip: Focus on keeping your front leg bent at a 90 degree angle to get the most out of this pose. Remember to engage both legs to distribute your weight evenly.
5. Peaceful Warrior
Peaceful Warrior has the same exact form as Warrior II, except the arms are different and your back is arched. It is a great chest opener and challenge for your legs.
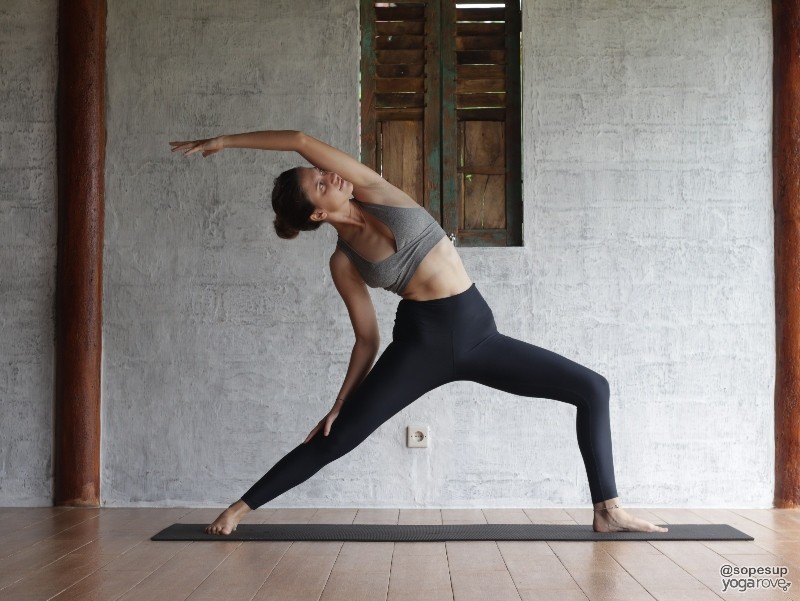
- Your back arm slides down your leg as your front arm comes up overhead.
- Flip your front palm and arch your back as you bend backward, placing your left hand on your left back thigh and bring your right arm up overhead.
- Be mindful of keeping your front leg bent.
- You will feel a nice deep side stretch in your side here.
Peaceful Warrior Modification: Keep your hand on your upper thigh instead of sliding it down your leg. Once you open up your side body more as you practice, begin to slide the hand down the leg.
Tip: Remember to keep good posture in this pose and not to collapse your shoulders- actively lift up through the chest and engage the core for support.
6. Warrior III
Warrior III is a great pose to challenge both strength and balance at the same time.
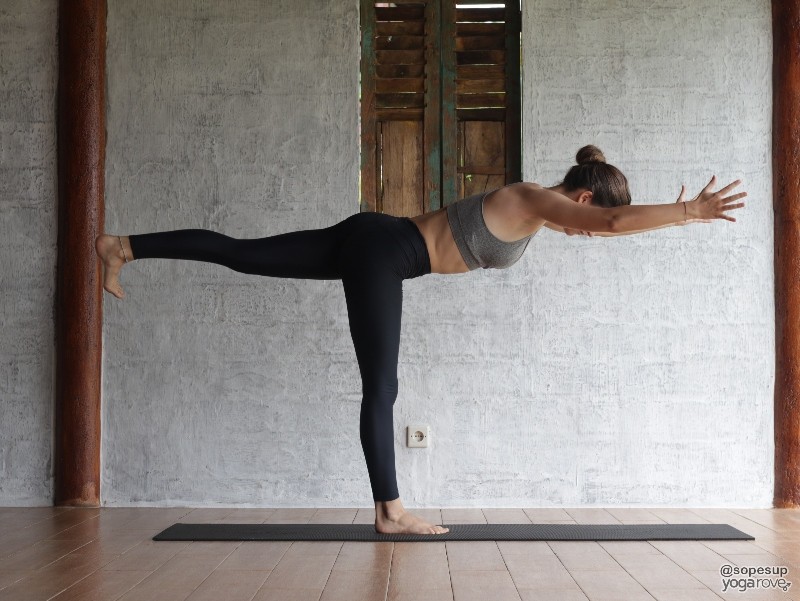
- As you come out of your peaceful warrior back into Warrior II, shift your weight into your right leg and tilt your body forward, lifting your left leg off the ground.
- Flex your back foot. Try to keep it at hip height.
Warrior 3 Modification: You can choose to use blocks here for your hands to stay supported, or bring your arms up by your ears for more of a challenge.
Tip: Be mindful of keeping your hips level and square- you should be able to balance a block on your lower back- if you can’t your hips are uneven.
7. Chair
If you want to get toned glutes and thighs, this is definitely one of the poses you want to be doing. Chair pose is a great pose to build strength in your lower body, and is also very effective at toning and strengthening the core.
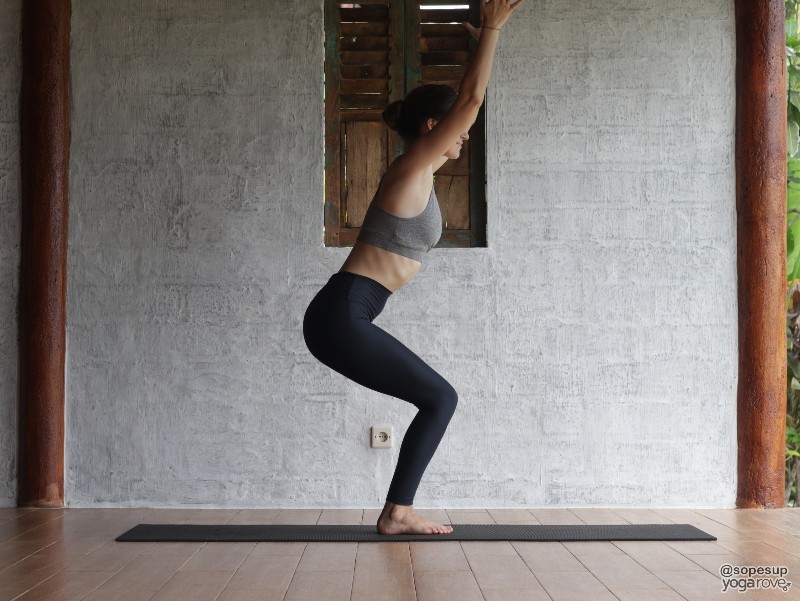
- Bend your right knee slightly and begin to float down from Warrior III.
- Bring your left foot to meet your right, then bend at your knees and lift through your chest.
- Sink your seat as close to the ground as you can while you raise up with your fingertips towards the ceiling.
- Adjust your legs to ensure one leg isn’t more forward than the other and keep your core engaged.
Chair Pose Modification:If balancing in this pose is too much of a challenge or are having a hard time sinking your seat, slightly part your feet.
Tip: Adjust your weight to you heels- you should be able to lift all ten toes. This will allow you to sink deeper.
8. Standing Forward Bend
To get a nice stretch and briefly catch your breath, come into Standing Forward Fold.
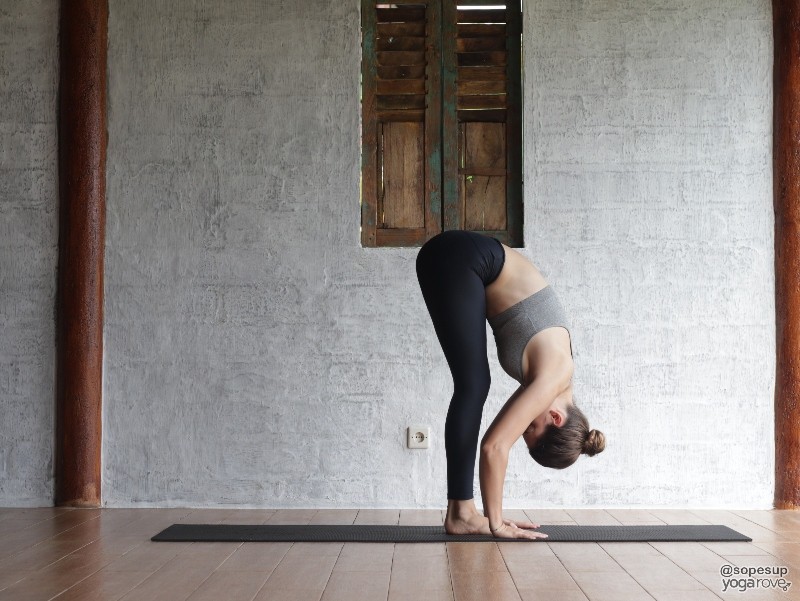
- From Chair Pose, drop your hands to the ground, then straighten your legs.
- Make sure your back is straight and you are not letting your chest cave in.
- Lengthen through your spine and ground through your feet. Release your head and neck.
Standing Forward Fold Modification: Feel free to come into ragdoll pose instead by grabbing onto opposite elbows and swaying from side to side to give release more tension and give your core a little break.
Tip: If coming into traditional forward fold, be sure to keep your core engaged. This is not time to rest! Use your core to bring yourself closer towards your thighs.
9. Chaturanga
Chaturanga is one of the best yoga poses to build upper body and core strength. Once you master this pose, you will have increased your upper body strength enough to try more challenging poses, such as arm balances. If you are new to this pose check out our article that goes more in-depth and modifications for chaturanga.
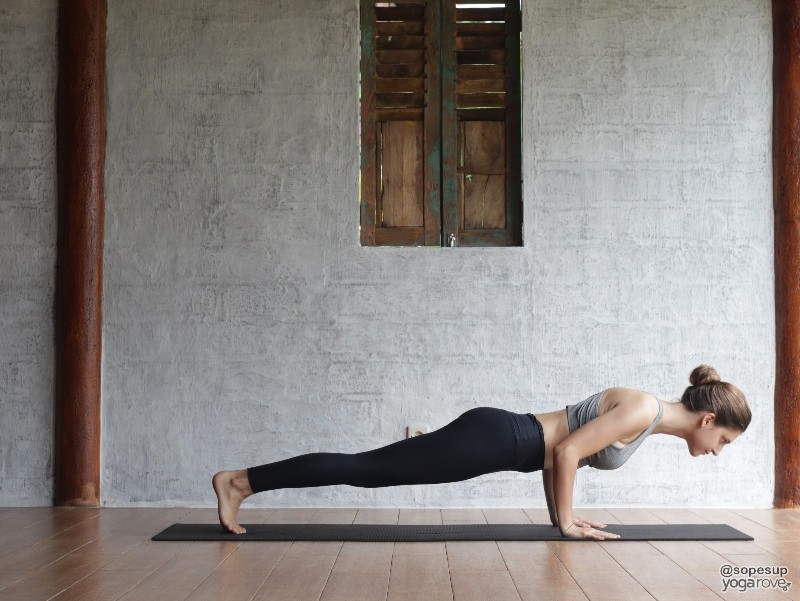
- From Standing Forward Fold, step back into Plank Pose. Make sure wrists are directly under shoulders.
- Hug your elbows tightly in towards your body. Make sure your core is engaged and your back is in a straight line.
- Propel yourself slightly forward, then begin to lower yourself down, still hugging your elbows in.
- When your arms come to a 90 degree angle, stay here and hold for the remainder of the pose.
Chaturanga Modification: If you have not yet built up to chaturanga, come into knees-chest-chin pose. This pose engages your core as well, and you can even try lifting a leg to make it more challenging!
Tip: If you completely collapse in your chaturanga, try using blocks like we go over in this post on how to use yoga blocks and straps to improve strength.
10. Upward Facing Dog
When you come into Upward Facing Dog, you want to make sure you shoulders stay dropped away from your ears and that you are engaging and lifting through your chest and legs throughout the pose.
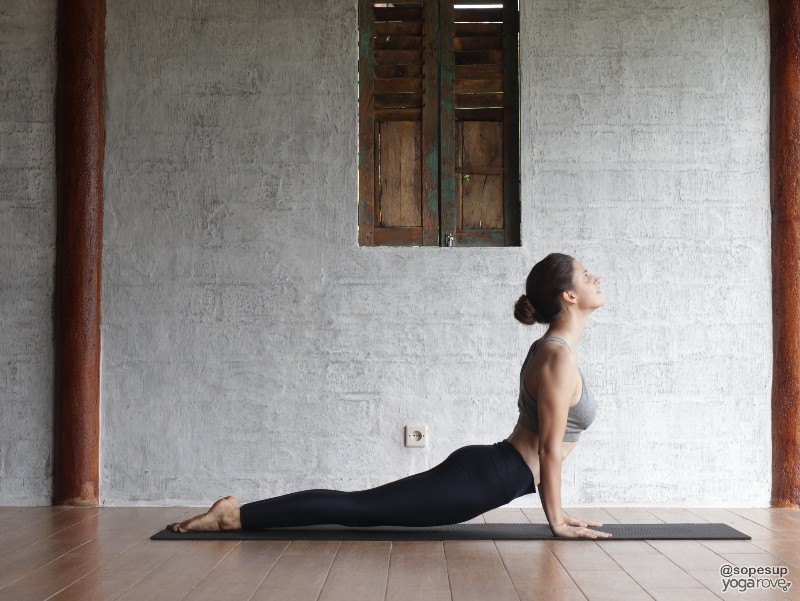
- The only parts of your body that should be touching the mat in Upward Dog are the tops of your feet and your hands.
- From Chaturanga, you can come directly into Upward Facing Dog by flipping the tops of your feet, then straightening your arms and lifting through your chest.
- You should be pushing into the tops of your feet and engaging your legs, keeping them lifted.
Upward Dog Modification: If you have trouble carrying your weight with proper alignment in this pose, try using blocks under your hands or even dropping your legs to the ground.
Tip: Remember to keep your shoulders away from your ears! Do this by actively engaged your arms and pulling your shoulders down and back.
11. Downward Facing Dog
Downward Dog is an all around great pose for stretching, strengthening, and toning. The flow from Chaturanga to Upward Facing Dog to Downward Facing Dog is commonly used in Vinyasa Yoga as the “flow” you go through before you go into your resting pose.
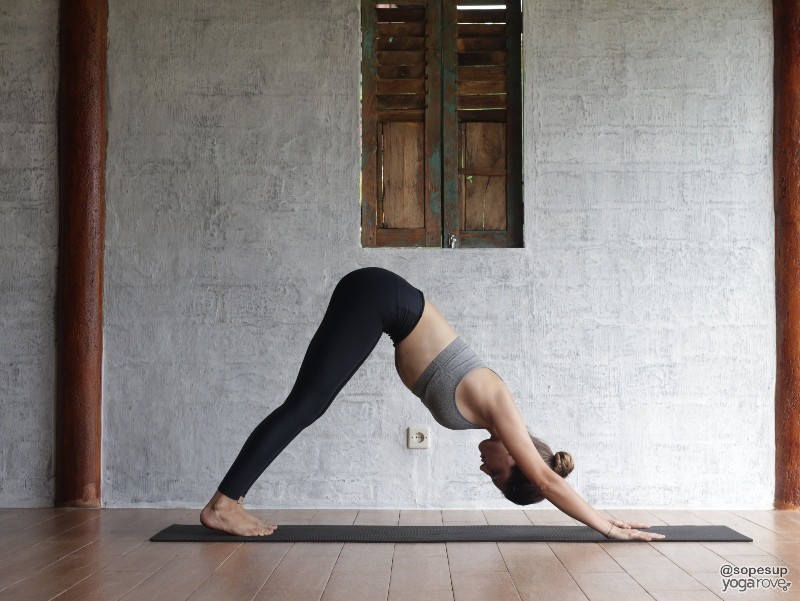
It is a great way to build strength and endurance, and getting your heart rate up.
- To get into Downward Facing Dog from Upward Facing Dog, flip the tops of your feet back so you are on your toes.
- Send your hips back up into the air to come into Downward Dog.
Downward Dog Modification: Feel free to bend your legs in a pedaling motion if you have tight hamstrings. If you have wrist problems, you can try using blocks underneath your hands for more support.
Tip: Engage your core, arms and legs super tight to avoid all of your weight from falling onto one area.
Repeat this full body yoga workout for beginners sequence 4 times, switching sides each time, before you come to your resting pose, Savasana.
It is so important to not skip Savasana, as it helps you seal in your practice and calm your mind after doing a fast moving flow.
Below is a detailed video tutorial on Savasana that I found very helpful when first starting out.
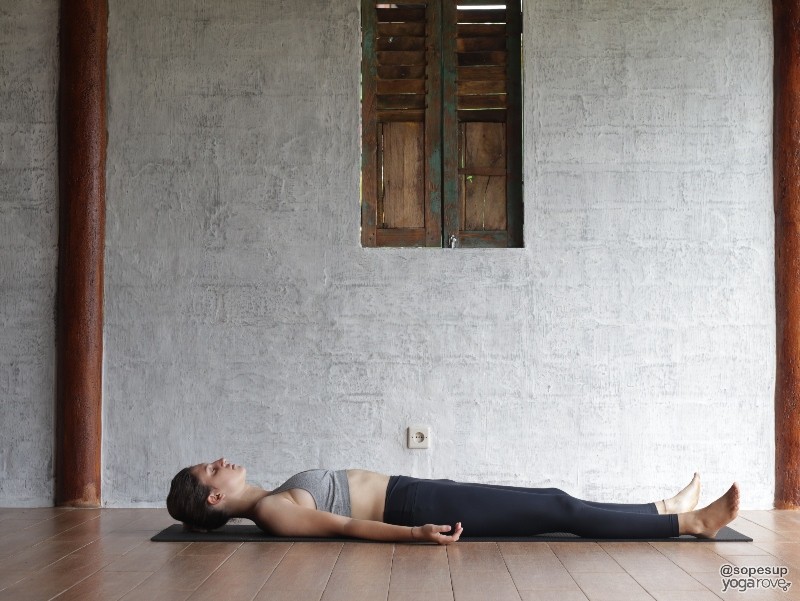
Resting Pose- Savasana
- Come to the ground in a comfortable position. Close your eyes.
- Become in tune with your breath and slowly begin to focus on relaxing each part of your body, one at a time.
- Stay here for a few minutes or as long as what feels right for you.
Why Should A Beginner Do A Full Body Yoga Workout?
To tone your entire body without straining it. Yoga is one of the best ways to lose weight and after completing this routine you will begin to notice your stress levels decreasing.
This effect is great because it is going to motivate you to continue with your practice on a weekly basis. How many times have you started a workout plan only to reach the two-week mark and stop because you feel exhausted and not motivated?
Working out just enough and gradually building up to harder poses and longer sequences is the secret to staying focused on your routine. Always workout just enough so that you want to do more later on.
When starting out we want you to feel like you have more in your tank. By pushing yourself to muscle failure from the start will only cause you to not want to show up to your next practice.
What Muscles Does This Yoga Sequence Work?
This is one of the best full body yoga workouts for beginners that will strengthen you from top to bottom. Each pose plays a valuable part in challenging you to develop muscle. Here are the muscles you will be working out in each pose:
- Plank: Chest, triceps, and core
- Three Legged Dog: Shoulders, core, legs, and glutes
- High Lunge: Legs, glutes, core, and arms
- Warrior II: Arms, legs, and glutes
- Peaceful Warrior: Back, core, and legs
- Warrior III: Legs, glutes, core, arms, and back
- Chair: Glutes, legs, and arms
- Standing Forward Bend: Knees and thighs
- Chaturanga: Core, chest, and triceps
- Upward Facing Dog: Wrists, back, and arms
You don’t need to go to a crowded yoga class to be able to build a strong, fulfilling yoga practice. All you need is willpower and your mat!
I hope you enjoy this sequence and it gets you on the path to achieving your goals. Check out our Free Resource Library for more fun and creative workouts!
Want to save this routine for later? Pin it!
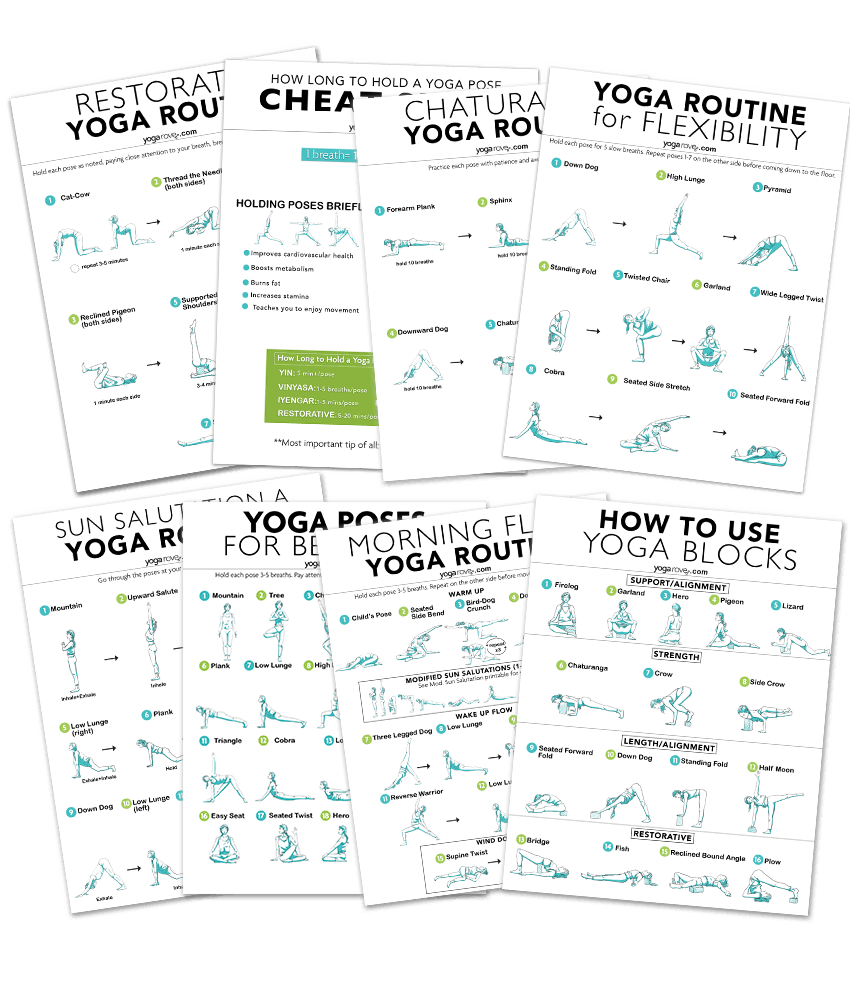
You can also check out our other yoga routines here:


hi. i’m just starting my yoga journey and would love to practice at home when I cant get to the studio. Please send me printable versions of these routines. Thank you.
Hi. I’m trying to use your printables, but I do not understand the colour code (blue and green) . What do they mean? Thanks
Hi Mary,
They are not color coded, the blue and green are purely just design. Hope that helps!
It’s very good very helpful
Glad you found it helpful Neeti!
Hi Ally,
I have been doing the yoga posture given by you for three days now, I want to know how long I have to stay in one posture.
Thank you😊
Hi Pankaj 🙂 The length you hold each pose can be adjusted based on your goals. We have an entire post about it you might find helpful! How Long to Hold a Yoga Pose: Beginner’s Guide
Hi I am gonna try the beginners yoga starting today Dec 13th 2023 I’m gonna try my best to do it atleast 3 to 4 times a week
Thank You!