

This post may contain affiliate links. Please read our disclosure for more info.
Also known as Fierce pose or Utkatasana in Sanskrit, Chair pose is a dynamic posture that fires up your body and builds strength and stability. The pose gets its name for its shape— when you practice chair pose, it feels as though you are sitting in an invisible chair.
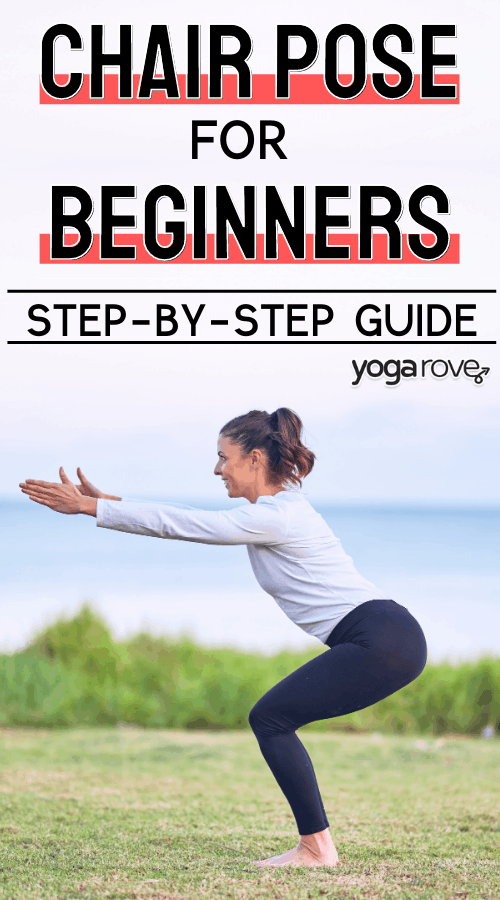
Chair pose can be practiced by every type of yogi and can be modified based on your needs. A challenging pose to stay in for long periods of time, this posture builds up strength in your lower body and strengthens your core. Often practiced during Sun Salutations, Chair is a shape that you will likely see in your vinyasa yoga class.
Benefits of Chair Pose
Chair pose is a powerful pose and offers a wide variety of benefits such as:
- Opens up your upper body
- Builds up strength in your hip flexors
- Lengthens your spine
- Increases your stamina
- Strengthens your thighs, quads, hamstrings, and calf muscles
- Engages your core
- Grounds your body and your energy
- Strengthens your joints
- Opens your shoulders and chest
- Improves your focus and balance
Warming Up for Chair Pose
Chair pose is often practiced in the first half of your yoga practice and during a Sun Salutation B sequence. While it is practiced in the beginning of class, there are still different poses that you can warm up with prior to practicing your Chair pose.
Ragdoll
Ragdoll opens up the hamstrings and spine allowing for freer movement in the body.
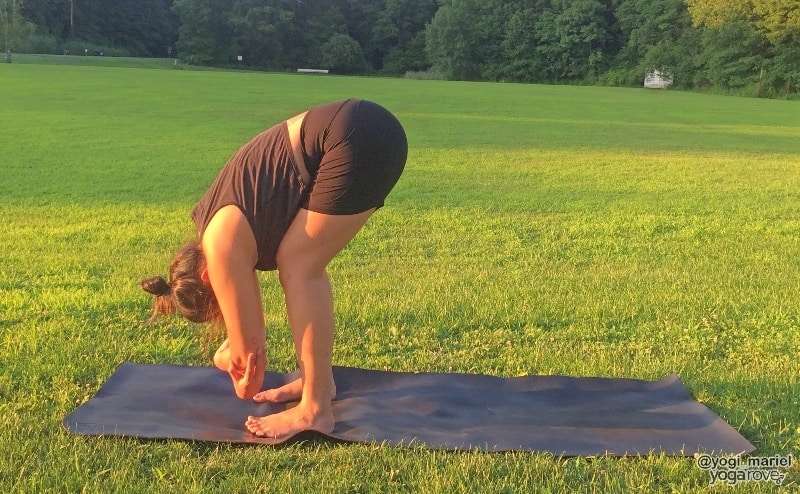
To practice Ragdoll:
- From downward facing dog, walk your feet forward to the top of your mat. Take your feet apart hips width distance and check that your toes are pointing forward.
- Soften your knees and rest your stomach on your thighs. Reach for opposite elbows and relax your neck, head, and shoulders.
- Allow your upper body to relax, keep your legs strong, but knees bending.
- Feel your weight shift slightly forward to the balls of your feet and stay for 5 breaths.
Mountain Pose
Find stability and grounding with Mountain pose before making your way into your Chair pose.
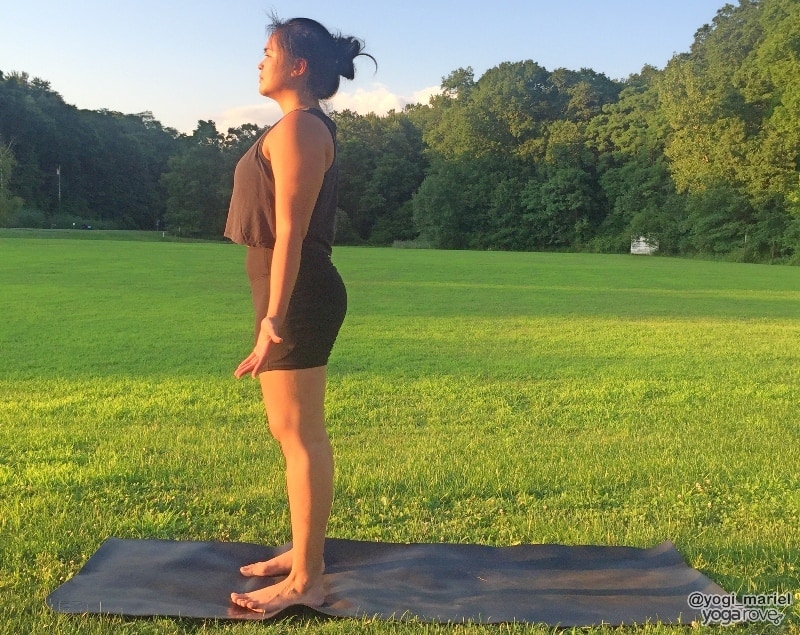
To practice Mountain Pose:
- From your Ragdoll, draw your belly in, release your hands, and slowly round your body up until you are standing tall.
- Keep your feet hips width distance apart and straighten your legs. Relax your arms alongside your body and take your palms to face forward.
- Roll your shoulders up, back, and down and keep your chest broad.
- Lengthen your spine and lift your upper body out of your waist, while rooting and grounding down with your lower body, feet, and toes. Stay for 5 breaths.
Sun Salutation A
These are usually practiced before Sun Salutation B, which is similar to Sun Salutation A, but with the addition of Chair pose and Warrior 1.
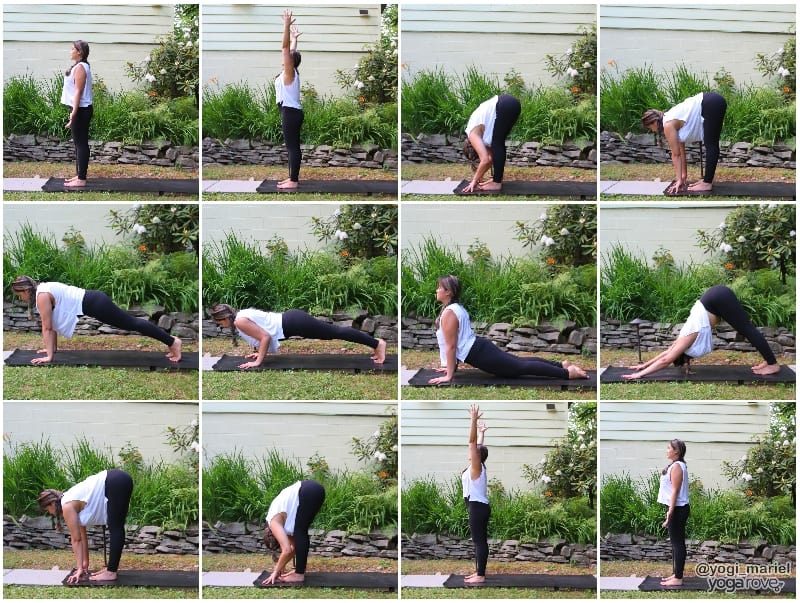
Sun Salutations warm up the entire body and gets your body moving with your breath. Take 3 rounds of Sun Salutation A and focus on synchronizing your breath to your movement. Sun Salutations will open up your lower and upper body, allowing it to be easier to move into Chair pose.
Check out the full tutorial + modifications for Sun Salutation A.
How to Practice Chair Pose
Chair Pose may look as simple as squatting, but there is actually a lot that goes into it. Below is a full step-by-step of how to practice Chair Pose with “proper alignment”.
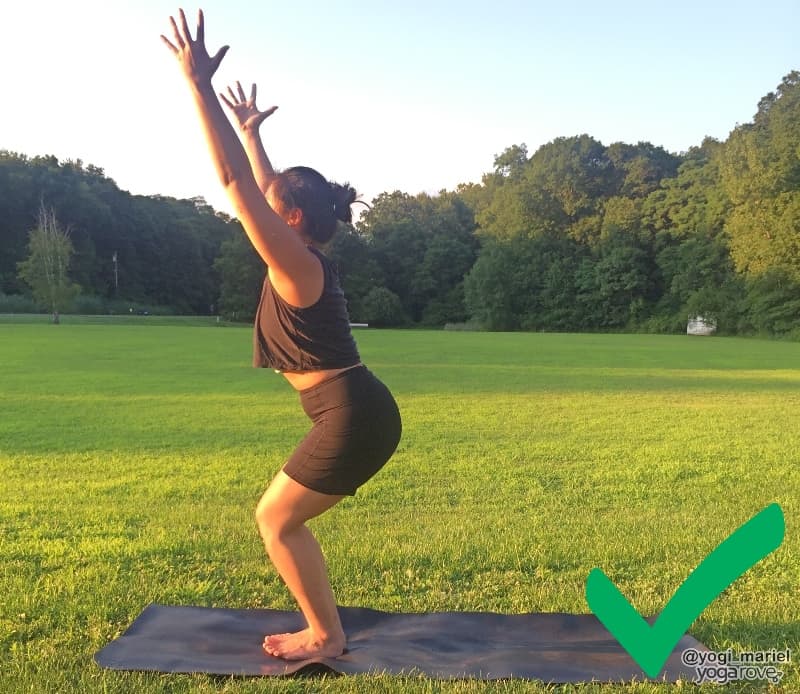
To practice Chair Pose:
- Begin at the top of your mat in Mountain pose.Take your feet together with your big toes touching and your heels very slightly apart.
- Bend your knees and sit down low, taking your fingertips to graze the mat.
- Inhale and lift your arms up over your head while keeping your hips down low.
- Take your biceps by your ears and your palms to face each other.
- Lift your chest up, broaden your collar, and relax your shoulders away from your ears.
- Lean your upper body back slightly and draw your belly button in toward your spine to engage your core.
- Keep your body weight to your heels and squeeze your knees and thighs together.
- Sit low while keeping your upper body open. Stay for 5 breaths.
Common Misalignments
Chair Pose can feel challenging to say the least, which can lead to misalignments. Below is a list of the most common things to watch out for when practicing.
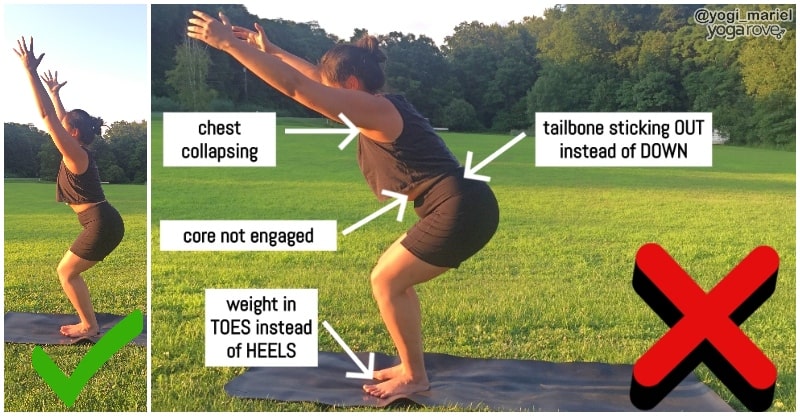
- Toes pointing out: It is very important to make sure that your toes are pointing forward in chair pose, in order to keep your lower body in alignment. It is okay to keep your heels slightly apart, but always check to see that your toes are pointing straight in front of you instead of turning them out to the sides of the mat.
- Stomach touching thighs and upper body rounding forward: Make sure that your upper body leans back slightly and that your stomach is not resting on your thighs. Engage your core to support your upper body and think of moving your arm bones back to keep your upper body lifted. Broaden through your collar and keep your chest open and lifted, while feeling your shoulder blades come together at your upper back.
- Body weight to the toes instead of heels: In Chair pose, your weight should be more on your heels than on your toes. While you are in the pose, shift your gaze down for a moment to check your toes. If you can see your toes, your weight is likely on your heels. If you can’t see your toes, shift your weight from your toes and the balls of your feet more to your heels.
Modifications
The best way to counteract misalignments and to avoid injury is to modify. Here are a few simple ways you can personalize this posture so it works and feels good for you.
- Place a block in between your thighs: If you are having trouble engaging your inner thighs and finding the proper alignment of your lower body, take your feet apart, check that your toes are pointing forward, and place a yoga block in between your thighs. Squeeze the block tightly with your inner thighs to engage your muscles, and keep your body weight to your heels.
- Lower your arms: If you have tight shoulders, lifting your arms up overhead and opening your chest may feel extra challenging. Instead, you can place your palms together at your heart center in a prayer position, or you can take your arms out parallel to the floor with your fingers pointing forward and your palms facing down. Find the openness of your chest by lifting your heart up and broadening through your collar.
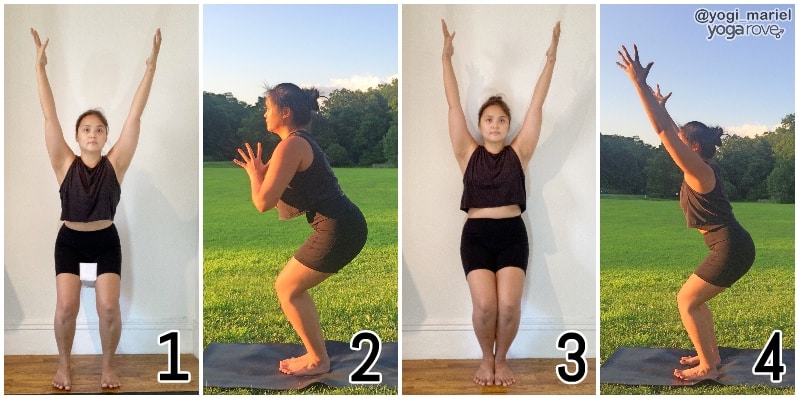
- Use a wall: The support of the wall can be very beneficial for beginners, especially if you are working on building up your strength and stamina. Come into your chair pose use the wall to support your hips. As you start to build your strength, you can begin to move away from the wall.
- Keep your feet apart hips width distance: A great modification for pregnant women is take the feet apart hips width distance while you are in Chair pose. This is a variation that is practiced often and can allow you to feel more stable in the pose.
Tips for Beginners
This pose can feel extra challenging if you are just starting out and it takes time to bring awareness to engaging the proper muscles to obtain the full benefit. Here are a few tips to practice this pose if you’re just starting out or find yourself struggling in this pose.
- Use a wall or a block: If you are feeling unstable in your chair, it is a great idea to modify by using a block or a wall. These tools can help you to find the proper alignment and engage the right muscles for your Chair pose.
- Keep your weight on your heels: A common mistake is to have your weight coming too far forward. Keep your weight behind you and engage your core.
- Keep your upper body and chest open: Your spine should be long and your chest lifted in Chair pose. If needed, modify with your hands and arms in order to find this opening in the upper body.
Variations in Chair Pose
If you feel like you have Chair Pose down and are ready to take it up a notch, try out one of these fun and challenging variations!
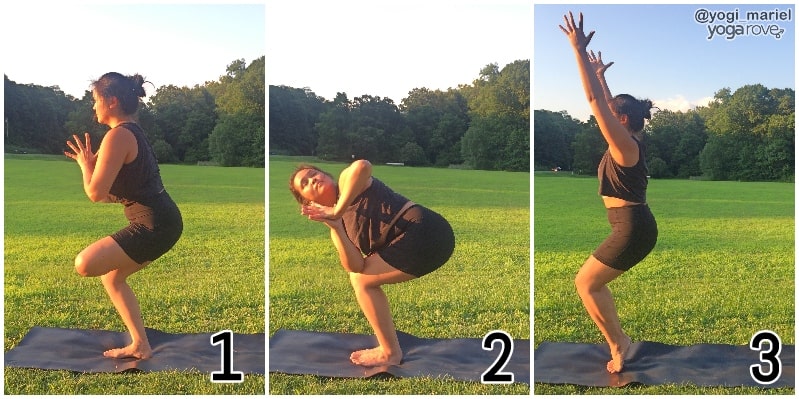
Figure 4 Chair Pose: Shift your weight to one leg and lift your opposite leg up, crossing your ankle on top of your standing leg’s knee. Flex your toes and take your hands to heart center. Lift your chest up, keep your weight to your heels and balance on your standing leg.
Twisted Chair: Take your hands to heart center and twist to your right side, hooking your left elbow outside of your right knee. Squeeze your knees together, roll your shoulders back, and lift your chest to the sky. Keep lengthening your spine and find your twist. Stay for 3 breaths and repeat on the opposite side.
Come up on your tip toes: If you feel stable and strong in your Chair pose and do not have any knee or ankle injuries, challenge yourself by lifting your heels off the mat. Feel the arches of your feet and strengthen your ankles and toes as you feel the weight on the balls of your feet.
Contraindications
- Chair pose can put pressure on your knees, so if you are recovering from a knee injury or pain, take caution when practicing Chair. It may be best to modify with the use of the wall or blocks, or skip the pose altogether.
- If you have lower back issues, make sure to engage your core in order to protect your lower back. Keep your belly button drawing in toward your spine and core strong and tight.
- Yogis with ankle, feet, or toe injuries should also be mindful in Chair pose. If there is pressure, discomfort, or pain it may be best to skip or modify this pose.
I hope you found this helpful and this shows you that no matter what current state you are in, you can make any pose work for you!

Ally is a Registered Nurse, Registered Yoga Teacher, and Co-Founder of Yoga Rove with her husband Victor. She first started yoga over 7 years ago when she started her nursing career to combat the physical and mental strain, and now loves to teach and help others.
Thank you so much for this! It is truly helpful for someone trying to get back into her practice…like me.
so glad you found it helpful Robin 🙂