This post may contain affiliate links. Please read our disclosure for more info.
Known as the ‘King of Asanas’, Headstand, or Sirsasana is a challenging pose with amazing benefits. Headstand is an inversion, which means that the head is below the heart when practiced. Though you are balancing on your head in this pose, your forearms should also help to support your body.
Many yogis find inversions daunting, but with practice and with proper alignment, balancing on your head is a goal that can be attained. Though it may feel challenging or unnerving at first, you can begin to find a sense of peace and calm while standing on your head.
Benefits of Headstand
Headstand holds tons of benefits for both the mind and the body. Some benefits include:
- Alleviates stress and anxiety
- Strengthens forearms and shoulders
- Helps to manage pain from headaches
- Strengthens and lengthens the neck and spine
- Improves blood circulation
- Strengthens your core
- Improves concentration
- Relieves back pain
Warming Up for Headstand
Headstand is typically practiced toward the end of your yoga practice, right before restorative poses or Savasana. Because it is more of an advanced pose, it is important to warm up the body adequately before inverting upside down. Practice these poses to strengthen your body and warm-up for your headstand.
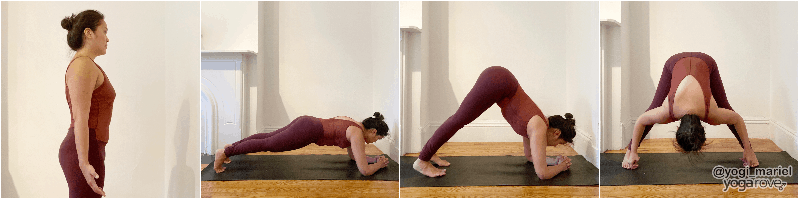
Mountain Pose
Headstand is essentially mountain pose in reverse with weight on your head and forearms instead of your feet. Practice this posture to feel the alignment of your spine and strong legs.
- Stand with your feet apart hips-width distance and your toes pointing forward.
- Feel your big toes and heels rooting down to the ground and engage your thigh muscles.
- Roll your shoulders up, back, and down and keep your chest open and lifted.
- Relax your shoulders and relax your arms alongside your body with your palms facing forward.
- Find a soft gaze and take 5 deep breaths.
Forearm Plank
This pose helps to wake up your core and your upper body.
- Start in plank pose and gently take one elbow down at a time.
- Interlace your fingers and press your forearms down to the mat.
- Check that your shoulders are over your wrists, legs strong, and core tight.
- Stay for 5 deep breaths.
Dolphin Pose
Start this pose from your forearm plank. This pose helps to build more strength and stability in your core and upper body.
- Keep a strong base with your forearms and begin to walk your feet forward toward your elbows.
- Lift your hips up so that your lower body is in a similar shape to a Downward Facing Dog.
- Keep your head off the mat and look slightly forward with your chin lifted slightly away from your chest.
- Relax your shoulders away from your ears, root down through your forearms and heels, squeeze your shoulder blades together down your back, and keep your hips lifted high.
- Lengthen your spine and find a soft gaze. Hold for 5 breaths.
Wide-Legged Forward Bend
This posture can take you into a tripod headstand and is a great prep pose to feel the length in your spine and crown of your head reaching toward the mat.
- Stand at the back of your mat and turn to face the left side.
- Step your right foot out to the top of your mat and take your arms out parallel to the floor. Check that your wrists are right above your ankles and that your toes are pointing forward.
- Straighten and engage your legs and engage your thigh muscles.
- Inhale to lengthen your spine and as you exhale hinge forward at your hips until your hands touch the floor.
- Plant your palms flat on the mat right underneath your elbows. Lengthen your spine and think of the crown of your head touching the mat.
- Shift your weight slightly forward to the balls of your feet as you keep your legs strong.
- Stay for 5 deep breaths.
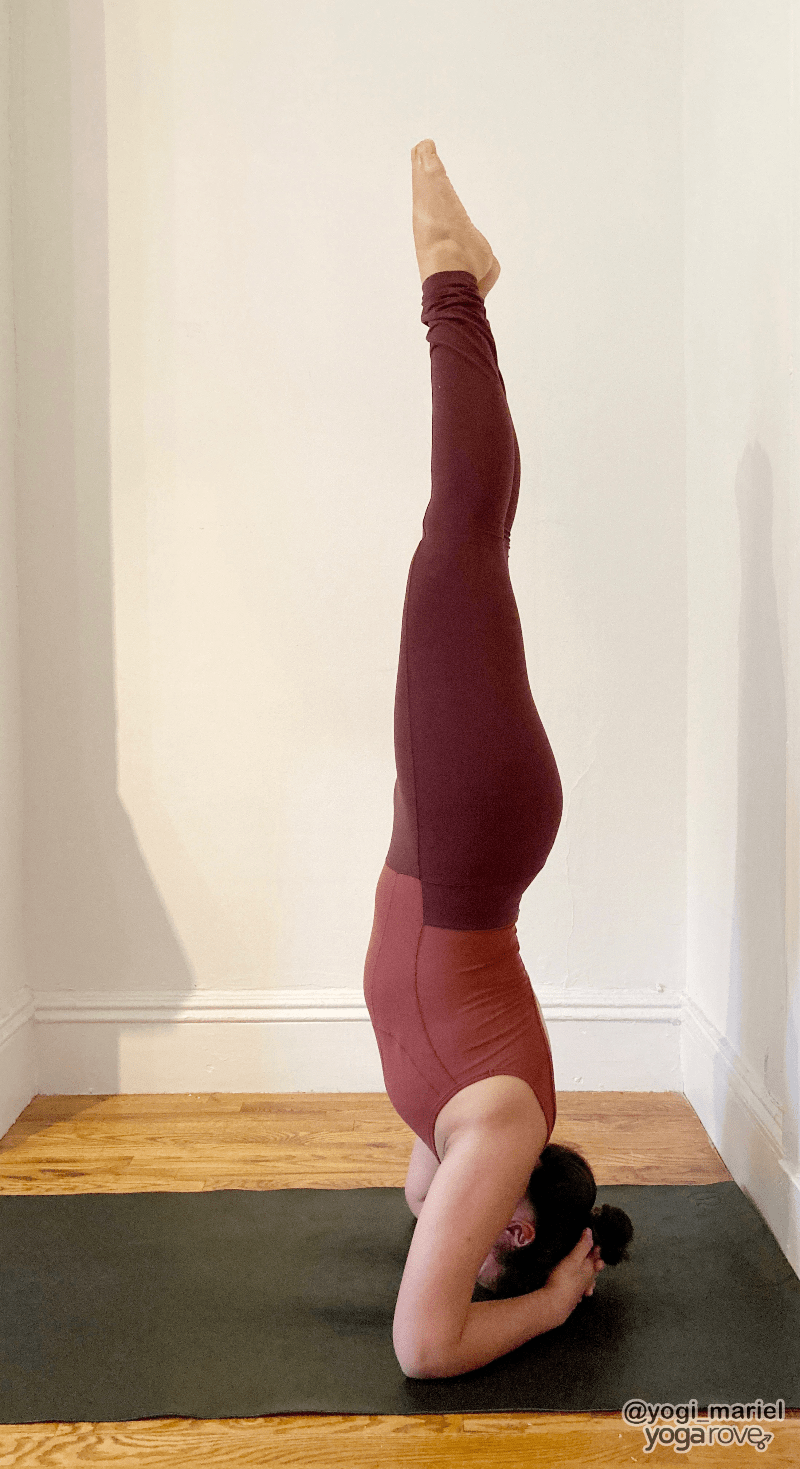
How to Practice Headstand
If you find this pose challenging at first, remember that yoga is a practice. Take it step-by-step, be patient with yourself, and focus on proper alignment and building up your strength.
To practice Headstand:
- Begin by kneeling at the center of your mat with your knees together and hips on your heels.
- Place your elbows down on your mat and reach for opposite elbows with each hand. This is the distance that you want to keep between your elbows.
- Plant your forearms down on the mat keeping this distance and interlace your fingers creating a Triangle shape on the mat.
- Keep your fingers interlaced but keep your palms apart so that you have space to rest the back of your head.
- Gently place the crown of your head down on the mat, resting the back of your head against your palms.
- Keep your forearms and head on the mat.
- Shift your weight forward as you curl your toes under and begin to lift your knees off the mat.
- Walk your feet forward so that your hips lift up. Keep walking your feet forward until your hips stack on top of your shoulders.
- Press your forearms down on the mat, relax your shoulders away from your ears, keep your spine straight, and your hips stacked on top of your shoulders.
- Shift your weight slightly forward and begin to bend one knee into your chest, keeping your knee touching your belly and your toes pointing up toward the ceiling.
- Find your balance and then lift the other foot off the floor landing in a tucked position with both knees bending into your chest.
- Keep your alignment and very slowly straighten your legs and point your toes up toward the ceiling.
- Stack your joints on top of each other, engage your core and your legs and keep pushing your forearms into the mat.
- Slow your breath down and stay for 5-20 breaths.
Common Misalignments in Headstand
Headstand requires a strong foundation before you find yourself upside down. Here are some common misalignments in Headstand and how you can fix them.

- Too much space between elbows: Make sure that your elbows do not slide out while in the posture. A good way to measure is the distance when you touch the opposite hand to the opposite elbow. Keep this distance and root your forearms to the ground.
- Incorrect head placement: Make sure that it is the crown of your head on the mat, not the back of the head, and not your forehead. Incorrect placement can make for a very uncomfortable headstand and could cause injury.
- Kicking up: While some teachers teach kicking up as a way to get into Headstand, it is safer to learn the proper alignment and technique so that you are engaging the muscles that you need to engage while coming into Headstand and while in the actual posture.
- Compression of the lower back: If you notice that your lower back is compressing, check that your ankles, hips, and shoulders are in alignment and that your spine is lengthening. Sometimes the ankles can go past the hips causing a ‘banana back’ and compression in the lower back.
Modifications for Headstand
If you are working towards finding comfort upside down, try some of these modifications:

- Use the wall or a partner: If you feel nervous practicing at the center of the room without support behind you, practice near a wall or with a friend. The wall or your friend can catch your legs so that you don’t tumble forward.
- Keep your knees into your chest: Before straightening your legs, find stability with your knees into your chest first. This allows you to engage your core and find your alignment before moving into the full posture.
- Practice with one leg: In your preparatory shape before you lift both feet off the mat, practice by lifting one leg up at a time so that you can feel where the weight shifts and how much you need to lengthen your spine and engage your core and upper body.
- Support your head and forearms: If your mat does not provide enough cushioning for your head, elbows, and forearms, roll up your mat or a blanket for some extra support.
Tips for Beginners
- Move slowly: It can take years to master Headstand but remember to be patient and move slow. Condition your body by practicing other postures that strengthen your entire body. The body needs some time to get used to being upside down so enjoy the journey to your headstand.
- Be precise with your alignment: Since you are upside down, it can be disorienting to feel the proper alignment in your body. Take your time to find this so that you can practice a safe and strong Headstand.
Variations in Headstand
Feeling comfortable and confident in your Headstand? Try some of these fun variations!
- Tripod: You can enter this variation of Headstand from a Wide-Legged Forward Fold. Plant your palms flat on the floor and place the crown of your head on the mat in front of your hands. Your hands and head should create a triangle shape. Shift your weight to your head and your hands and start to float your feet off the floor. Bring your legs to touch and reach your toes up toward the ceiling.
- Upward Facing Staff: Instead of coming into the pose with bent knees, keep your legs straight and pike up until you find your legs parallel to the floor. This shape looks similar to a Staff pose and is a great way to feel the engagement of your core.
Contraindications
If you have high blood pressure, a spine or back injury, or heart disease, take caution when practicing Headstand. In some yoga traditions it is not recommended to practice Headstand while menstruating, however, listen to your body and do what feels best for you.
Headstand is a more advanced posture, so if you are just starting out in yoga, practice the preparatory poses to build the strength and flexibility that you need for the pose. Be patient with yourself and enjoy the journey to practicing upside down!
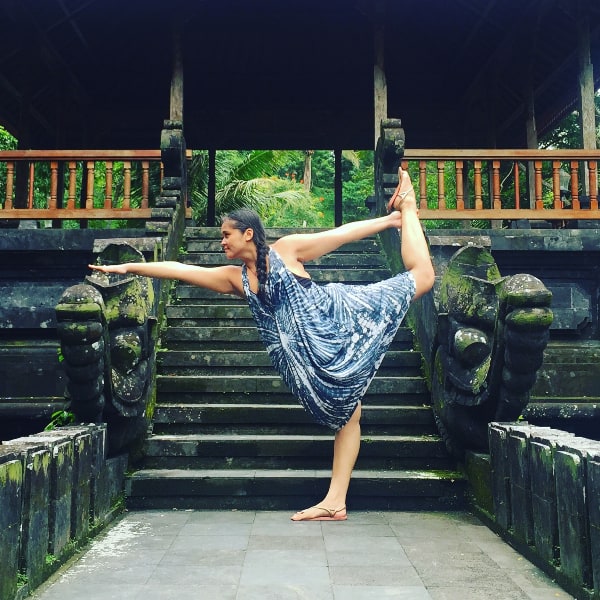
Mariel is a writer and NYC-based yoga teacher. She has been teaching for a decade and is a life-long student of the ancient practice.