

This post may contain affiliate links. Please read our disclosure for more info.
You probably hear “my IT band is so tight” from people in the gym, or you may hear a yoga teacher or class instructor say, “this will work your IT band,” but what exactly is the IT band? What works it and what doesn’t? If it’s tight, how do you stretch it? We’re here to answer all your questions…
Where in the body is the IT band?
Your IT band, short for iliotibial band, runs along the outside of your thigh, branching off form the tensor fascia lata (the muscular side of your hips) and the gluteus maximus, and extending down toward the knee where it inserts at a point called Gerdy’s tubercle, which is at the top of the tibia within the knee joint.
English please? The IT basically starts at the side underside of your bum and runs down the side of your quad to connect to the knee just about where the knee joint bends.
What is the IT band?
The truth about the IT band is that it’s still pretty much an “intriguing mystery” (that’s straight from Harvard scientist, by the way).
The IT band is not actually a muscle – it is fascia, which is a band or sheet of connective tissue that is made up of tons of collagen fibers woven in every which way. The IT band is more of a tension cable that holds the muscles in place (the gluteus maximus and gluteus medius), allowing them to do their job of flexing and extending, which in turn keeps your bones in the right place. It’s a stabilizer of the knee, making sure that the joint does not stray when bending and extending.
Ok but what does fascia do? Fascia is “a sheath that encloses muscles, connects muscles to bone and … compartmentalizes muscles that serve a similar function” – it behaves like a tension spring to both keep your skeletal components in place and to conserve energy in bipedal movement, much like your Achilles tendon.
What causes the IT band to tighten?
A tight IT band isn’t the same as a tight muscle since, well, it’s not a muscle. Instead, it is inflammation and/or irritation of the fascia tissue, which causes discomfort in addition to potential muscle and joint pain.
Why would irritated fascia cause muscle and joint pain? When the muscles and joints have to carry extra burden when the IT band is not performing in its full capacity it causes the surrounding muscles to overwork (similar to a situation such as breaking your thumb on your dominant hand – when you’re writing –or do anything, really—you’ll start to compensate with other fingers or even the wrists, and for a few days those compensating joints/muscles will be sore).
To be clear, you’re never really stretching the IT band – think of it more like a ligament or tendon; you definitely wouldn’t want to stretch those. Instead, you’re stretching and strengthening the muscles surrounding the IT band, so that it can properly do its job!
What does a tight IT band feel like?
Tight IT bands are most common in runners and cyclists, but anyone can experience it. When your IT band is tight, you’ll usually feel a pricking sensation on the outside of your knee while running, especially when your foot strikes the ground while running or walking. You may also feel it on the outside of your hip, where the IT band originates.
How can I test if my IT band is tight?
If you suspect that your IT band is tight but don’t recognize the pricking or stabbing sensation in your knee described above, partner up with a friend or family member and do Ober’s Test – it’s a simple 30-second physical exam that require no equipment.
Also – if you’re practicing yoga, especially any of the 12 yoga poses below, you’ll definitely feel it if you have a tight IT band!
What if it’s not my IT band?
If you are feeling the pain in your hips and have done both the Ober test and the heel-strike test, the pain may not be from your IT band – it’s likely from your Iliopsoas. You can test that relatively easily with the Thomas Test.
Yoga Poses to Stretch the IT Band
An irritated IT band can be alleviated two ways, both of which yoga can assist with:
First, by lengthening the IT band and the muscles it’s connected to, and second, by strengthening the muscles that connect to the IT band: the gluteus medius and the tensor fascia latae (TFL). By strengthening these muscles, you’re putting less strain on the IT band, so it will not be as irritated.
The following postures will help lengthen the IT band and surrounding muscles, while strengthening and stabilizing the muscles that will prevent the fascia forming your IT band from being irritated from overuse or stress:
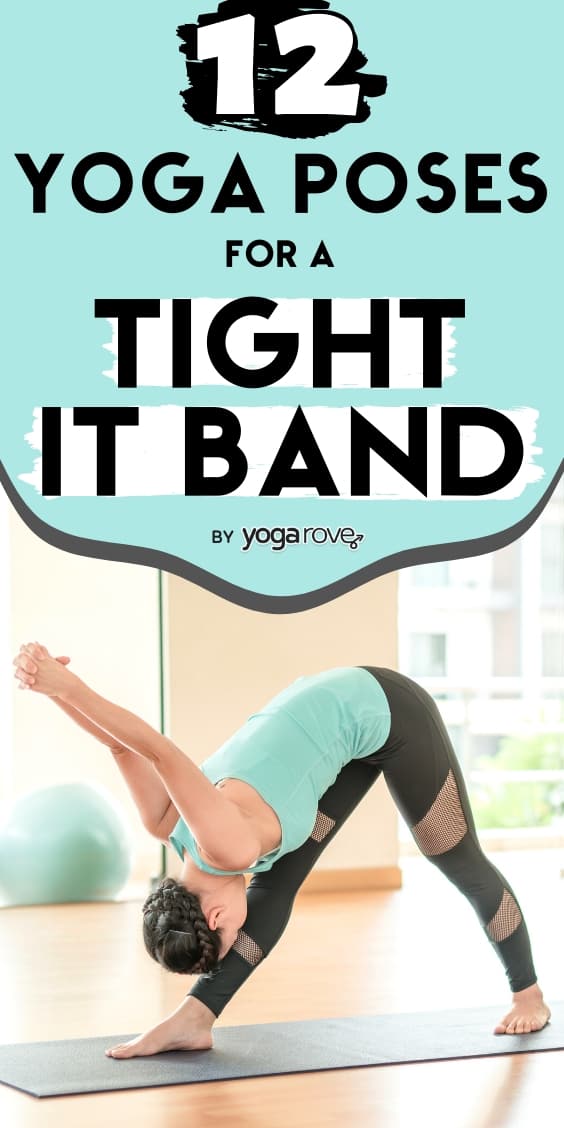
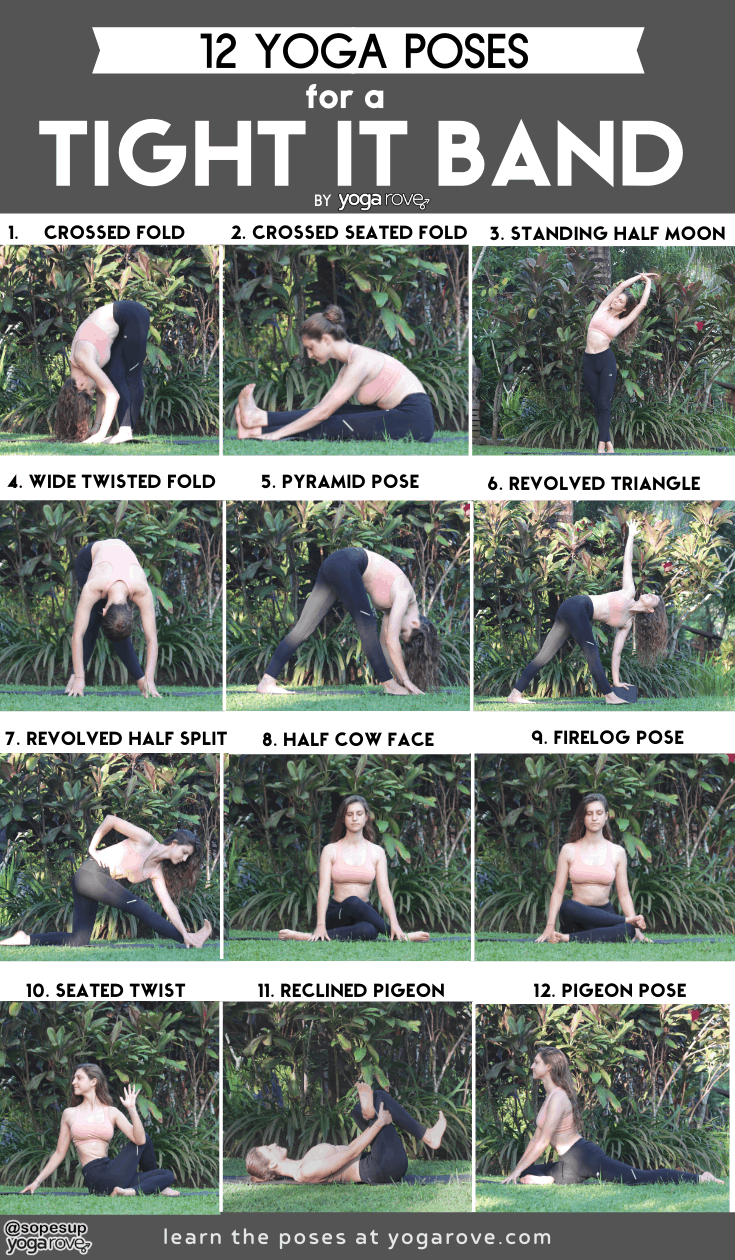
12 Yoga Poses to Release the IT Band:
- Ankles Crossed Standing Forward Fold
- Ankles Crossed Seated Forward Fold
- Crossed Ankle Standing Half Moon
- Crossed Legged Wide Standing Forward Fold
- Pyramid
- Revolved Triangle
- Revolved Half Split
- Half Cow Face
- Firelog Pose
- Half Lord of the Fishes
- Reclined Pigeon
- Pigeon
1. Ankles Crossed Standing Forward Fold
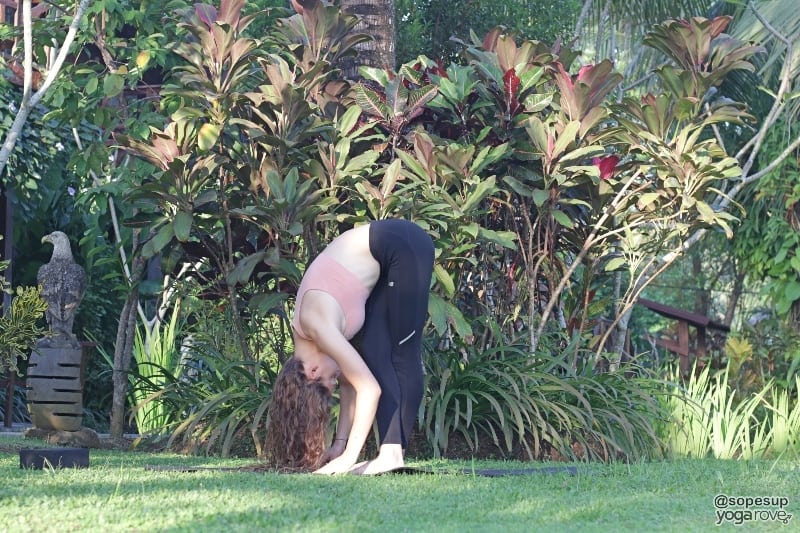
- Begin standing with feet together.
- Cross the left ankle in front of the right.
- Fold forward, aiming to reach the palms on the mat (fingertips is OK too).
- Use a block if you cannot reach the ground, and if you experience any lower back pain, keep a slight bend in the knees.
- Rise to standing and repeat with the second foot crossed in front.
2. Ankles Crossed Seated Forward Fold (if super tight, sit on a bolster, pillow, or block)
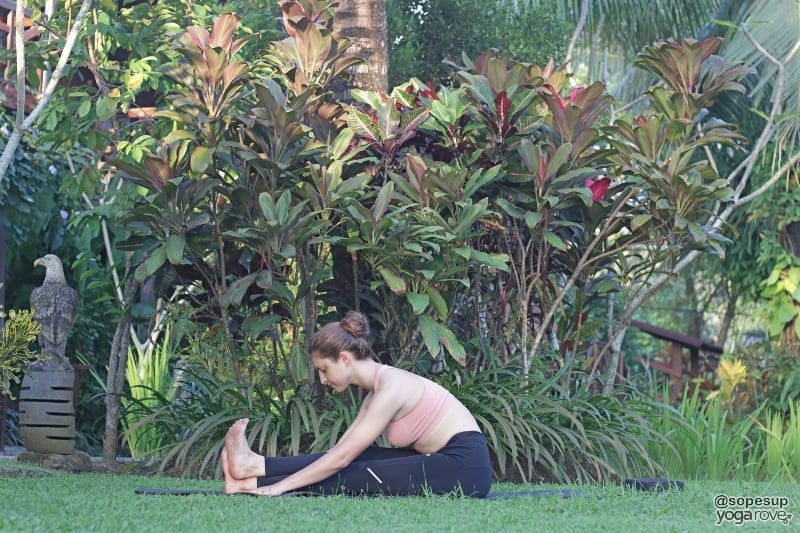
- The same pose as above, but seated.
- Begin seated in Staff pose (seated with your legs extended straight out in front of you). Cross the left ankle over the right, and fold forward over your legs.
- Focus on keeping your spine straight – don’t let your upper back hunch forward. If necessary, sit on a pillow or block.
3. Crossed Ankle Standing Half Moon
This pose is called standing half moon because you look like a half moon when you do it 🙂

- Begin standing with feet together.
- Cross the left ankle behind the right, bringing your feet as close together in alignment as is possible for you.
- Extend your arms overhead and take hold of the left wrist with the right hand.
- Reach the hands high to the sky, then fold laterally to your right without crunching your right ribcage (visualize folding upward and over a giant beach ball).
- Keep your gaze in front of you, and make sure that though you’re reaching upward and over to lengthen your spine, your shoulders should not be creeping up toward your ears – your shoulder blades will glide down your back, away from your ears.
- Gently bump your left hip outward as you lean toward the right. It’s helpful to visualize something in the right corner of the ceiling pulling you upward as someone directly to your left has arms around your waist pulling you toward your left.
- Rise to standing, switch ankle cross, and repeat on the second side.
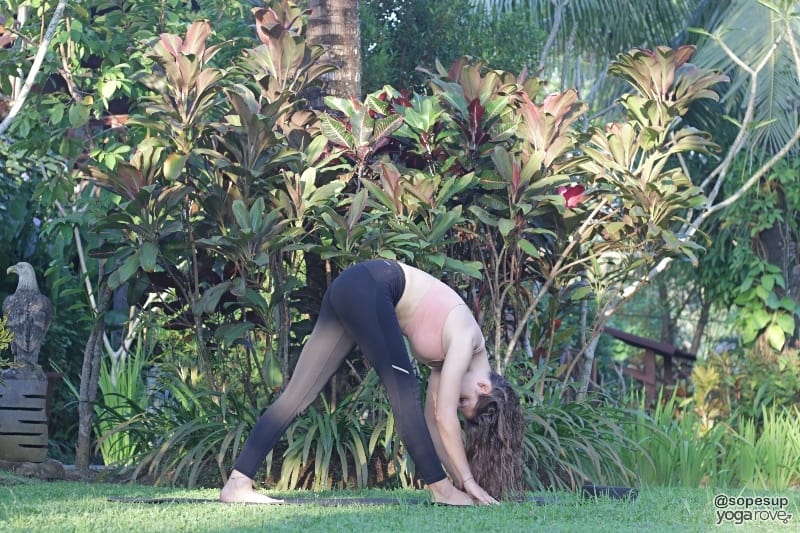
4. Cross-Legged Wide Standing Forward Fold

- Face the long side of your mat as if you’re going to enter regular wide-legged forward fold.
- Cross the left leg over the right, as far toward the right as you can get it (you want to aim for 1-2 feet between your ankles).
- Fold forward, aiming to reach your hands to the mat. If your hands don’t comfortable reach, place the palms on blocks.
- Repeat with opposite foot crossed over.
5. Pyramid
This pose is the precursor to Twisted Triangle. Make sure you able to perform Pyramid prior to attempting Pose #6.
- Begin standing with feet hips’-width apart.
- Step the left foot 2-3’ behind you, keeping the hip alignment.
- Rotate the back foot slightly outward so that toes are pointing toward the front left corner of the mat.
- Place your hands on your hips as you fold forward. Note: if you feel like you’re losing balance, feel free to widen the stance so that your feet are further than hips’-width apart.
- Keep your hands on your hips to keep your hips in space – your left hip will try to pull backward, but don’t let it. Bring your right hand to your right hip crease to shift it backward in space.
- Extend your hands to the ground to reach the floor. If they don’t reach, place the hands on blocks.
- If this pose feels OK, proceed to #6. If not, rise back to standing, and repeat on the second side.
6. Twisted (or Revolved) Triangle
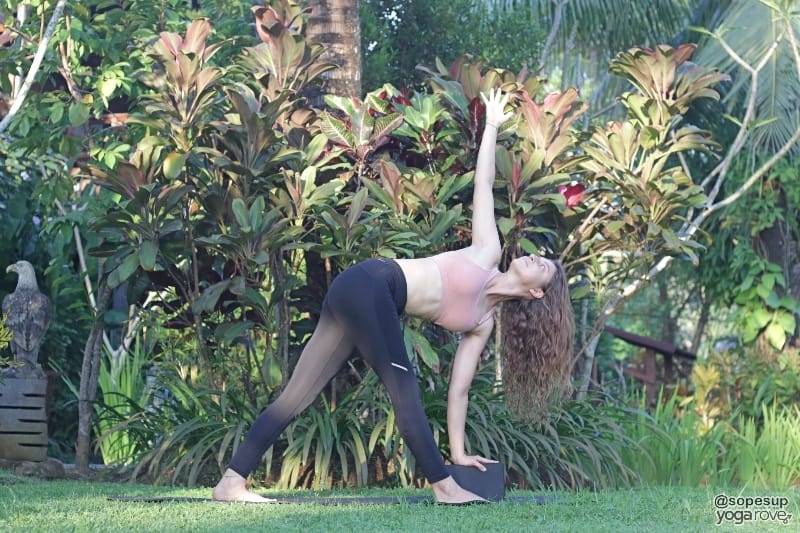
- Begin in Pyramid with the right foot forward, both hands on the hips.
- Place the left palm on the mat outside of the right foot.
- Use a block if this is too difficult. If, with a block, it’s still very uncomfortable, it’s totally OK to place your palm inside the right foot until you gain the flexibility for the full expression of the pose.
- With your right hand on your right hip, pull the hip back in space to assure your hips are in square alignment.
- If available (do not sacrifice the length of the spine to do this – if your upper back starts to hunch, keep the hand on the hip!), extend the right arm to the sky, palm facing way from you.
- To exit this pose, you can rise directly to standing within the twist and rotate back to center or bring the right hand back to the mat, and slowly rise to standing.
7. Revolved Half Split
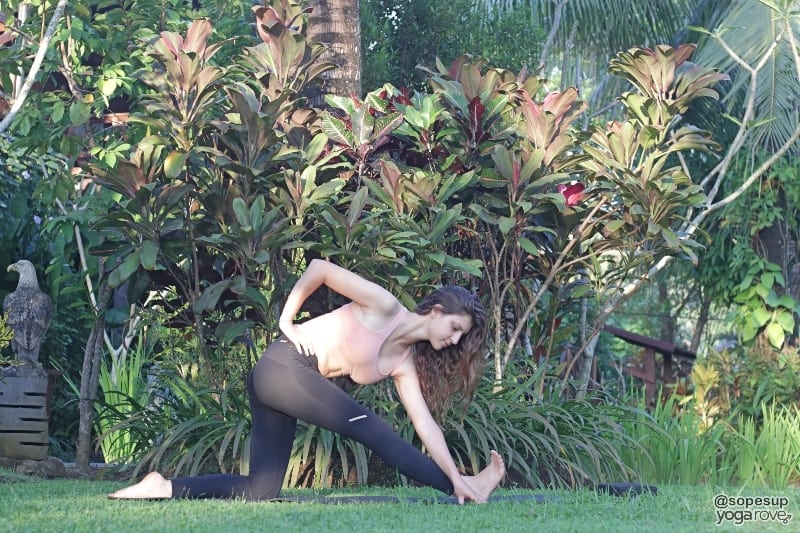
- Begin kneeling on your knees (if you have sensitive knees, place a folded towel or blanket underneath the knees, or double your mat by folding it).
- Extend your right leg forward, keeping your hips in direct alignment over your knees.
- Bend forward over the front leg, keeping the spine straight.
- Place the left hand on the mat directly outside of your right knee, keeping the right hand on the hip to make sure your hip doesn’t move anywhere in space – your hips should still be in alignment over your knees. Note: if the left hand doesn’t reach the mat, place it on a block.
- If available (do not sacrifice the spine’s length), extend the right arm to the sky, palm facing away from you.
8. Half Cow Face
- Begin seated with your knees bent so your feet on flat on the floor.
- Slide your left foot underneath the right knee so that the inside of the left heel/ankle sits outside of your right hip.
- Cross the right leg over the left, aiming to get the right knee bent directly over the left, with the right heel/ankle outside of the left hip.
- (Full Cow Face extended the arm behind the head for a shoulder stretch, but we’re only focusing on hip/IT stretch here.)
- If this posture is next to impossible, try #9 and/or #10 instead.
9. Firelog Pose
This is the more accessible version of Cow Face, though it’s still pretty intense on the hips.
- Begin seated and slide your left foot underneath your right leg, but instead of folding the foot in close to your hip like in #8, you’ll keep the knee bent at a 90-degree angle so that your left shin is parallel to the front edge of the mat.
- Bring right leg over the left, bending at the knee at 90 degrees and stack the right shin directly over the left.
- Keep both feet flexed.
- Sit tall, shoulders glide away from the ears. If this is enough, stay right here. If available, place the hands on the mat in front of you and walk as far forward as possible without curving the back. Once you lose the straight back, stop.
10. Half Lord of the Fishes
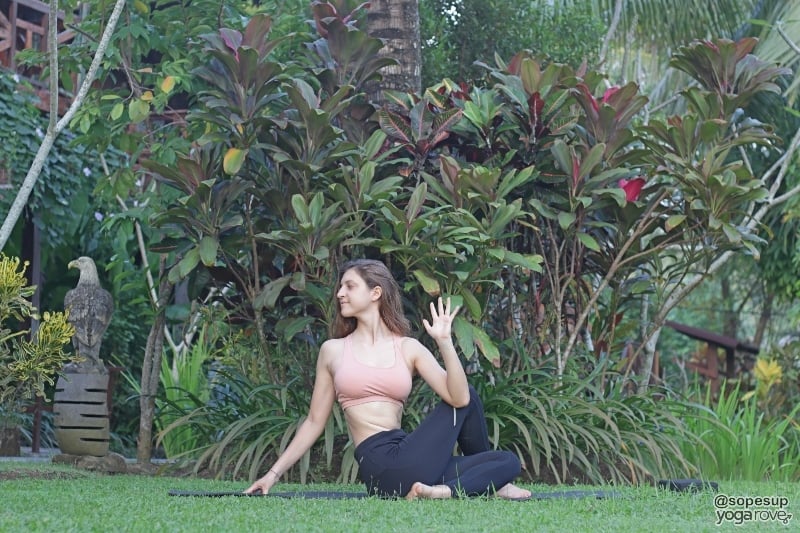
- Begin seated, both knees bent so that your feet are flat on the floor.
- Slide your left foot underneath the right knee so that the inside of the left heel/ankle sits outside of your right hip – your right foot will be placed on the floor outside of your left quad.
- Place your right hand on the floor behind you at the base of your spine.
- Extend your left arm high to the sky to elongate the spine, and then hook the left elbow on the outside of the right knee as you turn to face the right side of the room.
- With every inhale, grow taller (and visualize pressing into and away from the ground with your right palm, so that your shoulders are away from your ears), and with every exhale, twist a bit further.
- On an exhale, return to center. Cross legs the opposite way, and twist to the left.
11. Reclined Pigeon
The most accessible hip/IT band opener is taken lying down on the mat.
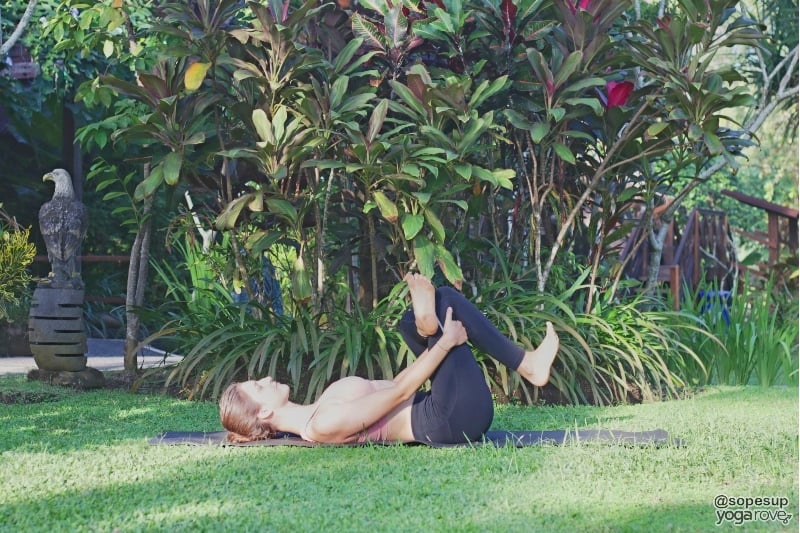
- Begin lying flat on your back.
- Bend both legs so the feet are flat on the mat and cross your right ankle over your left knee.
- Your right leg will be forming an approximate 90-degree angle.
- Lift the left leg off the mat, also in a 90-degree angle.
- “Thread” your right arm between the space of your legs and behind your left thigh to meet your left hand on top of your shin (if your hands don’t reach the shin, you can hold the back of the left thigh instead).
- Gently pull the left thigh closer to you as you actively press the right thigh away from you.
12. Pigeon
The easiest way to enter this pose is from downward facing dog.
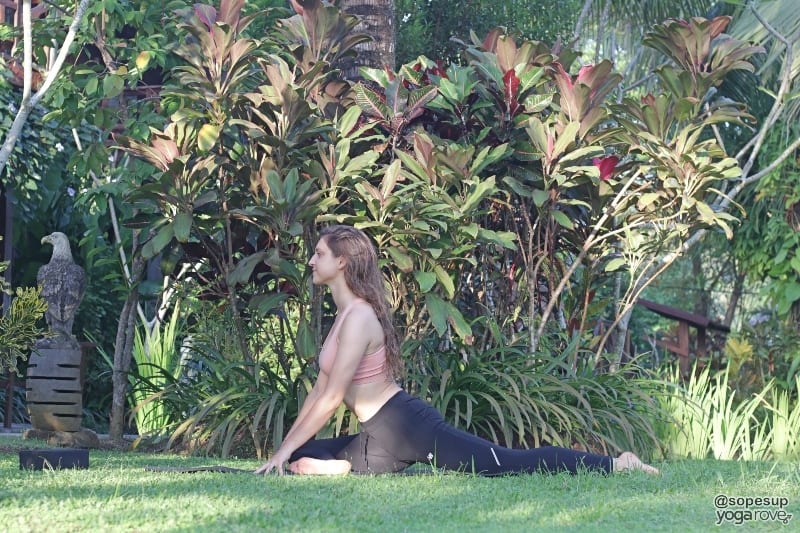
- From Down Dog, bring the right knee into your chest, rotating the hip outward in its socket and bringing the shin and hip to the ground.
- The shin should be parallel to the front edge of your mat: the right ankle will be just behind the left wrist, and the right knee just behind the right wrist.
- Your left leg rotates inward, so that the top of the knee, shin, and foot are resting on the mat.
- If your right hip rises, place a folded blanket or towel, or pillow or cushion, underneath the right hip.
- With your palms in front of you, press into the hands so that your spine can grow tall. If this is already uncomfortable, stay here and breathe. Otherwise, walk the hands as far forward as you can. To make this more restorative, places blocks, cushions, or bolsters in front of you high enough so that your forehead can rest fully. Allow all tension to melt from you neck and shoulders as you breathe into the space in your hips.
A lot of the poses mentioned are dual- (and triple-, and quad-) purpose; so when you’re performing many of these, you’re not only stretching the IT band – you’re also likely bringing flexibility to the hip flexors, hip muscles, quadriceps, gluteus, and all ligaments within the hip socket and pelvic floor region.
As you practice yoga to alleviate IT band inflammation and tightness, you will not only notice improvement in your other physical activities such as biking and/or running, but also improvement overall in the way you feel, physically and mentally. The issues are in your tissues! You’d be surprised how much releasing tension from your musculature and tissues can relieve tension in your mind!
Previously a dancer, Ashley has been practicing yoga for over 15 years and teaching for 5.
She balances an executive-level “corporate” position during the day with healthy, mindful wellness practices in her free time to stay grounded; she lives on celery juice and cold brew, and can’t live without her dark chocolate!

Oh my! I found this in Pinterest yesterday after suffering from a tight hip/back/glute and IT band for 6weeks caused by an overzealous leg workout in the gym. I haven’t even been able to walk my dog from the pain. After just one attempt at these stretches (I’m not fully able to do several towards the end), I’m experiencing relief! I’m in Aruba on a 2 week vacation and have vowed to myself to practice these twice daily. Thank you so much. I’m sure my spirit and mood will also improve, as pain can really take you down. How can I follow more of these workouts?