This post may contain affiliate links. Please read our disclosure for more info.
What’s more fun than doing one of your favorite yoga poses with one of your favorite people? Practicing yoga itself is such a rewarding practice, but practicing yoga with a partner can really make things even more enjoyable.
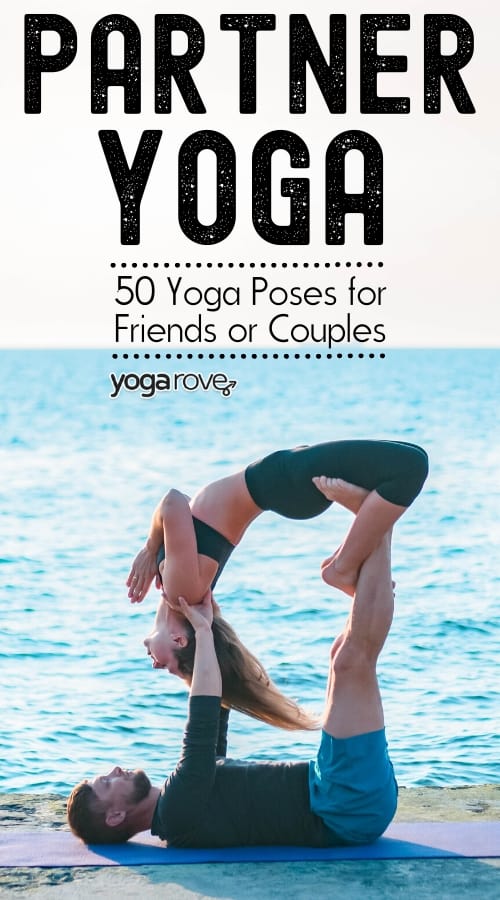
I’ve gathered a list of 50 yoga poses for 2 people to try with your friend or partner, but first, let’s go over why you should try partner yoga.
Things to Remember While Practicing Partner Yoga:
- Drop the ego. You’re not just working with your own body – you’re working with someone else. It’s not about who is more flexible, or who is stronger – you are working with what you have, right here, right now – it’s a great exercise in being present!
- Be clear and concise. Imagine you are instructing someone who is literally blindfolded – it will make the process significantly easier and reduce a ton of frustration. And always use proper alignment in poses just as you would in solo poses. Keep open communication with your partner while in poses to be aware of their comfort level.
- Keep it clean. You’re working in very close quarters with the person (or people) you’re practicing with, so be considerate – make sure you’ve showered, brushed your teeth, done all that – and don’t wear any strong perfumes (a lot of people are sensitive or allergic to it).
- Do NOT moisturize! Whether it’s coconut oil or hand cream, skip the moisturizing skincare before practicing partner yoga – you don’t want to be slipping and sliding the moment you break a sweat.
- Don’t take it too seriously. You may not even “fly” your first time (that’s totally normal, by the way). The whole purpose is to enjoy yourself. Breathe, let go, and have fun!
Enough about the boring stuff… let’s get to the fun part – the practice!
**Note: there are a few poses where one partner is doing something different from the other. In the instructions for these, instructions will refer to the partners as “P1” and “P2,”.
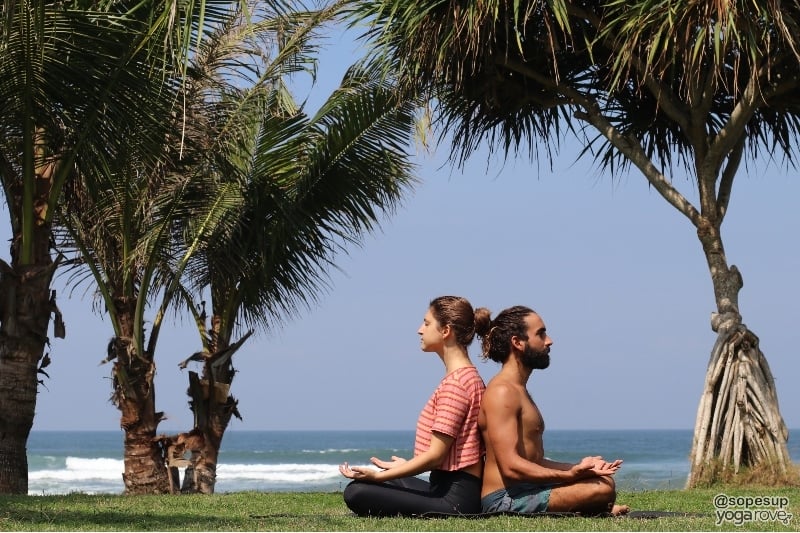
1. Supported Sukhasana
How To:
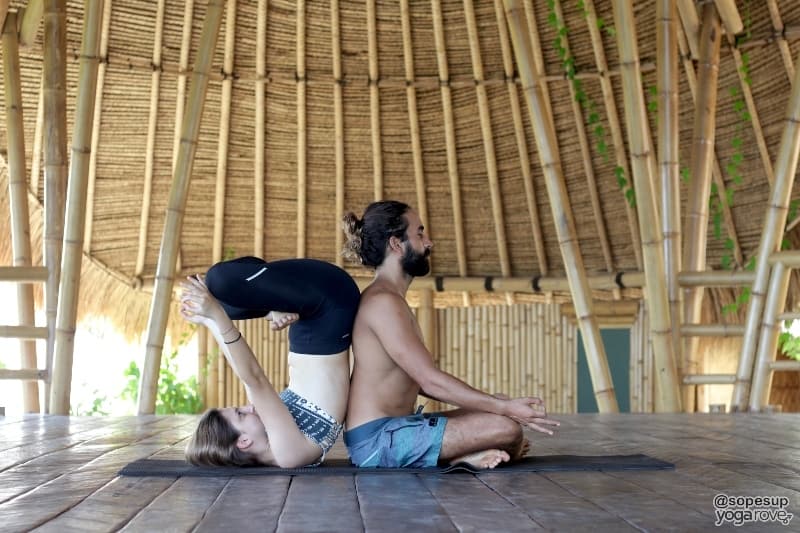
- Begin in easy crossed legged seated pose facing away from your partner, your backs making full contact with each other.
- Press your upper backs press into each other and place your hands on your knees to remind you to glide your shoulder blades down your back away from your ears.
- Notice how when you are making contact with your partner, your breath patterns tend to sync up – use this opportunity to sync in any other way with your partner, whether it’s breathing, talking, or sitting in pure silence.
Benefits:
By using each other as a “wall” to press your back into, you are able to achieve a lengthened spine and straight back.
This posture is a great starting pose for ANY partner yoga practice, as it establishes the comfortable physical connection prior to moving into deeper postures.
*For a more intimate version of this, take this pose to facing each other, and instead of placing your hands on your own knees, place them on your partner’s, and have your partner place his or hers on yours.
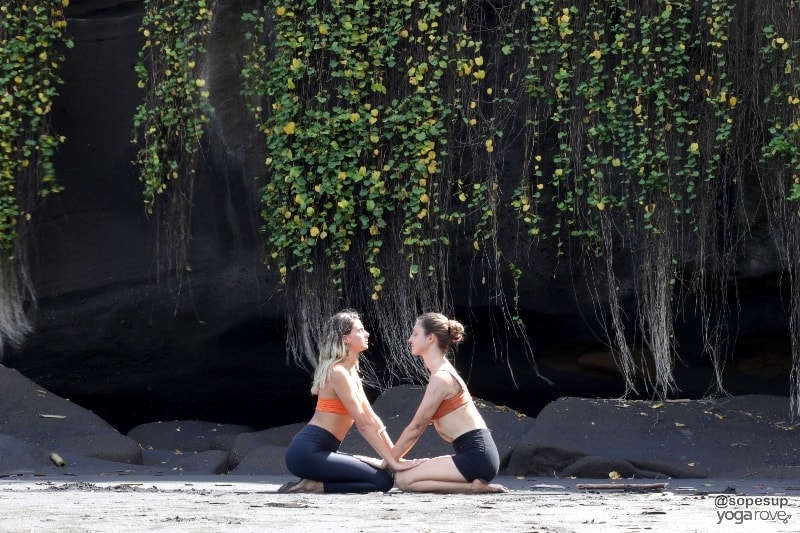
2. Facing Hero
How to:
- Begin in Hero’s pose facing each other, inner thighs touching, with your kneecaps touching your partner’s kneecaps.
- Lean forward, keeping a straight spine, so that you are able to place your hands on the top of each other’s thighs, palms open.
- Press gently into each other’s thighs, but not too much – you do not want to cause knee strain.
- You make keep your eyes closed or increase intimacy and connection by looking into each other’s eyes.
- Begin breathing in unison to establish the same breathing cycle.
Benefits: This is another posture that forms a wonderful basis for a deeper partner practice and is also an excellent posture on its own to establish connection. Try it next time you get in a fight with your significant other – it really does work wonders.
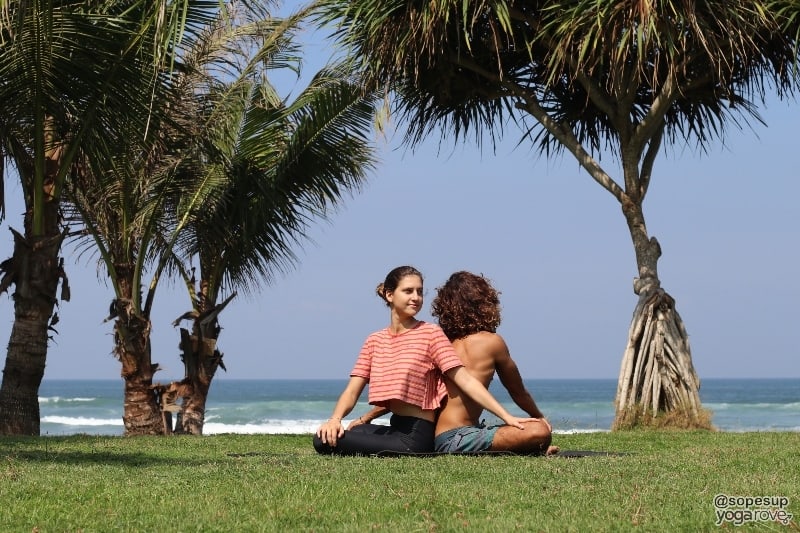
3. Seated Twist
How to:
This twist can be taken in Hero’s pose or easy cross-legged, but whichever one you choose, make sure your partner is in the same pose.
- Begin in easy pose facing away from each other so that your backs are pressing into one another.
- Inhale as you feel your spine grow taller. On an exhale, use your core to twist from the base of your spine to the right – your partner twists to the right as well.
- Place your left hand on top of your right knee and reach your right hand behind you to place on top of your partner’s left knee. Your partner does the same.
- Look over your right shoulder, as if you are looking at exactly what your partner would be looking at if he/she was looking straight forward.
Benefits: In solo seated twisted, we often lose the integrity of a long, straight spine because there is nothing to press against to keep tall – doing this with your back to your partner allows you to have support. Also, the twist is deeper than in solo twist.
4. Double Tree
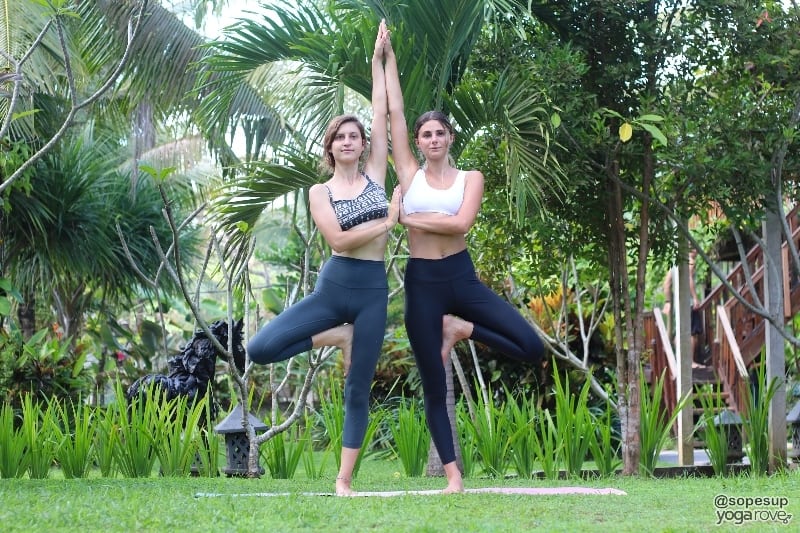
How to:
- Stand hip-to-hip next to your partner, approximately 1’ apart.
- Extend your inside arms up straight to the sky, rotating outward from the shoulder socket so that your palms press into each other.
- Bring your outside hands in front of you as if you are entering prayer mudra, but instead press your outside hand into your partner’s outside hand.
- Before lifting into tree, check in with your structure – though your inside arms are raised, the shoulders should still be gliding away from the ears. Do your best to press evenly through your palms, so that one partner is not leaning further than the other (*tip: do this in front of a mirror)
- Each partner lifts the outside foot into tree (so your inside feet are the standing, supporting legs).
Benefits: Although tree pose alone is a great pose for helping you improve balance, this version of it help you learn to distribute your weight evenly between you and a partner, and also helps you both improve your communication and trust.
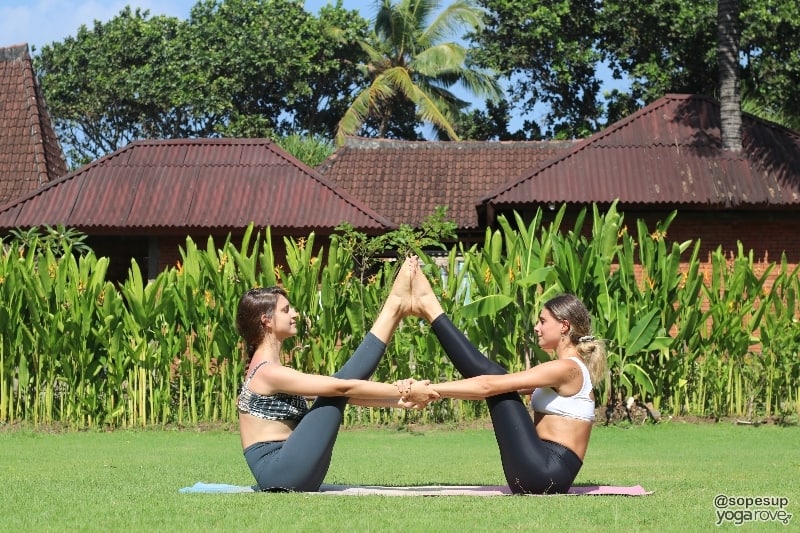
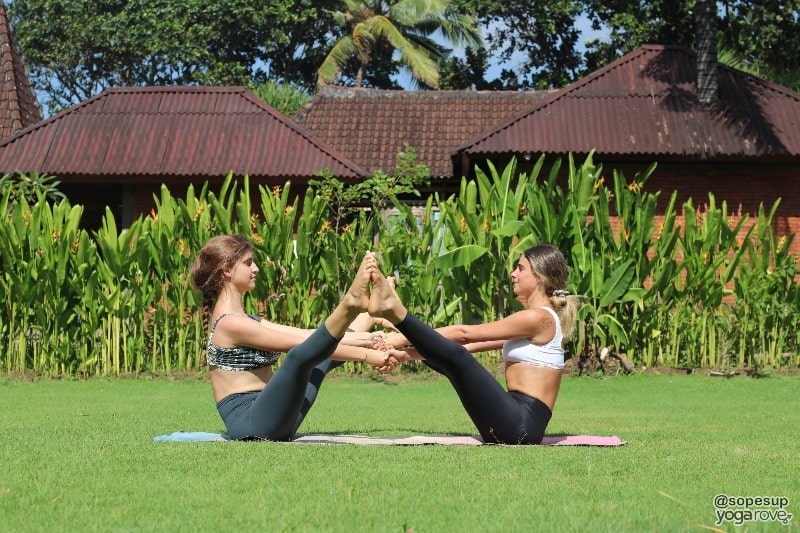
5.One Legged Boat Pose
How to:
- Begin in half hero’s pose with your right knee bent so that your right foot is flat on the mat, and your partner’s left knee is bent with the left sole on the ground to mirror your folded knee.
- Extend your hands in front of you so that you take hold of each other’s hands
- Holding hands, lean back so that you can lift your bent legs off the ground at a 90-degree angle, then press the bottoms of your feet together.
- Engage your core to stabilize the spine, and press your feet upward and together so that you can straighten the legs.
Benefits: Holding each other’s hands to lean back will allow for a wonderful shoulder opening while using opposing forces to get a wonderful hamstring stretch.
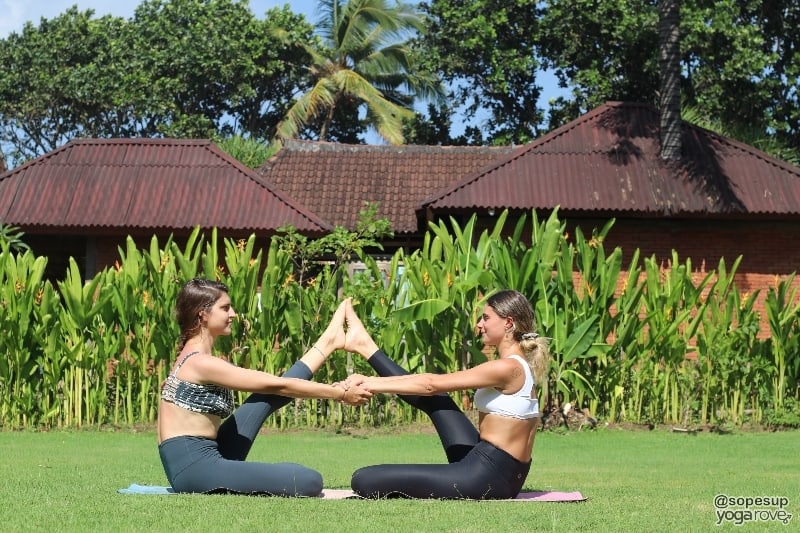
6. Double Boat
How to:
- Begin facing your partner with your knees bent, both feet flat on the mat, your toes touching your partner’s.
- Reach and take hold of each other’s hands.
- Lean back as far as you can without releasing hands, and bring your right foot (partner’s left foot) off the mat so that your legs are at a 90 degree angle. Press the soles of your feet into each other.
- Once stable here, lift the second foot off the mat and press the soles of your second feet into each other – you will now be holding hands with both (all four) legs off the ground, both soles of your feet pressing into your partner’s soles.
- Engage your belly button and lift the spine tall as you straighten your legs in unison with your partner, so that you are both in boat pose, feet pressing into each other.
Benefits: If you have difficulty in regular boat pose because you don’t have the core strength to hold it, this pose is an excellent option – it does not require as much strength, and it also will not stress your hip flexors.
7. Standing Shoulder Stretch
How to:
- Begin standing, facing your partner at arm’s length distance. Extend your arms forward so that your fingertips touch. (Note: this is a starting point, but you may need to walk yourselves closer or further away from each other.)
- Extend your arms straight overhead. Rotate the arms outward so the palms face forward toward your partner.
- On an exhale, begin to fold forward. Once you are at a 90-degree angle, where your torso is parallel to the ground, place your hands on your partner’s back, face down.
- Your head is in line with your spine, eyes gazing at the ground. If the crowns of your heads are crunching together, step a few inches back. If the crowns of your heads are more than 1 foot apart, step closer together.
- Allow your palms to press into each other’s backs to gently facilitate shoulder opening.
Tip: if you are fearful of falling over or having trouble balancing, try this pose with one partner about 1’ from the wall, so there is a wall to push back into if you are losing balance.
Benefits: This is a gentle shoulder opener – it’s similar to puppy-dog pose, but a little less intense.
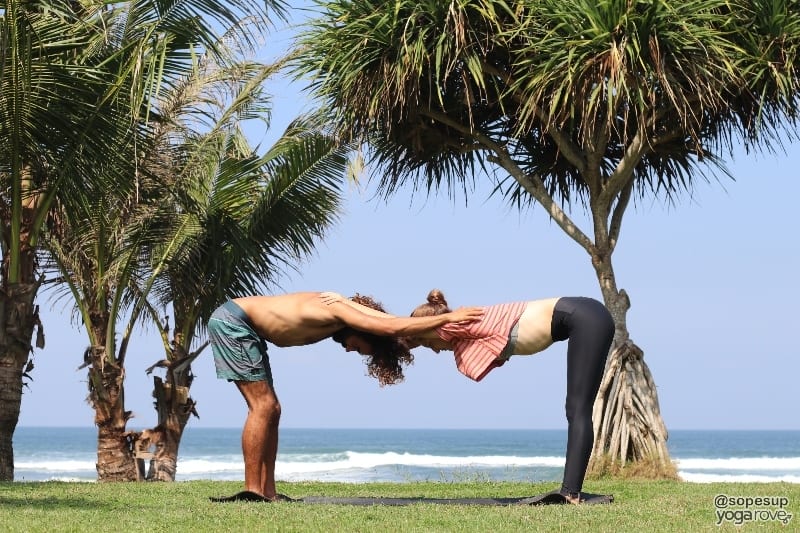
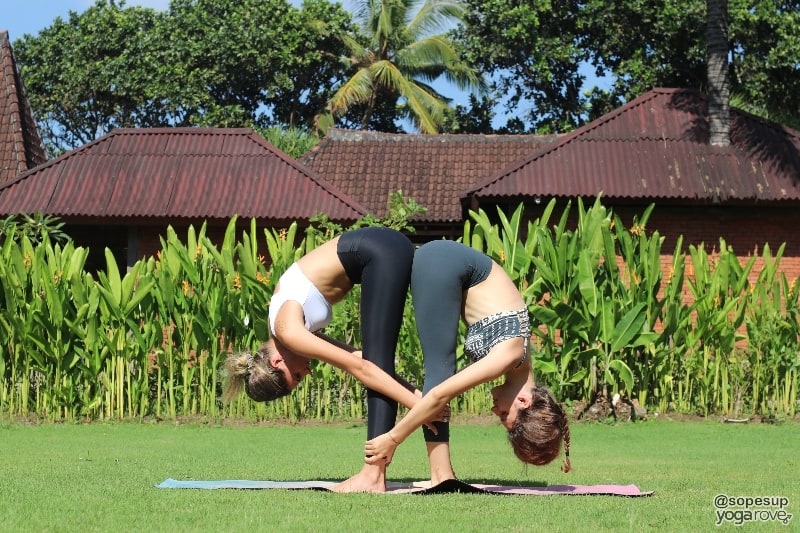
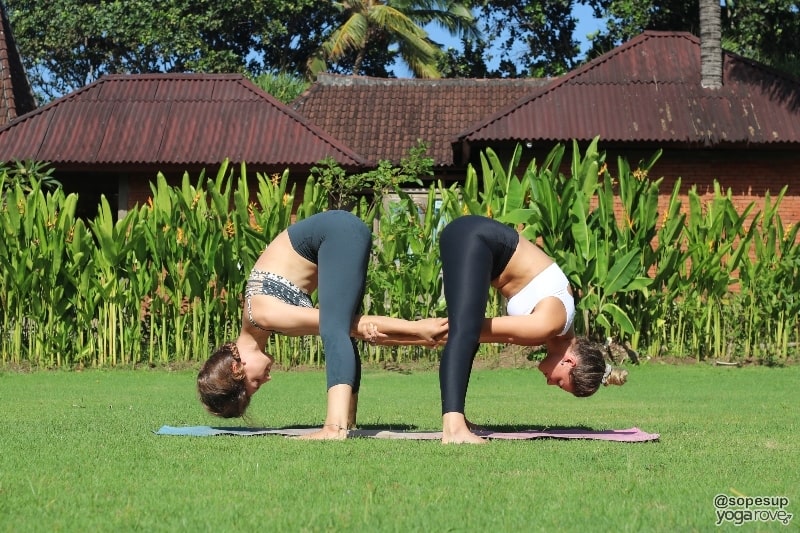
8. Standing Forward Fold
How to:
- Begin standing, facing away from your partner, with your heels about 6” apart (do not stand with your heels touching – when you fold forward, your hamstrings and backside move back slightly).
- Fold forward. Reach your hands behind your legs to take hold of the front of your partner’s shins.
Benefits: This is an excellent way to deepen your forward fold without fear of falling over – because your partner is holding you!
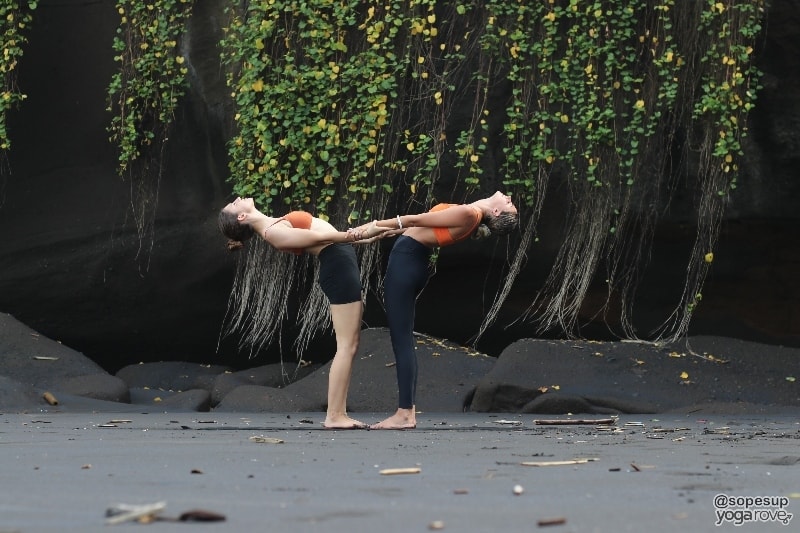
9. Supported Backbend
How to:
- Begin standing, facing your partner with the tips of your toes touching. If your lower back is tight, stand with your feet hips’-width apart; if you have a flexible back, stand with your feet together.
- Take hold of your partner’s forearms.
- Inhale as you lift upward, and exhale as you bend backward – imagine your back bending backwards over a large beach ball, rather than just folding backward, to keep from crunching your lower back.
- If the back stretch is not deep enough, you can walk your hands closer to each other’s wrists to deepen.
Benefits: Without support, we often “crunch” our lower spine in backbends, so we don’t reap the benefits. Additionally, sometimes we hold ourselves back from entering a deeper expression of backbends out of fear of falling or lack of strength – this support allows you to enter the pose without fear.
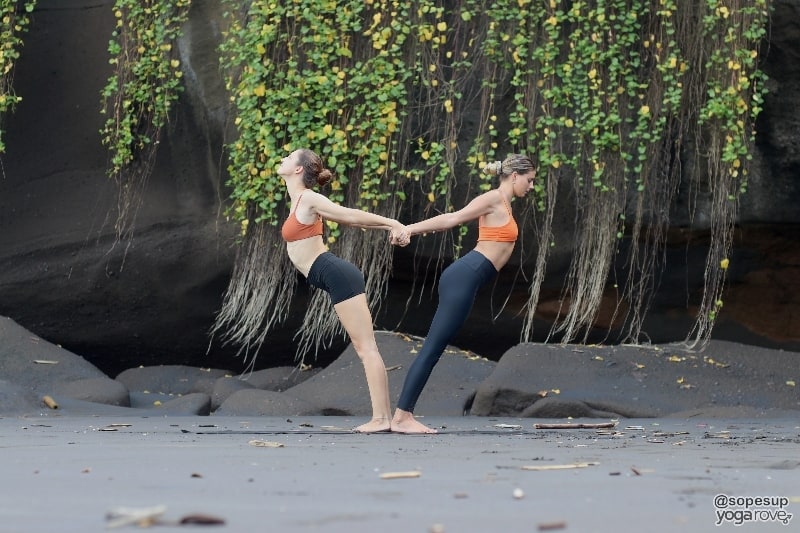
10. Backbend Balance
How to:
- Begin standing, facing away from your partner, feet hips-width apart, backs of your heels touching.
- Reach to take hold of your partner’s hands so that your inner elbow is pointing forward. Make sure your grip is strong!
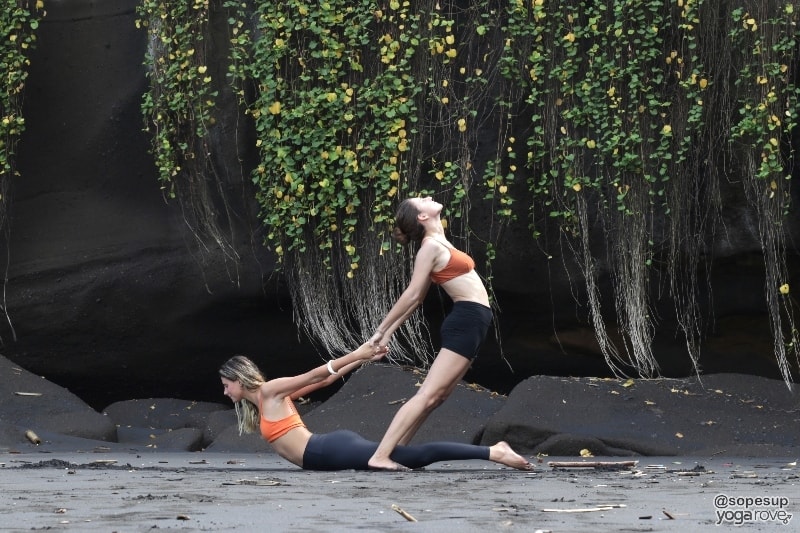
- Gently begin to lean forward, so partners are pulling away from each other, to open the chest.
Benefits: This partner backbend is a gentle assist to open your chest to allow for more flexibility in the upper back. It will open your heart and throat chakras right up, which improves communication and intention.
11. Wide Legged Standing Forward Fold
How to:
- Begin standing, facing away from your partner, about 2’ apart.
- Stand with wide legs – if you extend your arms outward so that they’re parallel to the ground, your ankles will line up with your wrists.
- Fold forward completely – let the head hang heavy.
- Reach to take hold of your partner’s arms – you will be holding near their bicep. It’s okay to be a little higher or lower, as long as you are not holding directly on the shoulder or elbow (never put pressure on joints!)
- Release any tension from the head – let the weight of your partners’ hands on your arms assist you in going deeper. Bonus points if you make silly faces at each other!
Benefits: You know that really amazing feeling when you’re in standing forward fold and you take hold of opposite elbows? This is kind of like that, only better, and with a little more stretch for the hamstrings!
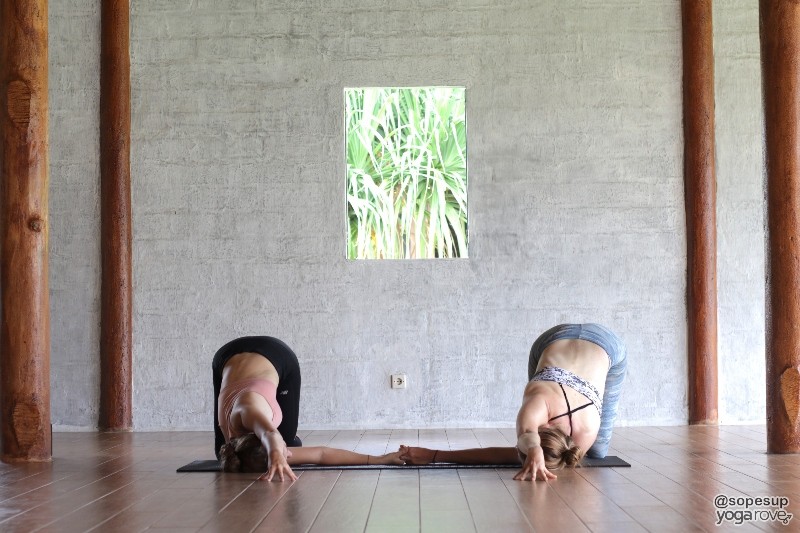
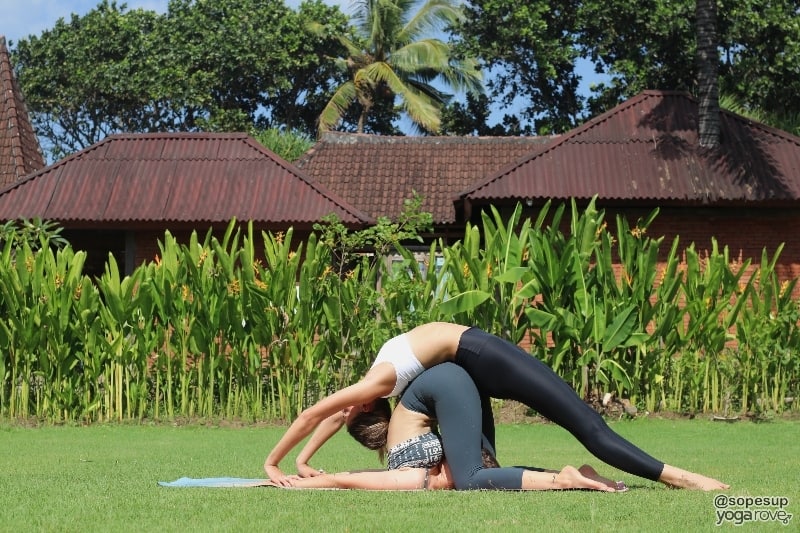
12. Thread the Needle
How to:
- Begin in tabletop position, a little closer than arms length to your partner. A good place to start is to extend your inside arms toward each other; move as close as you need to be to touch each other’s forearms.
- Slide your outside arm underneath your inside arm with your palm facing up. Let your outside shoulder come all the way down to the mat as you turn your head toward your partner and rest your ear and cheek on the mat.
- Walk your inside arm forward so that it’s extended over your head, palm pressing into the mat.
- Take hold of your partner’s hand that’s on the floor.
- Do not press your weight onto your head; instead, adjust your position so you do not strain your neck or shoulder, using your partner’s grip to deepen the shoulder stretch.
- Let your upper back broaden. Hold for 6-8 breaths. Unclasp the hands to rise back to tabletop, then turn around to repeat on the second side.
Benefit: This is a resting posture that gives you the opportunity to sync up breathing patterns with your partner to either start your practice, take a break, or on its own.
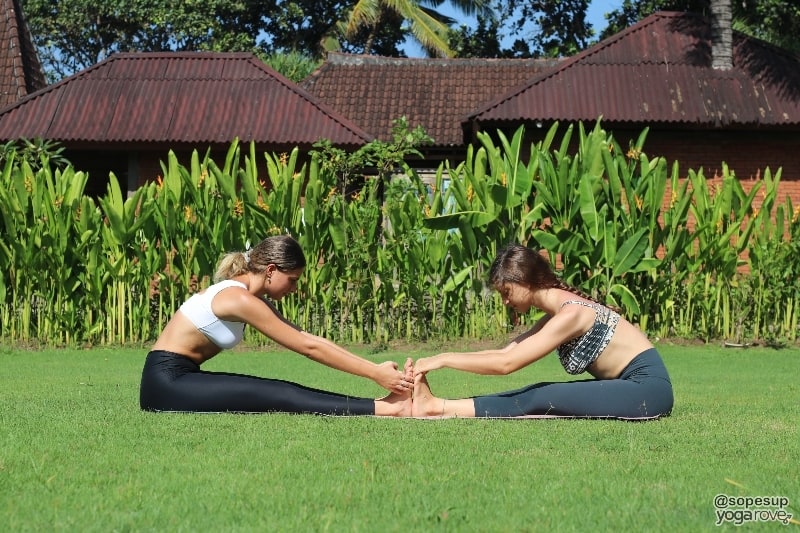
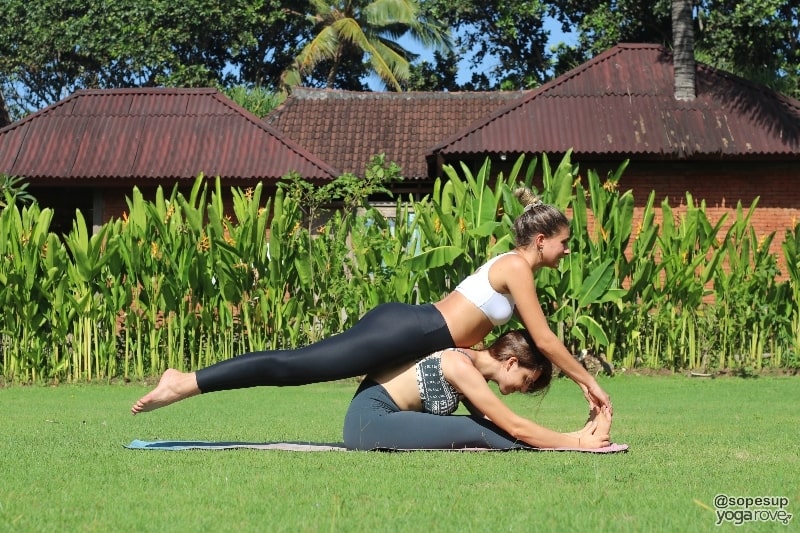
13. Seated Forward Fold
How to:
- Begin in staff pose, seated on the mat, legs extended long in front of you. Flex your feet so that the soles of your feet are touching.
- Lean forward with a straight spine, then allow your head to fall completely forward as you take hold around the back of your own feet to hold onto your partner’s feet.
Benefit: Even if you don’t fold all the way forward or cannot touch your feet, this partner assist can get you into a deeper stretch than doing it alone.
14. Reverse Warriors
How to:
- Begin in Warrior II, facing away from each other. The outside edge of your back feet will be touching each other.
- Maintain the integrity of Warrior II. Keep the front knee bent at a 90-degree angle, tracking directly over the middle of the front foot.
- On an exhale, extend your front arm upward and backward as you slide your back arm down the back leg to place on the back of the thigh.
- With your top arm, reach for your partners hand.
- Together, lift your clasped hands upward.
Benefits: Joining hands with your partner allows you to both lift higher, upward, and outward from the hips in Warrior II, so that you create more space along the front side body without crunching the lower spine.
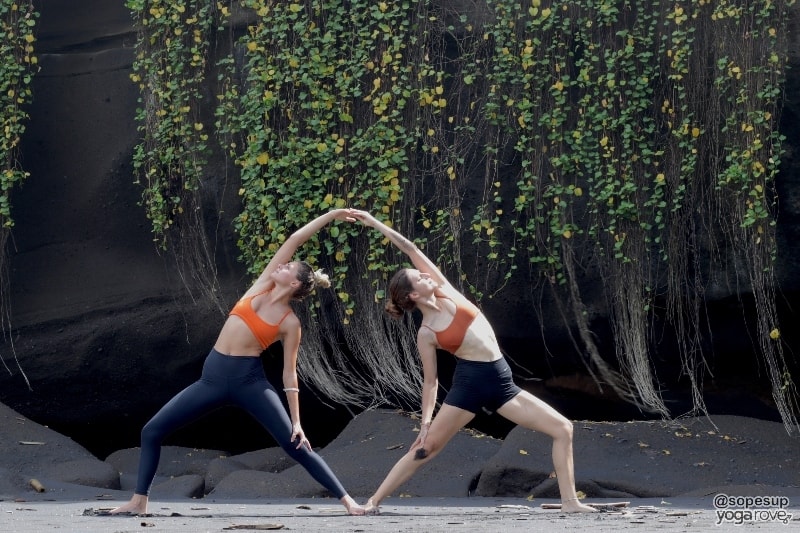
15. Extended Side Angle
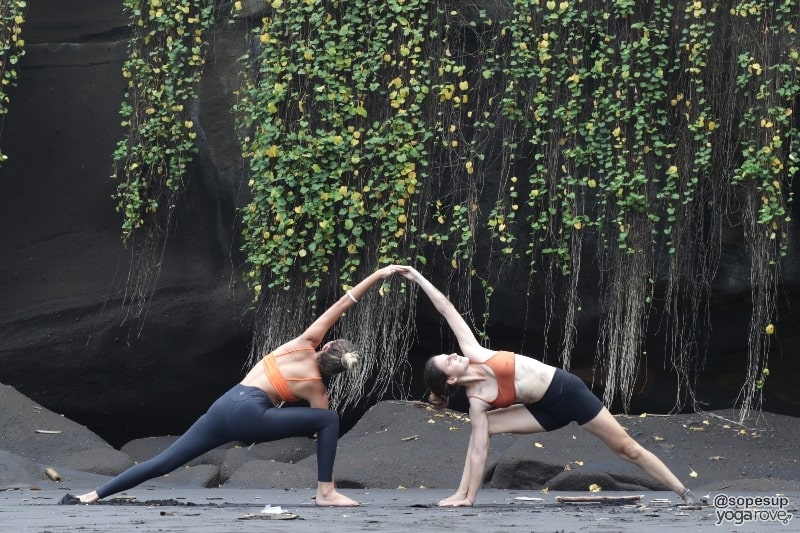
How to:
- Begin in Warrior II, facing each other, with the same foot forward (if you have your right foot forward, your partner will have their right foot forward). When you extend the arms outward, your front fingertips should be touching (you may have to move closer or further, but this is a good starting point).
- Without changing the setup of your legs, bring the front palm to the mat directly inside of the front foot to enter extended side angle.
- Reach your top arm overhead to take hold of your partner’s; your grip will be at the forearm.
- Use your partner’s grip to lengthen the side body as you rotate your torso upward.
Benefits: Similar to partner Reverse Warrior, this partner Extend Angle allows you to gain extra length without sacrificing the integrity of the lower spine. The grip also acts as an anchor that aids in twisting the torso further.
Note: If the inside palm can’t reach the floor, it’s completely fine to use a block, or both partners can place the inside forearm arm on top of the inside thigh instead of bringing the hand all the way to the ground.
16. Wide Legged Boat Pose
How to:
- Begin facing your partner with your knees bent feet wide apart, both feet flat on the mat, your toes touching your partner’s.
- Before doing anything – visualize this: you’re going to take Happy Baby Pose, seated upward, with your feet pressing into your partner’s, then straighten the legs.
- Reach inside your legs to take hold of your partner’s hands.
- Lean back to lift both feet off the mat, taking your legs into an approximate 90-degree angle, so that you can press the soles of your feet into the soles of your partners.
- Engage the core to stabilize as you straighten your legs into straddle.
Benefits: This is a fun way to test your balance, while holding onto your partner’s arms or hands demands that your shoulders release tension (we often clench our chest and shoulders up when we’re in strengthening poses such as Boat).
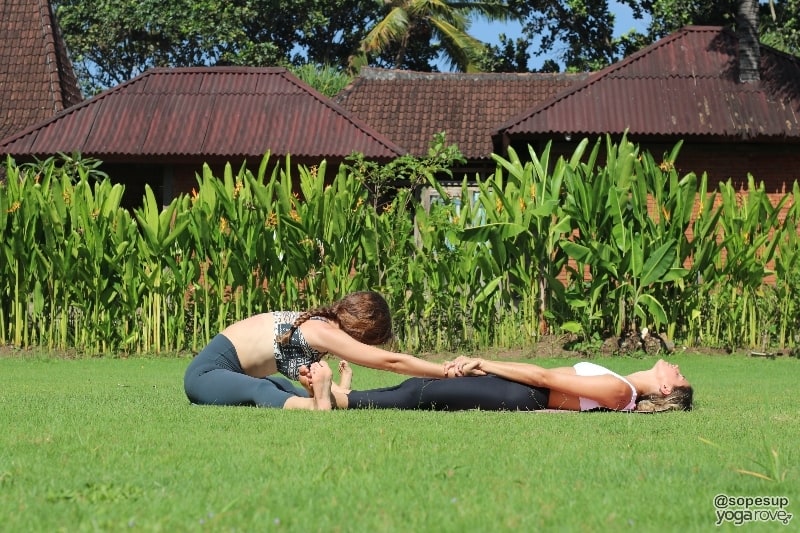
17. Seated Wide Legged Forward Fold
How to:
- P1 begins in a straddle as wide as available for that person. P2 sits in straddle with the legs a little closer together, so that P2’s soles press against the inside of P1’s calves.
- Partners take hold of each other’s hands as P2 leans backward in order to pull P1 forward.
- If possible, P2 will lean all the way back until lying on the ground.
Benefits: This is a personal favorite, as I’m guilty of not pushing myself as far as I can go in my straddle splits (AKA seated wide legged forward fold). Sometimes all you need is a little push (or in this case, pull) to access your deepest potential. Remember, there is a difference between stretching and straining, so ease into this and don’t push yourself further than you’re comfortable.
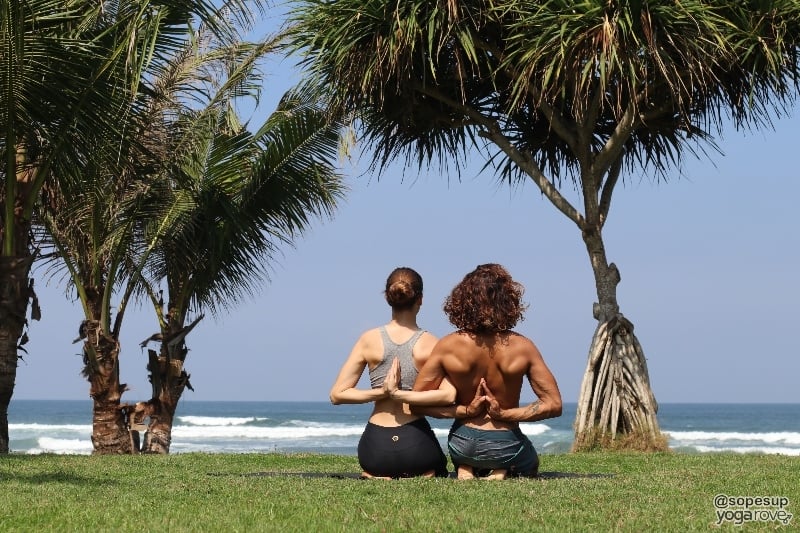
18. Intertwined Reverse Prayer
How to:
- Begin in hero’s pose directly next to each other so that your quads are touching.
- Extend your arms to the side (mindful of your inside arm – don’t whack your partner!) and rotate the triceps forward so that your palms face away from you.
- Inside arm: P1 (shorter person, if possible) brings inside arm below; P2 (taller person, if possible) brings above.
- Bend arms at the elbow so the palms meet behind your back in prayer, with the inside arms hooked.
- Glide the shoulder blades away from the ears as you press your palms into each other to open the collarbone.
Benefits: Hooking into your partner’s arm allows for a deeper shoulder and collarbone stretch. Remember to turn around and switch sides so that both sides are even!
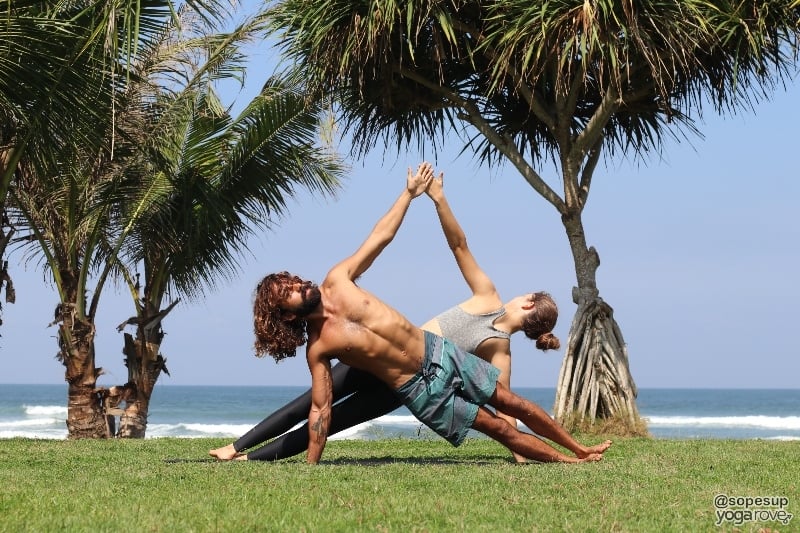
19. Double Side Plank
How to:
- Begin in preparation for side plank facing away from each other (approximately 6-12” apart), “tops to toes” – P1’s feet will line up with P2’s wrists.
- Press into the bottom hand to lift into plank as you extend your top arm diagonally upward to meet your partner’s.
- Gaze toward your fingertips.
Note: if you have wrist injuries, this pose can be taken in forearm plank instead
Benefits: Side plank is one of those poses that my students always groan about when having to hold for too long– sometimes having someone there with you just makes it easier to focus and motivates you to hold it longer!
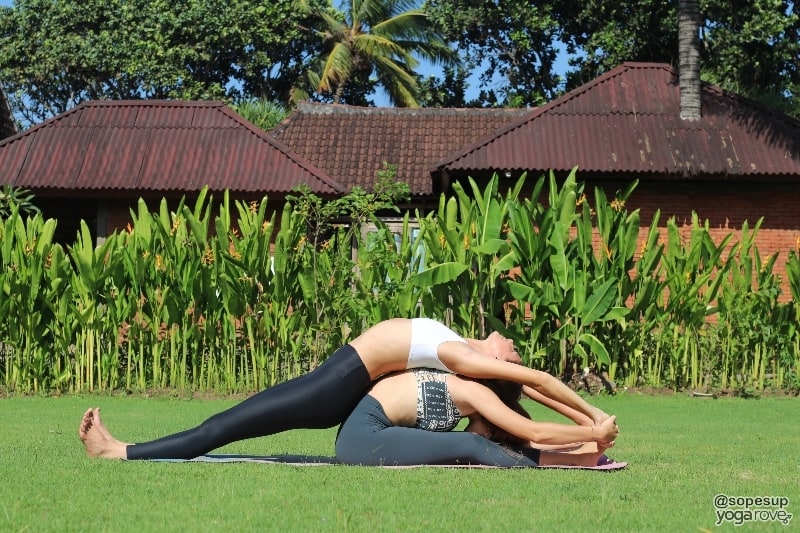
20. Seated Forward Fold and Supported Backbend
How to:
- Begin in staff pose, facing away from each other, entire backs touching, legs straight out in front of you.
- Extend the arms upward and take hold of your partner’s hands.
- P1 hinges forward into seated forward fold, keeping hold of P2’s hands.
- As P1 folds forward, P2 stays “glued” to P1’s back, allowing for upper body to expand and chest to open.
- P2 can gently push into the floor with heels to provide more pressure to P1, or to adjust position if necessary.
- Breathe – this is a deep pose for both parties.
- Gently rise to seated, and repeat for second person. This is commonly turned into a flow: inhale to seated, exhale to fold over P1; inhale to seated; exhale to fold over P2 – give it a try!
Benefits: P1 gets a gentle assist deeper into forward fold while P2 gets a lovely release in the lower spine as the heart opens. Visualize releasing anything your heart no longer needs to hold onto, allowing space for wonderful new things to enter.
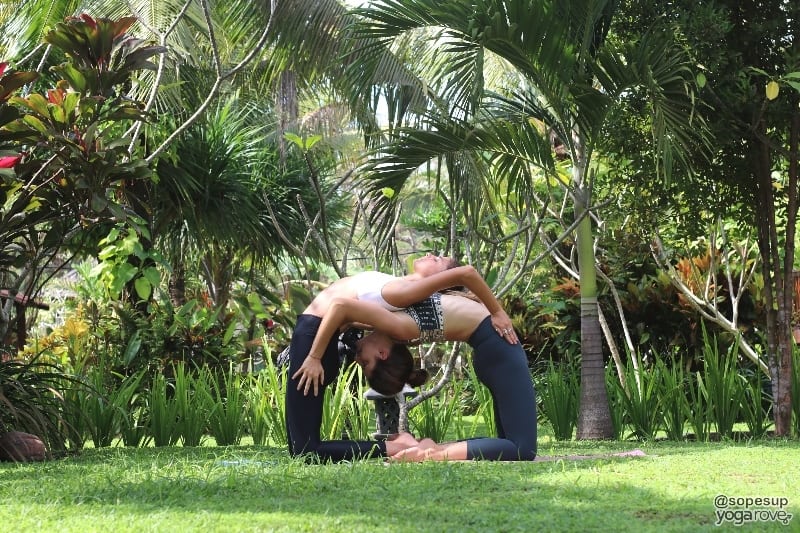
21. Double Camel
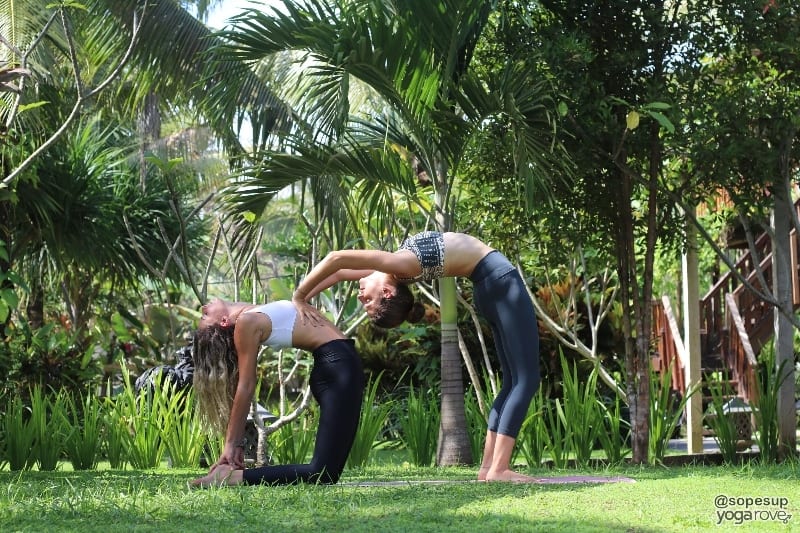
How to:
- Begin on shins facing away from each other, prepared to enter Camel. If you have a less flexible back, get closer to your partner so that your feet line up with your partner’s ankles. If you are very flexible, you can simply be touching toes.
- P1 leans backward into Camel, but instead of reaching for their ankles, reaches for the back of P2’s thighs.
- Once P1 has folded backward, P2 reaches overhead to take Camel, gently resting the back of the head on P1’s chest, with palms falling around P1’s hip area.
Benefits: This pose is great for working toward forearm bridge – you don’t have to worry about going too deep and harming yourself because your partner is literally there to stop you from going too far!
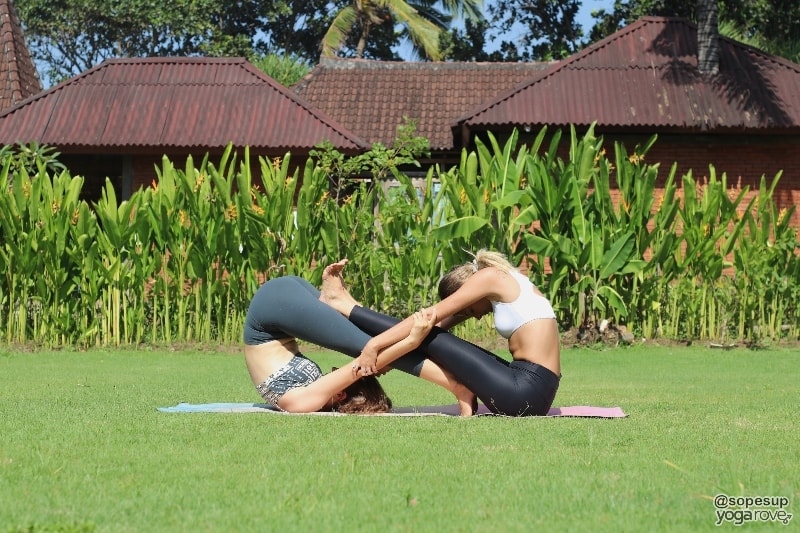
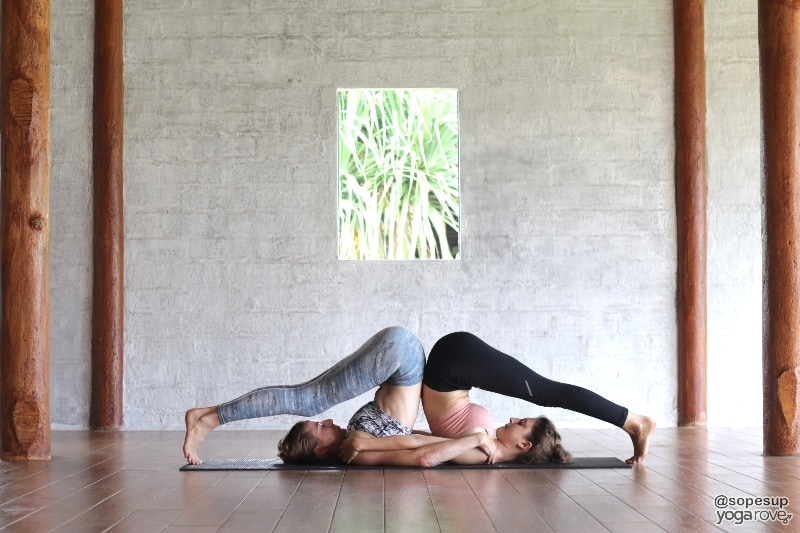
22. Plow and Seated Forward Fold
How to:
- P1 begins in Plow Pose with arms extended overhead toward the toes. Tuck the toes so they are pressing into the mat.
- P2 sits directly in front of P1’s feet (which are folded overhead into plow) and bends the legs so that soles of the feet rest on the mat.
- P2 takes hold of P1’s hands, leaning back to allow space to lift the legs off the mat and extend them on top of P1’s legs.
- P1 & P2 walk hands up each other’s arms to deepen the stretch.
Note: P1 is NOT to turn the head at any time! This can cause severe injury to the neck.
Benefits: Super cool picture in the sign of an infinity symbol! But, aside from being a great picture, it’s also a great hamstring stretch!
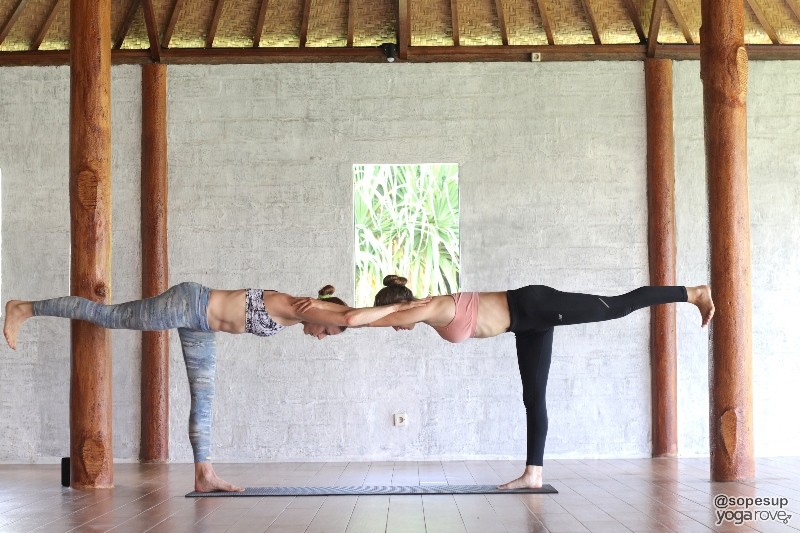
23. Unsupported Warrior III
How to:
- Begin in Standing Shoulder Stretch (#7).
- Partners lift opposite legs to be parallel to the floor, knees and toes facing toward the mat. (P1 lifts left leg up to Warrior III; P2 lifts right leg up to Warrior III – you can try lifting the same leg, but this will make balancing difficult).
Benefits: Because this pose requires both parties to be in proper alignment in order to achieve balance, it gives you a chance to tune into the alignment cues we often neglect in Warrior III: hips square to the ground, back toes pointed toward the mat, shoulders square, and gaze down at the mat. Partner yoga is great for reminding yourself of the basics.
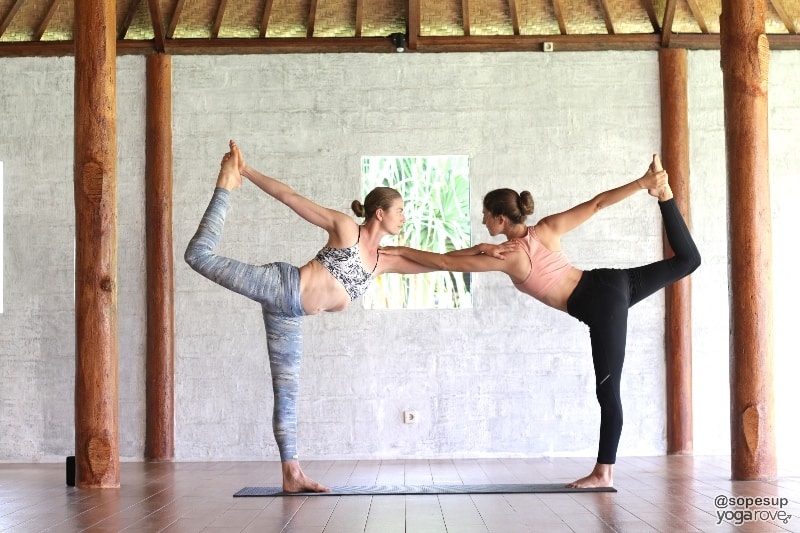
24. Double Dancer
How to:
- Begin facing your partner a little less than mat’s distance apart. You can have the same leg front or opposing legs – it doesn’t matter. For reference, in this photo, P1 has their left foot in front and P2 has their right foot in front.
- Extend your front leg arm upward as you take hold of the outside of your back ankle into Dancer’s Pose.
- Bring your front arm forward to rest on top of your partner’s, palms will be at the top of the shoulders.
Benefits: A partner provides a little helping hand when it comes to balancing. Because your arms are intertwined in the pose, you may find that you’re able to hold it significantly longer, and therefore are able to push deeper into the pose.
25. Supported Backbend and Ear Pressure Pose
How to:
- P1 begins in plow pose with arms extended on the mat in the opposite direction of the feet. Palms face downward.
- P1 bends knees to bring them to the ears, bringing the shins and tops of feet to rest on the ground.
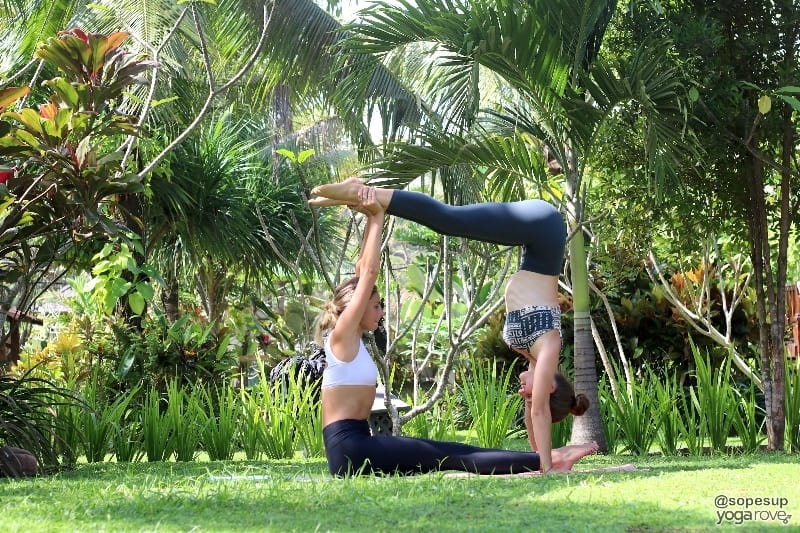
- P2 takes Handstand, Tripod Headstand, or Pincha Mayurasana, placing the palms (or forearms) inside of P1’s arms (fingertips will be facing toward P1, once inverted, P2’s head will face away from P1’s back).
- P2 gently arches back to bring the legs back and over P1’s bottom, as if exiting the inversion into Bridge.
- Once P2’s lower back is placed on top of P1’s tailbone, P2 extends legs to press soles of feet into the ground.
- If available, P2 lifts hands and places them on top of P1’s forearms.
Note: This is an advanced posture that only be attempted if P2 is capable of holding an inversion and releasing back into Bridge from the inversion, and if P1 is capable of bringing the shins to the floor – if P1 cannot reach shins to floor independently, entering this pose can cause serious injury to the back and neck.
Benefits: P2 gets an incredible frontal body opening while P1 gets a deep shoulder and spine release.
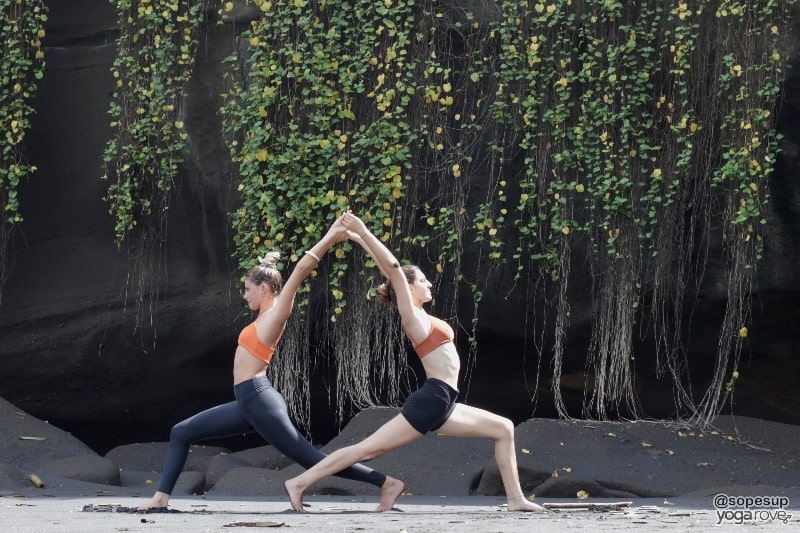
26. High Lunge with Backbend
How to:
- Begin in High Lunge facing away from each other, back foot in line with your partner’s back knee.
- Extend the arms upward to the sky as you backbend gently to reach for your partner’s hands.
Benefits: Expands the heart space and allows you to deepen into your lunge. Experience heart and throat opening as you ground your feet into the earth.
27. Seated Forward Fold and Lifted Locust
How to:
- P1 begins in Seated Staff, legs extended straight out in front.
- P2 stands on shins, front body pressing into P1’s back.
- P1 & P2 extend arms upwards to the sky and grasp hands.
- P1 folds forward, keeping hold of P2’s hands.
- Once P1 is folded forward, P2 extends legs straight backward, and takes hold of the soles of P1’s feet with hands.
- If available, P2 engages the core and glutes to lift the feet off the ground.
Benefits: P1 enjoys a deep assist into Forward Fold while P2 has an opportunity to strengthen Locust and literally feel like their floating in air!
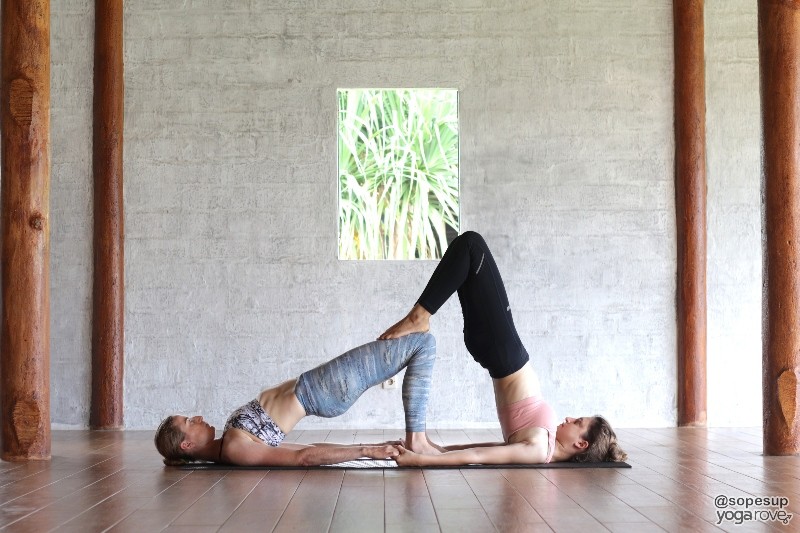
28. Bridge and Supported Shoulderstand
How to:
- P1 begins in preparation for Bridge, hands reaching to heels.
- P2 takes Bridge Pose with shins inside or outside P1’s. P2 extends arms to take hold of P1’s hands
- P2 presses the triceps into the mat to lift the hips enough to place the soles of the feet on top of P1’s thighs, directly above the knees.
- As P2 presses soles of feet into P1’s thighs, P1 lifts up to bridge pose.
Note: P2 can stretch further by walking the torso closer to the knees (toward P1) and lifting the hips further up, and you can even lift the up and back into Plow Pose.
Benefits: Supported Shoulderstand provides the benefits of an inversion but is a great option for anyone who is wary of attempting a full inversion. In addition, pressing into the top of the partner’s thighs allows the person into Shoulderstand to experience a release in the lower back that otherwise would not occur in standard Shoulderstand.
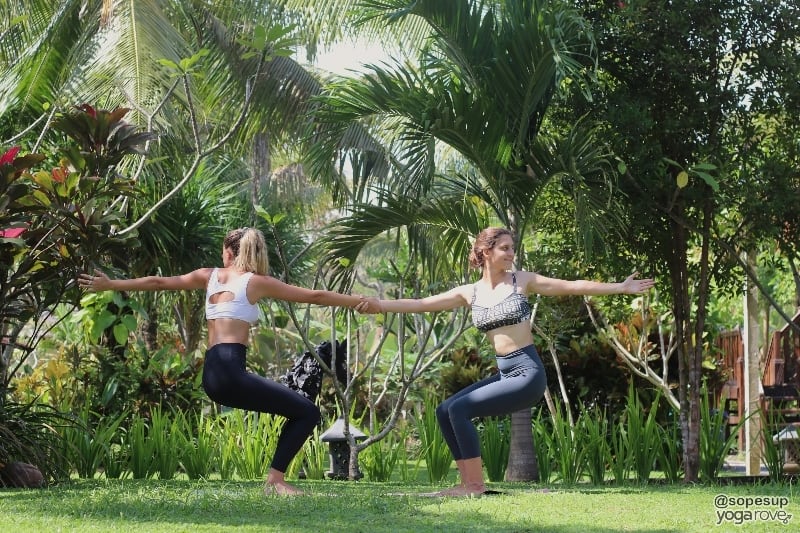
29. Twisted Chair Pose
How to:
- Begin in Chair, facing each other, at a distance so that when you extend your arms forward, you are able to grasp hands tightly.
- Take hold of each other’s right hand as you twist the torso to open to the left and extend the left arm behind you.
Benefit: Gripping your partner’s hand allows you to shift what would normally be your center of gravity backward so that you can bring your shoulders directly over your hips without falling backward (unlike regular Chair Pose, where your torso must lean forward to counterbalance). As a result, you’re able to access a deeper core twist while opening your torso more easily than when you’d normally have to be exerting your energy and strength maintain Chair. You can turn this into a more strengthening move by practicing moving in and out of squats in tandem.
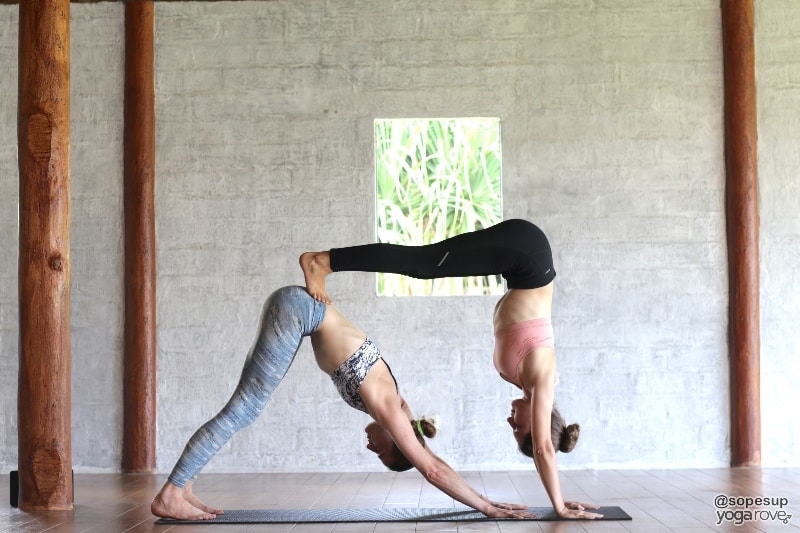
30. Downward Facing Dog and Supported Handstand
How to:
- P1 begins in Downward Facing Dog
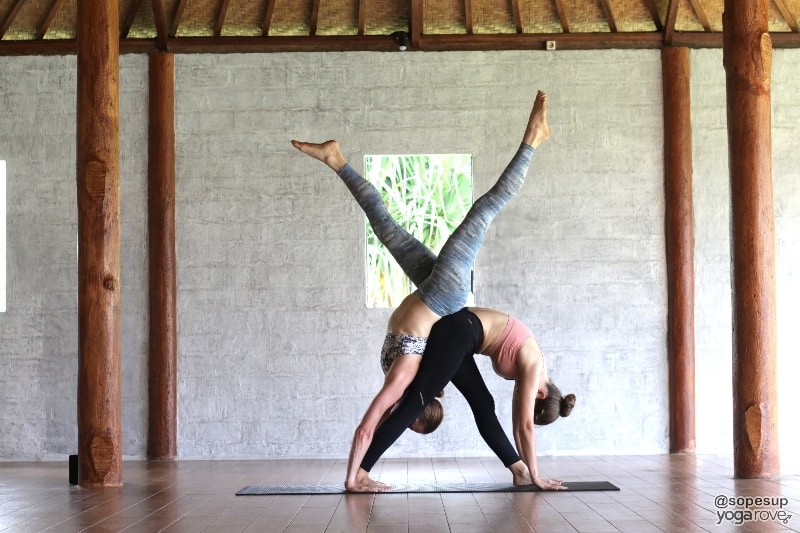
- P2 enters Downward Dog by placing palms on mat at shoulder-width’s distance approximately 1’ from P1’s hands and folds forward.
- P2 shifts torso weight upright over palms as she puts 1 foot (starting with just the toes) on the sacrum of P1’s back. P2 brings the 2nd foot to P1’s tailbone, then uses this support to press into Pike, aligning her hips over her palms in Handstand.
Benefits: The down-dogger gets an assist to deepen the dog and reach the heels to the floor, while the handstander has the opportunity to strengthen the shoulder girdle for Handstand with support.
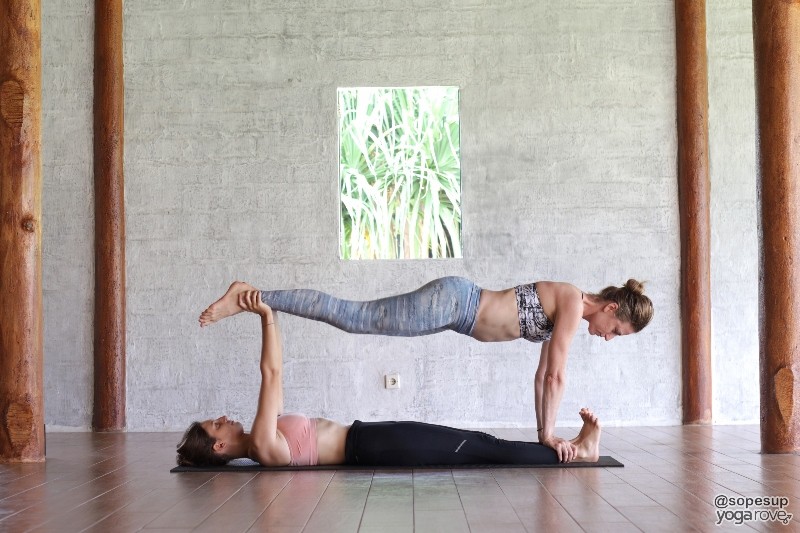
31. Lifted Plank
How to:
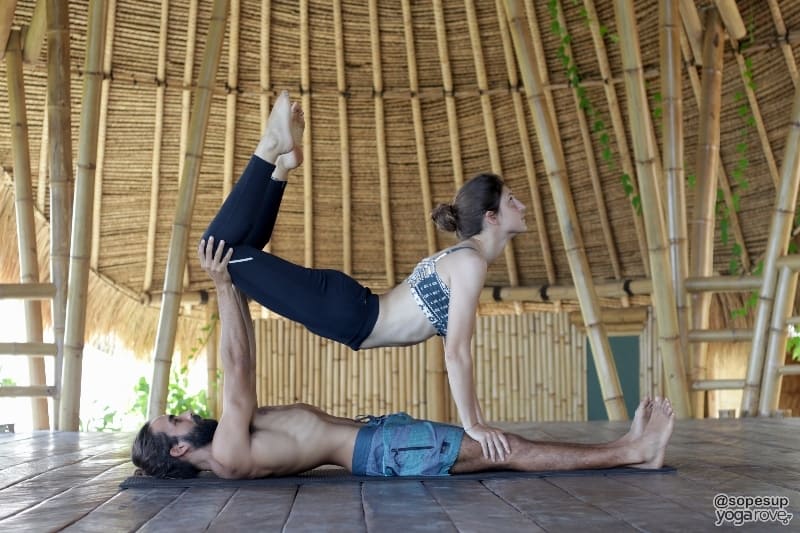
- P1 begins lying flat on the floor, arms bent with palms upward as if entering Chaturanga – elbows glue to the side body.
- P2 begins in plank with the hands placed on top of P1’s shins.
- One at a time, P2 places the top of the shin onto P1’s hands.
- P1 takes firm (but not too firm) grip of P2’s ankles and presses upward while P2 engages core to maintain straight Plank. (Tip: P1 should visualize pressing P2’s ankles upward as if pressing the floor away in a push-up)
Benefits: Major strength training! Who needs CrossFit or weightlifting when you can practice this?!
32. Assisted Standing Backbend and Cobra
How to:
- P1 begins lying face down; P2 stands facing away from P1, feet outside of P1’s thighs.
- P1 extends arms upward behind their back as P2 bends at the knees to reach behind the back to take hold of P1’s hands.
- P2 straightens legs and pushes the pelvis forward, pulling P1’s torso off the ground.
Benefit: Backbends for all! Both partners get a wonderful back stretch, working in unison to provide support for each other. This is an incredible heart-opening pose that will leave you feeling joyful and exhilarated.
33. Staff Pose and Supported Handstand
How to:
- Begin in Lifted Plank (#31) with P2’s palms on the mat instead of on top of P1’s shins.
- On an exhale, P1 & P2 engage core to provide the power for this pose: P1 rises to Seated Staff as P2 Pikes up so that the hips are directly in line over the shoulders and hands.
- To exit, P1 rolls down.
Benefits: This is a partner power move – both positions require a ton of strength – the base gets a great ab workout while the flyer is able to strengthen proper form and alignment for Handstand. Flyer can try extending one leg (or both legs) to the sky to enter Handstand!
34. Double Child’s Pose
How to:
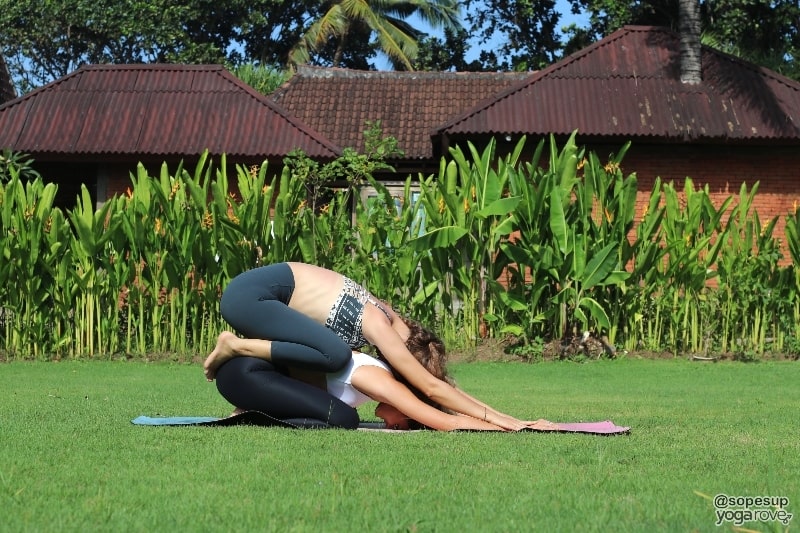
- P1 begins in Hero’s pose. P2 stands directly behind P1, so P1’s back is touching P2’s front body
- P1 extends arms upward as P2 gently squats to take hold of P1’s hands
- P1 begins to lean forward into Child’s Pose as P2 squats deeper down in order to touch the torso to P1’s back.
- Once folded forward, P2 brings one foot off the floor at a time, bending at the knee so that the inner thighs rest on the outside of P1’s ribcage and the tops of the toes rest on P1’s tailbone.
Benefits: This variation of Child’s Pose provides a deep assist for P1 and a feeling of close, comfortable intimacy between both partners. It elicits the safe space of what an embryo feels in its mother’s womb.
35. Double Plow
How to:
- Begin in Bridge & Supported Shoulderstand (#28). From Supported Shoulderstand, P2 lifts hips upward and overhead into Plow.
- P1 shifts the torso closer to P2, then lifts one foot at a time to place on P2’s tailbone, entering Supported Shoulderstand (the pose that P2 was originally in) – P2 skootches as close as possible to P1, then lifts hips upward and overhead into Plow.
- Partners lower backs will be pressing into each other. Place your hands on each other’s shoulders.
Benefits: One of the most common mistakes in Plow is allowing the back to “stegosaurus spine” (that’s the dinosaur with the rounded back, with all the spikes); practicing this with your partner allows you to press into each other to correct the rounded spine, all while getting a nice, deep stretch.
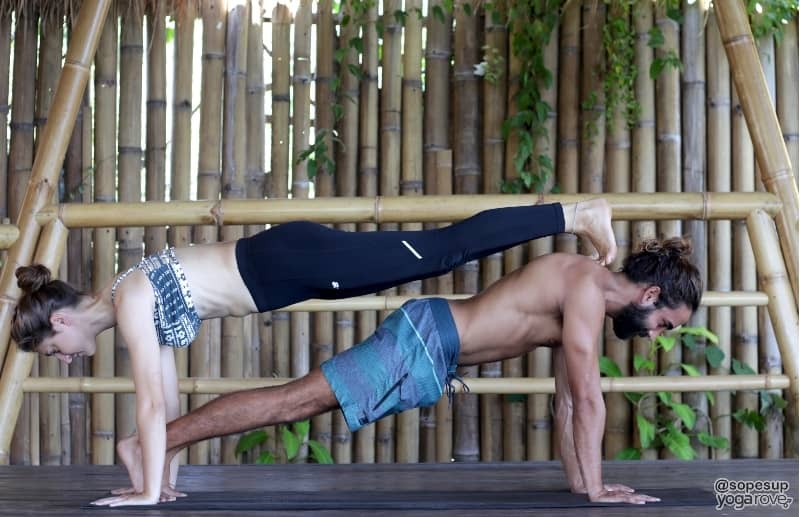
36. Double Plank
How to:
- P1 begins in Plank
- P2 enters Plank facing away from P1, hands directly outside of P1’s ankles.
- One foot at a time, P2 places the toes on P1’s shoulders.
Benefits: These are power planks! The flying planker must stabilize the core because the feet are not on solid ground anymore, while the base planker is supporting more weight than solo Plank. Step it up a notch by attempting push-ups in unison!
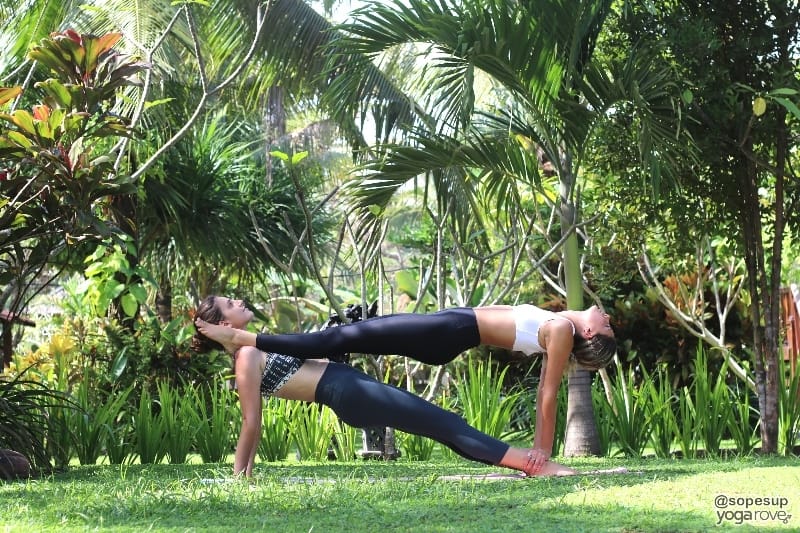
37. Double Reverse Plank
How to:
- P1 begins in Reverse Plank.
- P2 begins in Reverse Tabletop, placing the hands on top of P1’s ankles.
- One foot at a time, P2 places the ankles on P1’s shoulders, lifting the hips up to enter Floating Reverse Plank.
Benefits: Similar to Double Plank, adding a partner to Reverse Plank requires the flyer to stabilize more (losing all solid ground in this pose) and requires the base to support more weight than solo Reverse Plank. Partner yoga is not all relaxation – it’s intense strength training when you want it to be!
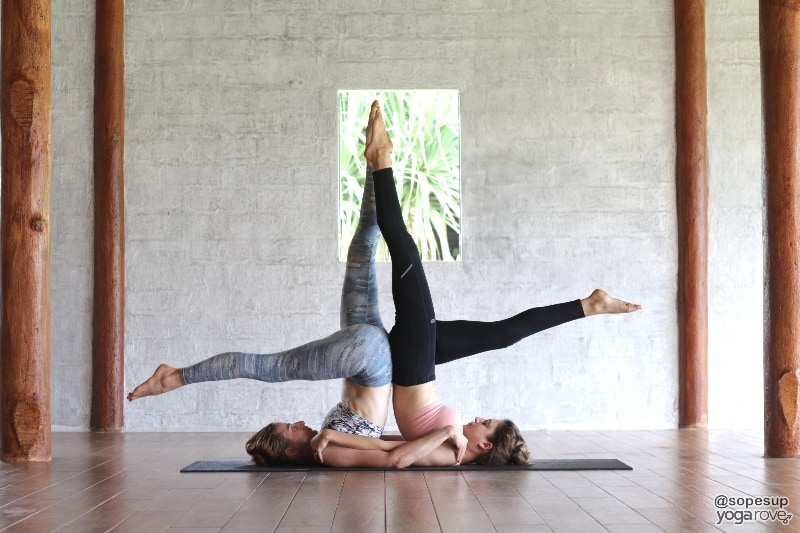
38. Supported Shoulderstand
How to:
- Begin in Double Plow (#35), but instead of placing your hands on your partner’s hips, bring the arms down to the mat so that they are pressing into the mat. Take hold of your partner’s shoulders.
- Engage the core to lift the tailbone to be in line with your shoulders, pressing into your partner’s back to assist.
- Stay with both legs extended to the sky, in line with your shoulders, or extend one leg overhead into Plow as you each press your extended legs into each other’s to maintain Shoulderstand.
Benefits: When you’re in Shoulderstand, it’s so important to never EVER turn your head that you literally never get a chance to see if your alignment of pelvis over shoulders is even close! Having a partner in this pose ensures that you will be reaching correct alignment, because you’re using each other for support.
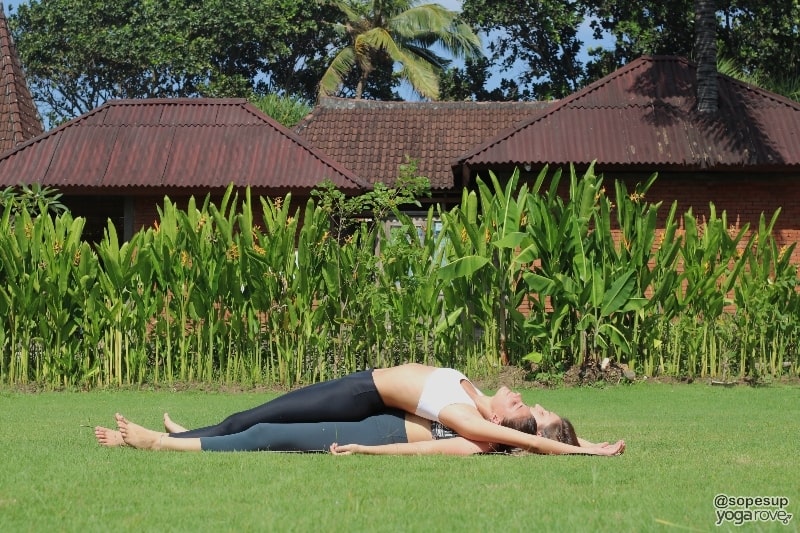
39. Shavasana and Supported Backbend
Can we stay in this pose forever?! It’s seriously so comforting.
- P1 begins in Savasana.
- P2 lies on top of P1, upper back lined up with the highest part of P1’s torso in order to achieve a slight backbend.
- P2 extends arms overhead; P1 wraps arms around P2’s torso to stabilize P2.
Benefits: P2 gets a gentle release while P1 gets their very own human weighted blanket!
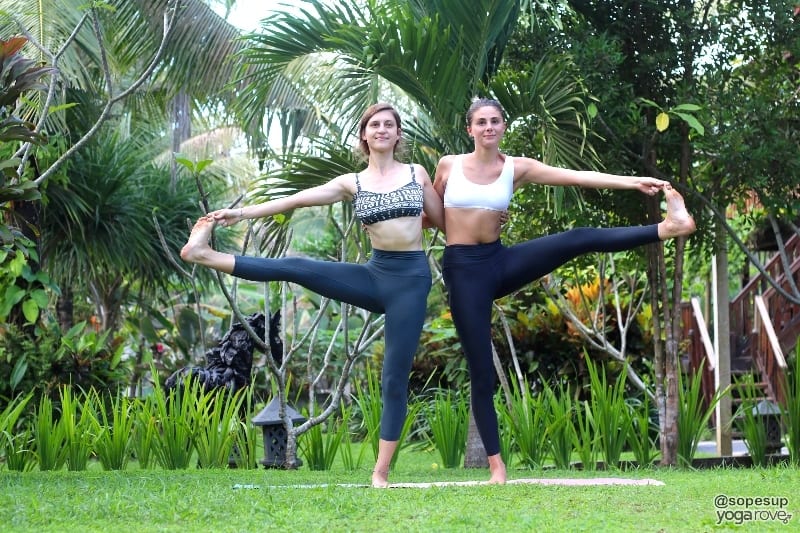
40. Double Hand to Big Toe
How to:
- Begin standing side-by-side approximately 1-2’ apart. Each partner brings outside leg into Tree Pose and wraps the inside arm around partner’s back.
- Each partner takes hold of the foot that’s in Tree, and extends the leg forward.
- Make sure you’re both stable before rotating the leg outward.
Benefits: Your partner takes away your ability to fall over in this pose so that you can work on your extended leg’s flexibility instead of having to focus on balancing on the standing leg.
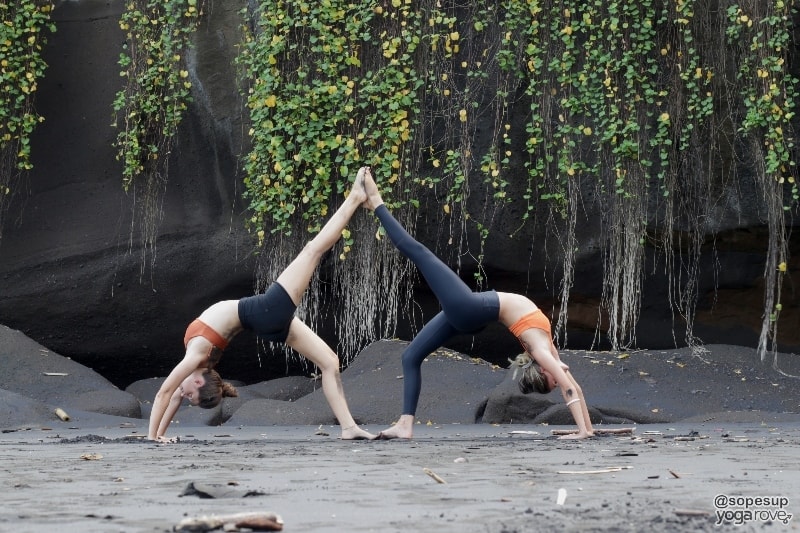
41. One Legged Wheel
How to:
- Partners take Wheel Pose facing away from each other, tips of toes touching.
- Partners lift and extend opposite legs up to the sky to press soles of the feet together.
Benefits: One-legged wheel is a very strong pose that we’re sometimes unsure of when practicing on our own, so having something to press into provides just the smidge of stability you need to access the pose comfortably.
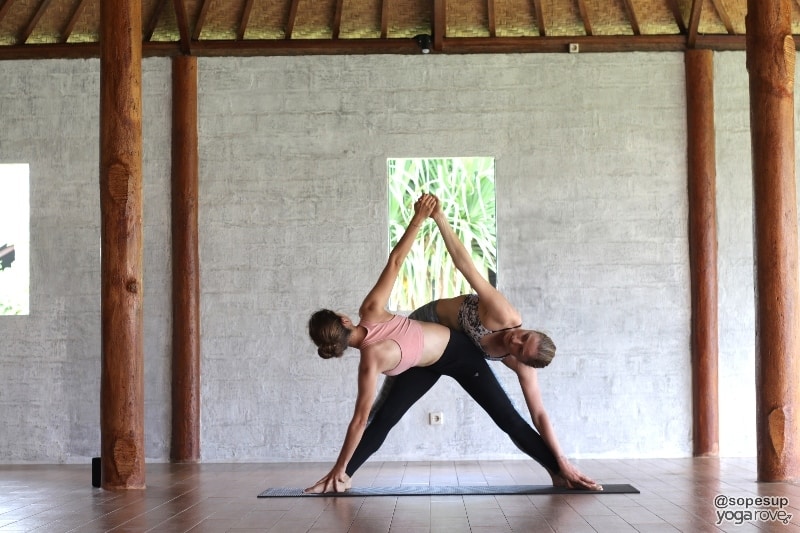
42. Twisted Triangle
How to:
- Begin in preparation for Triangle Pose, both partners facing the same direction. P2’s feet will be directly behind P1’s feet; P1’s tailbone will be touching P2’s pelvis.
- Partners take Triangle in opposite directions:
- P2 takes Triangle over the left side: brings their left hand to the top of P1’s foot (to the mat) and extends their right arm to the sky.
- P1 takes Revolved Triangle to the right side: brings their left hand to the mat to revolve the torso to face P2 and extends right arm to the sky to meet P2’s hand.
Benefits: How many times have you heard your yoga teacher tell you “feel like you’re pressing back into a wall” or “feel like you’re between two panes of glass” as cues when you enter Triangle to keep you from swaying the hips backward and out of alignment? Well, no need to even think about that here, because you and your partner are working together to press your hips toward each other to ensure proper alignment.
43. Supported Handstand and Pyramid
How to:
- P1 begins in Pyramid Pose, right foot forward.
- P2 enters Handstand with the palms on either side of P1’s back (left) foot.
- P2 gently releases the weight backward so that the back rests on P1’s leg, and the tailbone rests on the back of P1’s tailbone.
- P2 extends the right leg slightly forward (foot will be in line with eyesight) as the left leg extends slightly backwards so that the body forms a straight line from the hands to the toes.
Benefits: P1 gets a deep assist into Pyramid to open the hamstrings while P2 gets to play with fun Handstand shapes.
44. Supported Forearm Stand with Standing Backbend
How to:
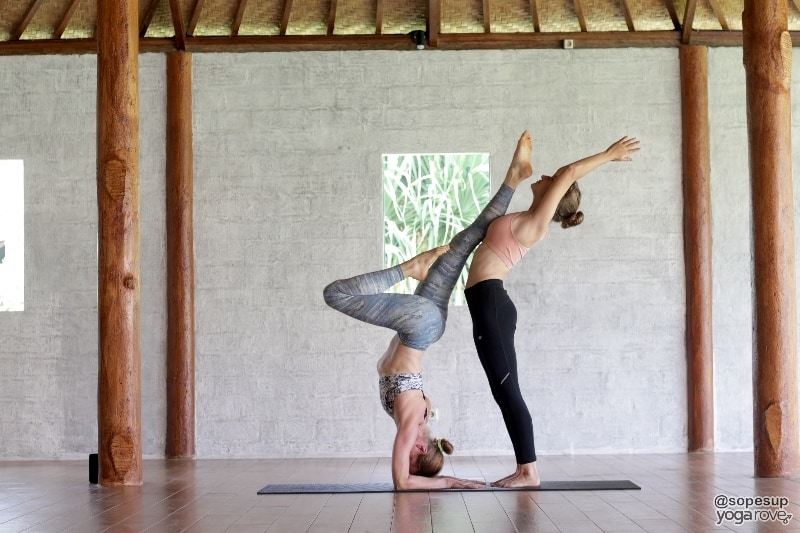
- P1 begins standing. P2 enters Pincha Mayurasana, placing the palms so that the fingertips meet P1’s toes.
- Once P2 is in Pincha, P1 guides one of P2’s legs to rest gently on their torso. P2 bends the other leg to help counterbalance the weight.
- With P2’s calf resting on P1’s torso, P1 extends arms upward and back for a standing backbend.
Benefits: P2 is able to stabilize the pose with a little help from a friend – having a base instead of a wall is a little more helpful in guiding your alignment than, well, a wall that doesn’t talk. ????
45. Double Lotus
How to:
- P1 begins in Plow.
- P2 sits in Lotus, base of the spine pressing into the top of P1’s torso.
- Once supported in Plow, P1 enters Lotus legs, and is able to press the back body into P2’s torso to lift the arms off of the mat for upside down Levitating Lotus.
Benefits: Having a solid friend to support your Plow allows you to work into Lotus, which is sometimes tricky when you have no support for your spine.
46. Lifted Bow
How to:
- Begin similar to position for Lifted Plank, but P2 (flyer) places hands higher on P1s shins (closer to the knees than to the ankles), so P1’s hands will be on P2’s shins instead of ankles.
- P1 presses upward so that P2 is in Plank. One at a time, P2 will bend the knee into Bow, and P1 will walk the corresponding hand inward so that the hand is supporting the top of P2’s knee.
Benefit: A little strength practice for the base while the flyer gets an assist to deepen Bow makes this pose not only beautiful to look at, but also wonderful to practice.
47. Double Upward Facing Dog
How to:
- P1 begins in Upward Facing Dog.
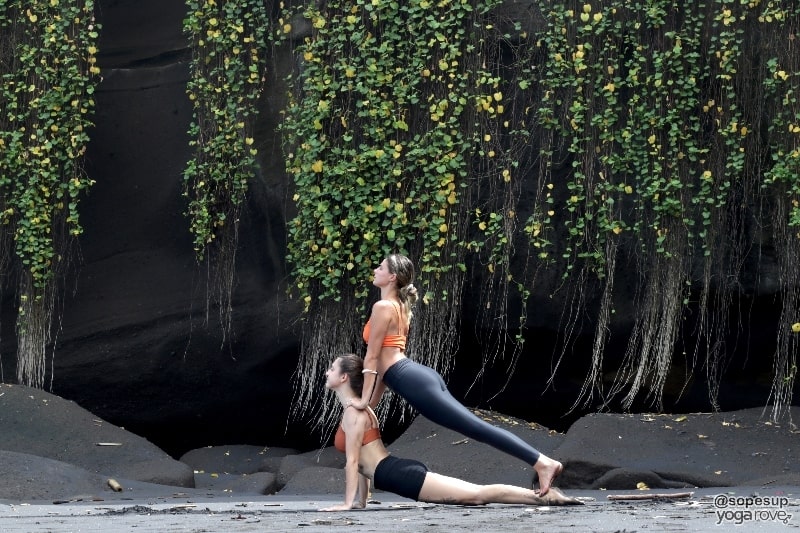
- P2 places hands on P1’s shoulders and gently steps onto the back of P1’s ankles in order to lift into Upward Facing Dog.
Benefits: “Shoulders away from the ears!” is a constant reminder you’ll hear during Upward Dog in yoga class, but with this pose, your partner does it all for you. P2 literally forces your shoulders away from your ears so that you can achieve a relaxed neck.
48. Camel and Supported Backbend
How to:
Note: If P2 is a little wary of entering backbend, P1 can assist:
- P1 begins in preparation for Camel, standing on the shins behind P2 approximately 3 feet apart (if P2 is less flexible, keep a closer distance – if P2 is more flexible, keep a further distance).
- P1 places palms of hands on the back of P2’s tailbone or thighs (this will depend on P2’s height and distance.
- P2 arches upward and backward to enter standing backbend, reaching to place the palms on P1’s belly or ribcage.
- Once P2 has achieved palm placement, P1 enters Camel, pressing s torso upward and outward to achieve the backbend while supporting P2.
Benefits: Standing backbends are pretty scary – falling backwards is terrifying and that’s kind of what you’re doing, especially if you lose balance or support. Luckily, your partner is there to gently guide you and support you the entire way in this pose!
49. Chair and Mountain
How to:
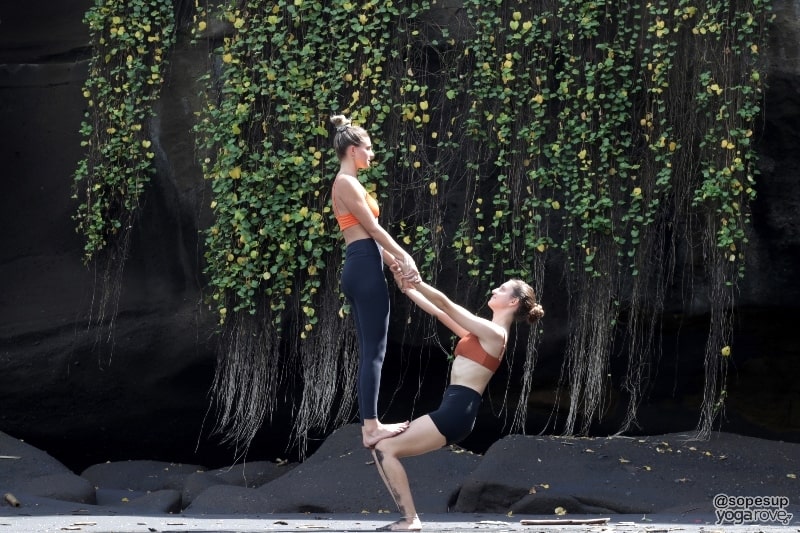
- P1 begins in Chair. P2 places one foot on top of P1’s thigh (just above the knee).
- P1 & P2 lean away from each other as P2 places 2nd foot on top of P1’s thigh.
- Continue to pull away from each other as P2 straightens legs to standing.
Benefits: Having a partner in Chair allows the base to access a new alignment that is otherwise not possible, while the Flyer experiences an exhilarating heightening of the physical body that tends to heighten the mood of the non-psychical body too.
50. Flying Warrior
How to:
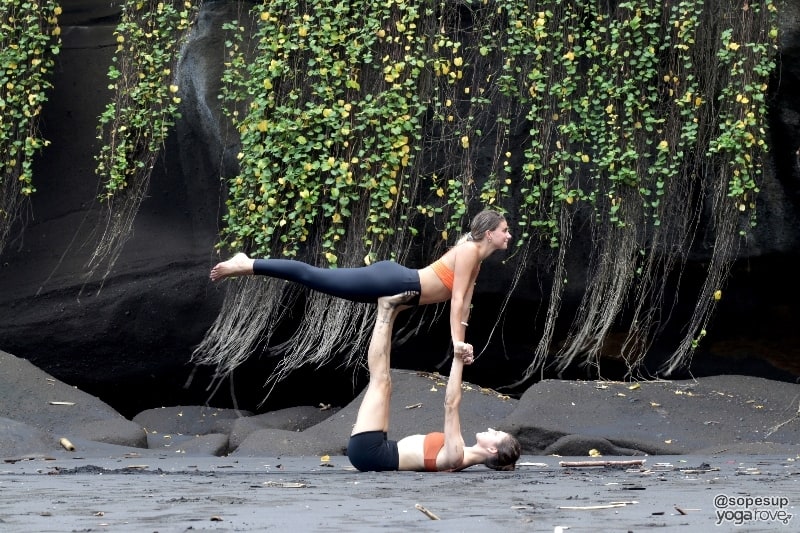
- P1 (base) lies on back, knees bent, legs lifted toward the sky.
- P2 (flyer) stands in front of P1, clasping hands, and adjusting the stance so that pelvis lines up with soles of P1’s feet.
- P1’s feet will be turned out slightly so that when P2 leans forward, the sole of the foot it supporting P2’s hip crease.
- P1 keeps arms strong, shoulders and head pressing into the mat, while P2 leans weight into the feet and shifts torso forward to “fly.”
- Communicate here to make sure flyer is ready, then P1 will straighten the legs, effectively lifting P2’s lower body off the ground.
- Though P2 is the flyer, there’s still a lot of work – flyer must stabilize core in order to maintain balance.
- If you’re feeling adventurous, let go of each other’s hands!
Benefits: Just because you’ve grown up doesn’t mean you have to stop playing! This adult airplane will take you back to the fun, carefree times of when you were a kid playing “airplane” with your family or friends.
This pose is the entrance to countless more advanced poses – Bow, One Legged Bow, and more Acroyoga poses and sequences. If this is your first time in this type of pose, practice on a soft floor (we recommend grass) with a 3rd person as a spotter. Partner yoga is no fun when you’re injured and can’t practice it!
Enjoy and have fun!
Benefits of Partner Yoga Poses
1. Builds Trust
You know that when you enter the 4 corners of your yoga mat, you’re in a safe space. Choosing to practice with a partner means letting that person into your sacred safe space, which in and of itself requires trust.
As you move from pose to pose, and especially into the more challenging balancing and weight-bearing poses, you and your partner are required to trust each other to enter the poses in order to let go of what you cannot control.
For example, in Flying Warrior, if you’re the flyer, you must trust that your partner is strong enough to hold you – if you don’t, you will be tensing your muscles and will actually make it more difficult for your partner to do what he/she needs to be doing!
“Partner yoga is the medium to building stronger communication and intimacy between human beings in any relationship,” – Cain Carroll
2. Creates Intimacy
Physical touch is pretty much as intimate as it gets (aside from a really great conversation, am I right?). In fact, partner yoga is a common recommendation that couples’ therapists suggest to their clients.
Don’t have a romantic partner? Not to worry – intimacy isn’t only romantic or sexual – there’s also intellectual, experiential, and emotional intimacy, all of which can be applied and strengthened in partner yoga.
Do you have a friend that is that shoulder to cry on? Your “person” as they in Grey’s Anatomy? That’s just as important, and just as intimate (sometimes even more) as a romantic partner.
3. Improves Balance (both physically and mentally/emotionally)
Physically, you have to have a lot of balance if you’re going to add another person to the yoga party! For example, if you’re in Double Tree, you have to be strong and balanced enough to stand in your own Tree Pose in order to add another person to the equation!
Mentally and emotionally, you and your partner can use partner yoga to acknowledge that sometimes your state of balance goes a little out of whack – maybe one person is dedicating more attention to the relationship than the other, or one person is acting a little more sensitive (or insensitive) than usual.
Friend yoga poses reels you both back into a state of balance, recognizing that there is no giver or receiver – there are simply two parties that are working symbiotically.
“Postures are dependent on two people showing up for one another and giving equal effort. It’s a great metaphor for the nut and bolt aspect of all relationships.” – Cain Carroll
4. Enhances Communication
Partner yoga requires clear communication – there is no wishy-washy middle ground, especially when it comes to flying and balancing.
Often in relationships, wires get crossed when one does not understand the other – or one is simply not listening to the other. Partner yoga mandates listening and clear instruction, which can get you back on the right track of effective communication.
5. It’s FUN!
Partner yoga is new and exhilarating – remember riding your bike for the first time? It was a little nerve-wracking, but once you got the hang of it, there was such a sense of freedom and “I did it!” excitement – that’s exactly what you’ll experience in partner yoga, no helmet or knee pads necessary!
Can I practice partner yoga poses if I’m a beginner to yoga?
Absolutely! The seated and standing postures are perfectly fine for beginner yogis to practice. However, the flying and lifting postures are not recommended for beginners. If you don’t have a steady yoga practice under your belt, visit an Acroyoga or Partner Yoga studio, or practice with a 3rd person as a spotter before attempting any of the more difficult poses.
Remember to only go as far as you and your partner are comfortable with. Partner yoga is meant to challenge you, but always communicate with your partner to see what level they are okay with as well.
Previously a dancer, Ashley has been practicing yoga for over 15 years and teaching for 5.
She balances an executive-level “corporate” position during the day with healthy, mindful wellness practices in her free time to stay grounded; she lives on celery juice and cold brew, and can’t live without her dark chocolate!

It is clear to understand your post. First, I and my boyfriend usually argued because he is stronger than me and I am more flexible than him. And then, I searched on Google how to practice yoga for couples and saw your post. I shared this post with him and he read. And now, we are able to practice yoga together without arguing. Thank you so much for sharing! I love your post!
That’s awesome Kiera! So glad you guys found it helpful and are able have fun practicing partner yoga together now 🙂